
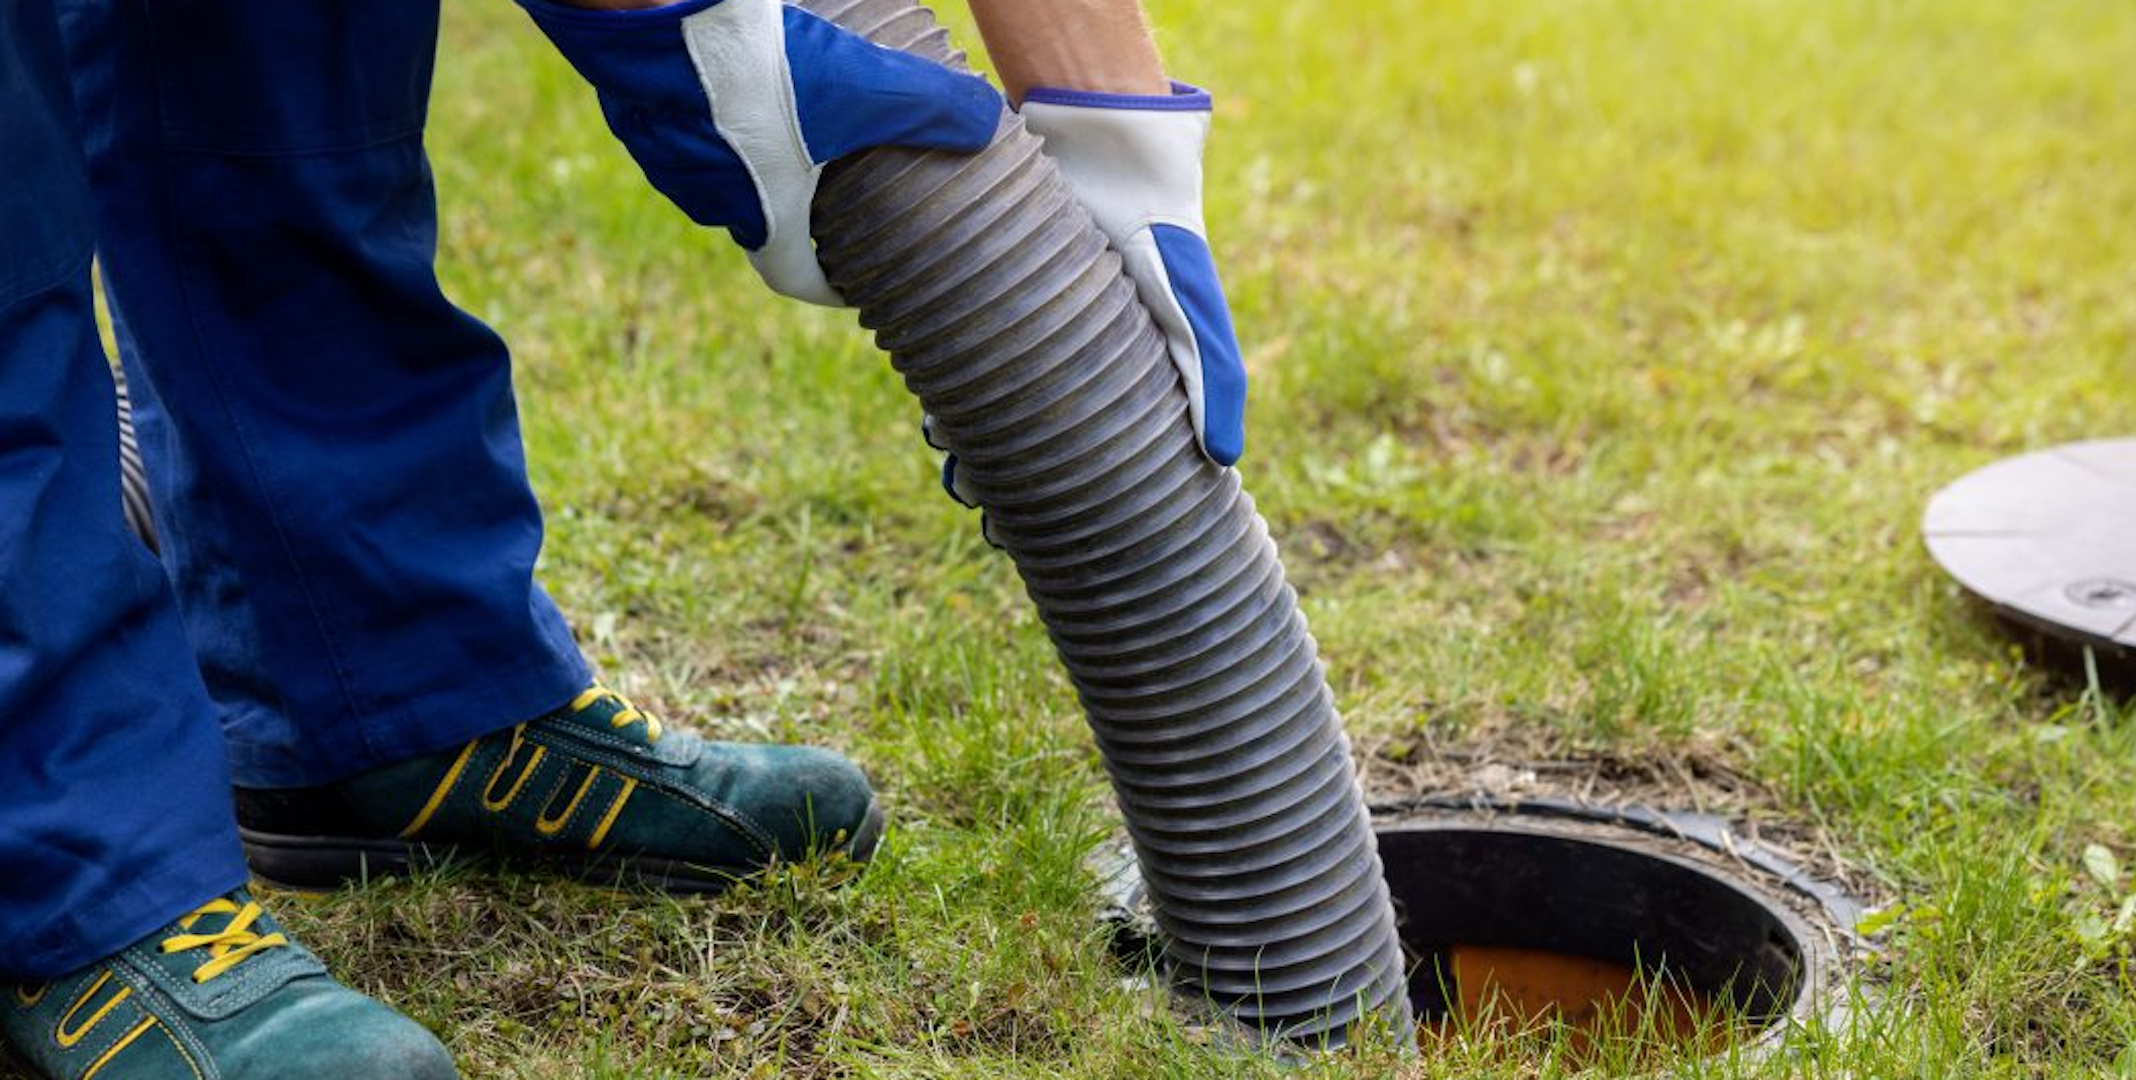
How to Properly Care for Your Septic Tank System in NEPA
When properly maintained, septic tanks can save homeowners thousands of dollars on sewage bills over the system’s life.
According to Penn State, nearly 26% of homes in Pennsylvania have septic tank systems–most commonly found in rural areas, such as Northeast Pennsylvania.
With a little basic maintenance and care at the sink, you can greatly extend the life of your system. However, you will have to service your septic tank system every few years and get it inspected to ensure it works properly and has no clogs or backflows.
Whether you own a septic system or are looking to buy a home with a septic tank and are a first-time owner, this guide will cover basic septic tank maintenance to help you prolong the life of your system.
Understand How Your Septic System Works
Septic tanks may seem foreign to folks from Scranton or Wilkes-Barre, but they are fairly simple systems.
At its heart, a septic system is a wastewater conveyance designed to separate solids from liquids and disperse the resulting mixture into a drain field (i.e., your backyard or separate field).
The solids float to the bottom of the tank where they decompose and the scum floats to the top. The clarified liquid (effluent) then flows into the drainfield, where it percolates into the soil for final treatment, helping to enrich the soil with nutrients.
By understanding this process and identifying where each component lies, you can avoid costly mistakes, such as parking a vehicle over your drain pipes, and identify issues as they arise at the source.
Basic Septic Tank Maintenance: How Homeowners Can Help Their Septic
Septic tank maintenance doesn’t have to be expensive;, by practicing just a few housekeeping steps, you can greatly extend the life of your septic system.
Watch What You Flush
Whether you have a sewage system or a septic tank, you can greatly extend the life of your pipes and wastewater conveyance by limiting the amount of solid materials you flush down the drain. Some of the most common waste products that end up clogging pipes and slowing down drainage include:
- Grease, fats, or oils
- Feminine hygiene products
- Paper towels or wipes (even “flushable” ones)
- Harsh chemicals (bleach, drain cleaners)
Paints, solvents, or medications
Most experts also caution against using garbage disposals altogether, as residents are more likely to flush solid waste products through their pipes instead of their garbage.
Additionally, consider switching to septic-safe toilet paper and eco-friendly cleaners.
Conserve Water Usage
Septic systems are designed to process a certain volume of water each day. Overloading the system can flush solids into the drainfield or prevent the tank from properly separating waste.
Some tips to reduce water usage include:
- Fixing leaking faucets and toilets immediately
- Spreading out laundry loads during the week
- Using low-flow showerheads and toilets
- Only running dishwashers and washing machines when full
Overuse can strain an already sensitive system in areas like NEPA with older homes or high water tables, especially during wet months.
Avoid Septic Additives
Some companies market septic additives as a way to eliminate pumping or boost bacterial activity. While these products might sound appealing, most experts, including the EPA, agree they’re unnecessary and sometimes harmful.
Additives can disrupt the natural bacterial balance in the tank, slowing down decomposition. Additives can also push solids into the drainfield prematurely and void your warranty.
Protect the Drainfield
Your drainfield is essential to the system and needs protection from compaction, contamination, and excessive water.
We strongly caution against parking heavy vehicles on the drainfield or planting trees near the drainfield. Limiting erosion in the drainfield and direct downspouts from the house away from the drainfield is also wise.
Maintain Good Records
Good record keeping can ensure you never miss a routine pump or inspection. Maintain a log of all septic services, including pumping dates, inspection reports, and any repairs or upgrades.
This information is helpful for routine maintenance, home sales, or diagnosing problems. In NEPA, where some systems date back decades, having historical documentation can be a major advantage when selling a house with a septic system.
Professional Septic Tank Maintenance
To truly guarantee a long septic life free of costly repairs, it’s essential to get routine maintenance performed by a professional every so often.
Getting Your Tank Pumped Regularly
One of the most important steps in septic system care is regular pumping. Over time, solids accumulate in the tank and can overflow into the drainfield if not removed. This can clog the system and lead to failure.
Generally, we recommend pumping your septic tank every 3 to 5 years. However, your pumping schedule depends on your household size, tank size, and water usage habits.
Due to our area’s cold winters and clay-heavy soils, failing to pump your tank can quickly become a costly problem due to poor percolation and frozen drainfields.
Scheduling Routine Professional Inspections
Even if your system seems to be working fine, regular septic inspections can catch early warning signs before a minor issue becomes a major repair.
A certified septic professional in NEPA can check for:
- Sludge and scum levels in your tank
- Signs of leakage or backup
- The condition of the tank, baffles, and pipes
- Drainfield saturation or odor issues
Aim to have your system inspected at least once every three years, or more often if you have an older system with a history of problems.
Warning Signs Your Septic Needs Repairs
Septic system problems rarely go away on their own and are built to last for decades. Pay attention to the following red flags that your septic system may be in need of repair.
- Slow-draining sinks or toilets
- Gurgling sounds from plumbing
- Wet, soggy, or unusually green patches of grass over the drainfield
- Sewage odors indoors or outdoors
- Backups in the lowest drains of the house
If you notice any of these issues, call a septic professional immediately. Delaying repairs can lead to complete system failure, which you don’t want during the winter.
Caring for Your Septic System Pays Off
Your septic system is one of the most important parts of your home. With proper care, it can last 20 to 40 years or longer with little to no repairs. Unfortunately, neglect can lead to backups, environmental damage, and expensive system replacements.
Whether you live in the backwoods of Wayne County, the hills of Luzerne County, or the farmlands of Lackawanna, taking the time to properly care for your septic system ensures peace of mind, protects your investment, and safeguards NEPA’s groundwater and environment.
FAQs
Is it OK to use a garbage disposal with a septic system?
It’s not recommended. Garbage disposals add extra solids to your tank and can lead to faster sludge buildup.
Can I plant trees near my septic system?
No. Tree roots can invade pipes and tanks, causing damage. Stick to grass and shallow-rooted plants that won’t disrupt pipes underground.
Are septic tank additives helpful?
Generally, no. Most additives are unnecessary and may harm your system or drainfield.


Top 9 Common Problems Found in Newer Construction NEPA Houses
As Northeast Pennsylvania enters a housing shortage, new construction homes offer a way to relieve an overinflated market.
Just drive by areas like Dallas, Clarks Summit, and Forty Fort, where demand is sky-high, and you’ll find dozens of new suburban developments and townhouse communities under construction.
Most new construction homes come with the benefit of a choice location and feature modern appliances and fixtures, such as that ultra-desirable new kitchen.
Unlike older homes with greater wear and tear, many home buyers trust newer construction homes to be free of defects.
However, new construction homes should always be inspected, as poor craftsmanship and improper foundation settling are common problems that can spread across these properties.
While the home builder warranty may cover you up to a year after construction, these problems can take years to manifest, though they may be spotted early.
Here are nine common issues found in new construction homes in Northeast Pennsylvania and the importance of new home inspections.
1. Foundation Settling and Grading Problems
How much settling is normal for a house? That’s one of the most common questions from new homeowners who may notice cracks emerge on the walls and foundation of their new home.
While a small amount of settling is expected in the first year of moving in, if you start to notice any of the following signs, it could indicate more serious foundation issues:
- Horizontal cracks forming in drywall, especially around windows and door frames
- Uneven floors that feel sloped
- Doors and windows that are difficult to open or stick
- Gaps forming between walls and ceilings
- Observable cracks in the foundation
- Water pooling around the foundation, leading to moisture intrusion in the basement or crawl space
While some of these are normal symptoms of advanced settling in older homes, they should ring alarm bells if observed within the first two years of occupying an entirely brand-new building. `
2. Improper Drainage and Water Intrusion
One of the most common builder mistakes we observe throughout all homes in NEPA is poor drainage from downspouts, malfunctioning sump pumps, and improper site grading. The heavy rain and snowfall observed throughout the area could have devastating long-term effects on your foundation, asphalt, and landscaping.
While improper downspouts can be easily fixed, poor or improper grading can be much more costly and should be addressed by builders immediately before their warranty expires.
3. HVAC System Deficiencies
Energy efficiency is in high demand among home buyers as energy costs continue to skyrocket in NEPA. However, central air systems and new boilers may be among the most expensive and consistent repairs you make if they are improperly installed.
Some common issues we frequently observe with newer HVAC systems are almost always owed to poor workmanship, such as improper ducting, missing return vents, or incorrect sizing.
If left unchecked, your HVAC system could end up driving up your utility costs and lead to more costly repairs down the road.
4. Insufficient Insulation and Air Sealing
While newer homes tend to have better insulation than older homes, poor contractor work can lead to a bevy of issues. Chief among them is improper air sealing, allowing for outside air and pests to get in and settling if blown-in insulation is used.
Not only can improper insulation lead to higher utility bills, but it can also lead to faster degradation and moisture issues if proper ventilation is not installed.
5. Roofing and Siding Issues
Unfortunately, virtually any home with a new roof or siding can suffer from issues related to poor construction.
Exposed nails, rising shingles, and poor decking are among some of the most common issues we see, even in recently installed newer roofs.
Likewise, if the same roofing contractor was used for siding the house, poor workmanship can easily allow water to enter behind the panels, leading to a whole host of issues behind your walls.
Again, we strongly urge buyers to inspect new roofs and siding just as you would an older roof and siding, as these are complicated projects that are subject to human errors.
6. Electrical System Problems
Modern homes have greater electrical demands than ever, but in some new construction houses, the wiring doesn’t reflect that. Builders may use minimal circuits to save money or fail to include enough outlets, leading to the following issues:
- Breakers that frequently trip
- Insufficient kitchen or bathroom outlets
- Missing GFCI protection near water sources
- Loose or poorly installed switches and outlets
In fact, one home inspector from Arizona recently went viral for exposing many of these same issues found in new builds around the Phoenix area.
7. Plumbing Concerns
Hand-in-hand with electrical concerns tend to come from plumbing concerns. While not as common in newer homes, cheap materials and rushed work can still lead to leaks, low water pressure, and slow-draining pipes that can aggravate homeowners long-term.
Unfortunately, these issues may not be visible during an initial home walk-through but can easily be spotted by your home inspector.
8. Cosmetic Defects and Inconsistent Finishes
One of the most telltale signs of rushed work or poor builder quality is cosmetic defects found throughout the home. This may be noticeable on the trim, paint lines, or caulking of important fixtures. In extreme cases, we’ve observed cabinets and appliance doors that don’t close properly due to poor work.
9. Window and Door Problems
Finally, diagnosing window and door seal problems may be difficult for homeowners without a proper inspection, but they can result in heat loss and other issues throughout the year. For example, you may start to witness window fog due to poor seals or doors that don’t open or close properly.
Over time, these issues will get worse, either requiring an entirely new frame or fixture for your door or window.
Why Multiple Inspections Are Important for New Builds
Most experts recommend that at least three home inspections be conducted during the home construction process:
- Pre-Construction Inspection: Observes the foundation and grading of the site property.
- Frame Inspection: Analyzes the framing of the home.
- Pre-Drywall Inspection: Analyzes interior components, such as electrical work and plumbing.
Afterwards, home buyers should conduct their final walk-through inspection covering the home’s totality from the foundation to the roof.
Remember, mistakes can happen even if you work with a reputable builder. Plus, much of the work involved in constructing a home is outsourced to subcontractors, so all it takes is one mistake by any of these companies to put you on the hook for thousands of dollars in repairs.
How Much Does a Builder’s Warranty Cover?
Unfortunately, many home buyers forgo an inspection on new construction, trusting the builder’s warranty to cover any defects that may manifest. However, most standard builder’s warranties only last 6 months to a year, covering workmanship and materials.
Long-term warranties, such as a 2-year warranty, may be purchased to cover repairs to electrical, HVAC, or plumbing work, but you could also save more money by getting a qualified home inspection in NEPA.
Even getting a post-sale inspection can help cover any issues listed under the warranty so that you do not have to pay out of pocket in the future.
FAQs
How much settling is normal for a house?
Most homes will settle slightly within the first year—up to 1/2 inch is generally considered normal. Horizontal cracks or cracks wider than 1/4 inch may signal more serious issues.
Are foundation cracks in a new home serious?
Hairline cracks are common due to settling, but wider or stair-step cracks may indicate structural problems and should be evaluated by a professional.
Can I negotiate repairs with a builder?
Yes. Most builders will address punch-list items before closing. Having an inspection report can help you make a stronger case.

Buying an Older Home in NEPA? 9 Common Issues You Should Look For
While many of the older generations prefer new builds, a growing number of millennial home buyers are opting to buy older houses.
In addition to the craftsmanship and attention to detail that older houses boast, younger generations who are more eco-conscious take greater pride in restoring old buildings.
Fortunately, there is no shortage of older houses in Northeast Pennsylvania. From the Queen Victorians of Green Ridge to the craftsman-style, American Four Squares, and colonial houses sprinkled throughout the Valley, home buyers have their pick of the litter when it comes to finding a vintage home in NEPA.
The condition of older homes in our area varies based on how well previous homeowners took care of the property, as well as environmental conditions.
Older homes tend to boast an established foundation and mature landscaping, but may suffer from aged siding, outdated electrical work, or corroded plumbing.
Getting a proper home inspection can ensure that any investment you make into an older home is safe and free from surprise repairs.
If you are considering buying an older home in Northeast Pennsylvania, here are a few factors you will need to consider.
The Benefits of Buying an Older House in NEPA
The perception surrounding older houses varies from buyer to buyer, with some viewing an older house as more of a project than a treasure. While every house will run into its fair share of issues over the course of its life, there are many positives that an older house may boast over a newer one.
- Character and Craftsmanship: Older homes often feature architectural details that are difficult or expensive to replicate today. Built-in cabinetry, solid wood doors, crown molding, ornate fireplaces, and hand-carved staircases are just a few of the features you can find in an older home built before the 1970s in NEPA. These historic touches add charm and uniqueness that can increase their value with time.
- Established Neighborhoods: Older homes are typically located in long-established neighborhoods with mature trees, walkable streets, and a strong sense of community. These often fall in desirable neighborhoods like Waverly, Mountain Top, and West Pittston.
- Larger Lots and Yard Space: Depending on the plot, many older homes sit on larger parcels of land than are available in a new community. The landscaping is often well-established and many include other unique additions, such as a pool area, barn, or outdoor gazebo.
- Lower Purchase Price: Because they often require updates, older homes tend to be priced lower than newer, move-in-ready properties. Buyers willing to put in the work have an opportunity to build equity and customize the home to their liking over time.
- Thicker Walls and Solid Construction: Many older homes were built with high-quality materials like plaster walls, hardwood framing, and stone foundations. These contribute to better soundproofing, structural stability, and a long-lasting building envelope—qualities that may sometimes run into issues in newer homes.
Common Issues to Look For in Older Houses
On the flip side, older homes can come with their fair share of challenges, especially if they were poorly maintained. Some of the most common issues associated with older homes in the area we’ve run into include:
1. Foundation and Structural Issues
One problem with older home designs is that they often suffer from poor drainage, which allows water to build up around the foundation and exert pressure on it. Additionally, established tree roots can slowly make their way under the foundation or any retaining walls and affect their stability over time.
Studying cracks in the foundation is key to identifying any underlying issues and acting to prevent them from spreading.
2. Old Electrical Systems
Homes built before the 1960s often possess outdated electrical systems that may not meet today’s safety standards. Some of the most common issues include:
- Knob-and-tube wiring
- Fuse boxes instead of circuit breakers
- Ungrounded outlets
- Overloaded circuits due to modern appliances
In addition to not meeting local code requirements, they can present fire hazards and other issues for your home. Since these issues aren’t always visible to the naked eye, it reinforces the importance of getting a proper home inspection.
3. Plumbing Problems
Plumbing problems can be one of the most expensive and destructive in any house. Natural corrosion will eat away at lead, copper, or cast iron pipes, which can leach harmful chemicals into your water and eventually burst and flood your walls.
It’s always recommended to test the water pressure in any home you want to purchase and inspect the pipes and water color. Advanced green pipes could indicate oxidation, which will most likely result in a leak at some point. Of course, newer materials, such as PVC piping, are just as susceptible to leaks, so a proper plumbing inspection is often recommended for older homes.
4. Roof Age and Condition
The northeast’s harsh winters and wet springs can impact roofing materials. Depending on the roof’s age, it’s not uncommon to start noticing small leaks after prolonged rain and other signs of damage, including popping nails and lifted shingles.
Assessing the roof’s condition may be difficult from the ground level, which is why Mountain to Valley Home Inspections uses a drone to perform inspections of the roof using a high-definition camera that can spot issues clearly.
5. Insulation and Energy Efficiency
Many older homes in NEPA were built before modern energy standards existed, and may contain little or no insulation in walls, attics, or crawl spaces. A lack of insulation can contribute to higher energy bills, higher noise levels outside, and even more allergens inside your home.
Some red flags we look for regarding insulation include drafty rooms, ice dams, or cold floors above crawl spaces. We also feel around windows and doors for drafts and will inspect any insulation present to ensure it’s not too settled or moldy.
6. Moisture and Mold Issues
Indoor air quality is one of the most overlooked features of a home in most inspections. However, prolonged exposure to mold, lead, and other toxins can lead to allergy-like symptoms and cognitive decline.
Our indoor air quality tests can help identify common toxins like mold and identify their source so that you can negotiate with a seller to get it remediated before the final transaction is made.
7. Lead Paint and Asbestos
If a home was built before 1978, there’s a good chance it contains some form of lead-based paint. When it finally comes time to strip this paint or remodel the house, you could release massive dust clouds of lead paint into your home that anyone nearby can breathe in.
Similarly, asbestos may be found in old insulation, vinyl flooring, ceiling tiles, or pipe wrap that could harm your lungs if disturbed.
8. Pest Damage and Infestations
While just about every home is subject to pest infestations, older homes with wood frames may be more susceptible to termites and carpenter ants if the wood has been damaged by water in the past.
We should note that most older homes are built with a superior timber that is denser and actually more resistant to termites. However, that old-growth timber can easily invite termites and other wood-destroying organisms without proper care or poor drainage.
Our wood-destroying organism inspections check for signs of termites and carpenter ants to see whether a past or present infestation exists or has damaged the home significantly.
9. Outdated HVAC Systems
Finally, buying an older home in NEPA may mean dealing with less efficient HVAC systems or no central air at all.
Most furnaces and air conditioning units have a 15–25 years lifespan, meaning that you could be on the hook for a $10,000 repair or replacement unit when the old one inevitably kicks the can.
While most home buyers aren’t HVAC experts, you can get a pretty good idea of how well a unit was maintained by checking the filter and inspecting the ductwork and outside unit for any signs of damage.
Is Buying an Older House a Smart Investment?
Though building standards have grown over the 20th century, many homes built over a century ago can theoretically last hundreds of years with the right care and maintenance. With a combination of superior building materials and already settled foundations, a well-maintained Victorian or farmhouse could last for generations.
Additionally, older homes benefit from better pricing and, if in rough condition, can be fixed and flipped for a greater profit.
That said, if you are buying an older home, you need a proper home inspection. Not only are older homes susceptible to problems associated with age, but many parts of the house may be outdated and not up to code. It pays to get a proper home inspection for the safety of your health and your financial investment.
FAQs
Are older homes in NEPA safe to live in?
Yes, older homes can be perfectly safe if properly maintained or renovated. A thorough home inspection is crucial to identify any safety concerns like outdated wiring, lead paint, or structural issues before you buy.
Can I get insurance on an older home?
Yes, but it might be more expensive or require specific updates (e.g., upgrading electrical systems or replacing the roof). Some insurers may also decline coverage for homes with knob-and-tube wiring or other outdated materials.
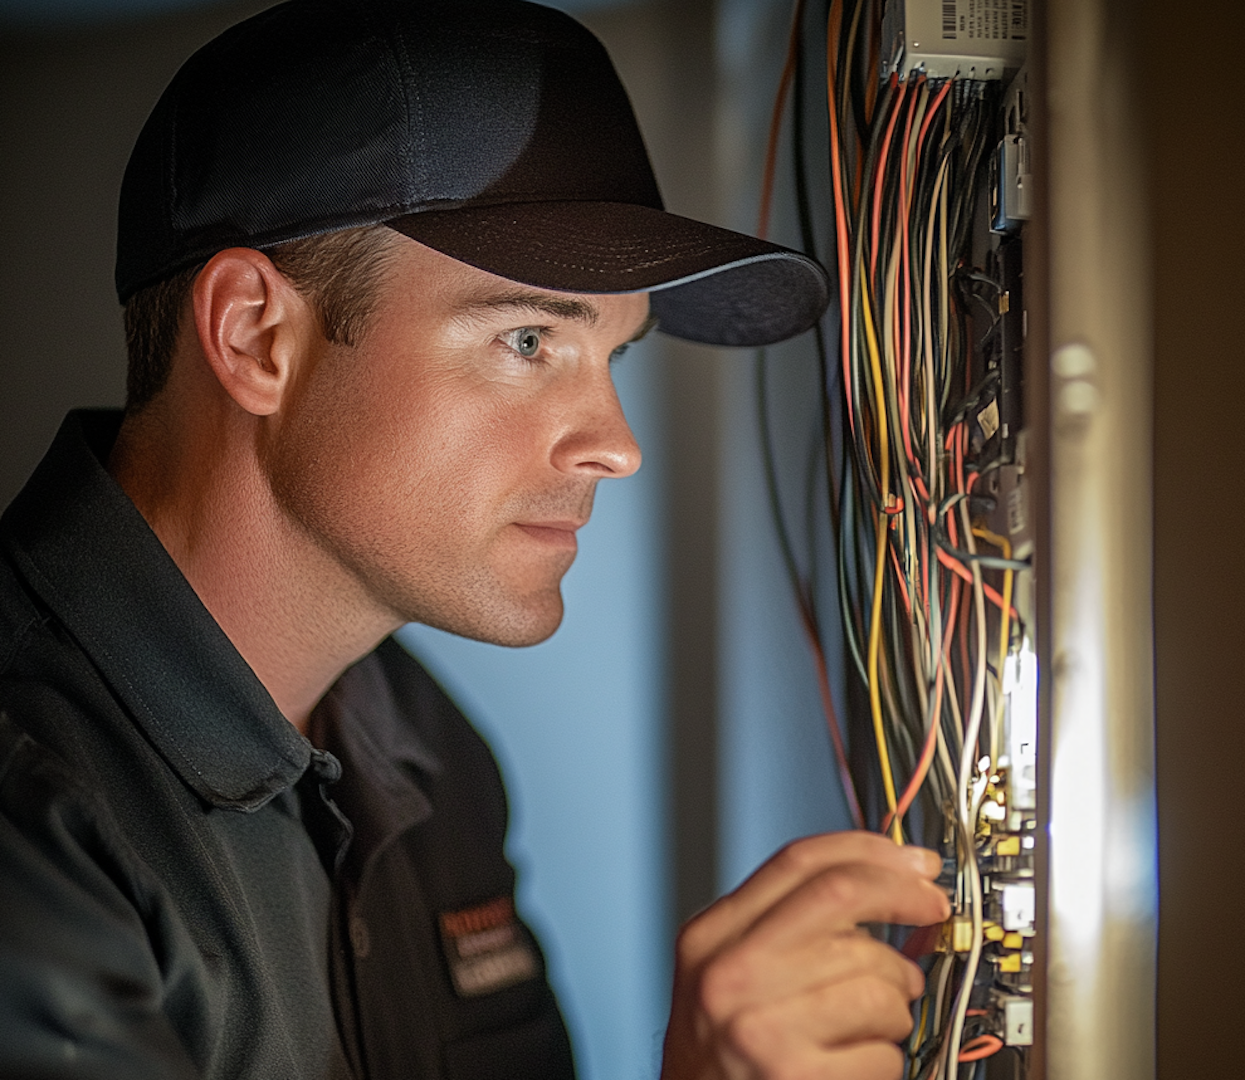
Is Your Old Electrical Wiring Safe in Your PA House? Here are 6 Signs It's Not
Faulty electrical wiring is responsible for over 53,000 home fires annually.
Some of the most common culprits of electrical fires are:
- Frayed chords
- Loose electrical connections
- Damaged wire insulation
- Overheated wires
- Rodent damage to wires
- Outdated electrical wiring, such as knock-and-tube wiring
Many homes in Northeastern Pennsylvania also have not adopted the latest National Electrical Code standards, which mandate that all kitchens, garages, crawl spaces, bathrooms, and laundry rooms install ground-fault circuit interrupters (GFCI).
These devices are designed to shut off electricity to circuits once a ground fault occurs, preventing your electricity from arching or overheating the wiring.
While most people associate electrical issues with older homes, any home can suffer from these issues.
Fortunately, spotting these issues is often not as difficult as most people think. By conducting routine home inspections of your electrical system and learning the signs of electrical issues, you can diagnose problems in real time and make repairs to protect your home.
Dangers of Fault Electrical Systems
It’s easy to address issues in your home when you can spot them with your eyes, whether it’s a leaky roof or a leaky pipe. However, faulty wiring and bad circuits are dangerous because they occur behind closed walls.
If left unchecked, damaged wiring, short circuits, and even outdated wiring could lead to:
- Electrical Fires: Damaged or overloaded wiring is a leading cause of house fires. Wires that overheat can ignite insulation, wood framing, or nearby household items.
- Electrical Shock: Exposed wiring or improperly grounded circuits can deliver painful or even deadly electric shocks, especially in areas like kitchens, bathrooms, and basements where water is present.
- Appliance Damage: Faulty wiring can create voltage spikes or inconsistent current flow, which may damage sensitive electronics or shorten the lifespan of appliances.
- Increased Energy Bills: Poor electrical connections force your system to work harder, which can waste electricity and drive up your utility costs.
Even small issues like loose connections or frayed wires can spark major trouble if left unaddressed. In addition to identifying and correcting these issues, it’s also important to update your home’s electrical system to modern standards. With that said, let’s explore six common electrical issues found in older and newer homes alike.
6 Signs of Electrical Issues Within Your Home
If you discover any of these nine potential electrical issues, be sure to perform a home inspection as soon as possible.
- Flickering or Dimming Lights: In some cases, a flickering bulb could be the result of a loose bulb, but it could also be a sign that your electrical system is struggling to keep up. Faulty electrical circuits can occur over time for several reasons, including damaged wiring, overloaded circuits, or loose connections.
- Frequent Circuit Breaker Trips: Circuit breakers are designed to trip (shut off) when a circuit becomes overloaded or short circuits. While this may be common where huge appliances draw too much power from the same circuit, frequent circuit trips could indicate a deeper problem.
- Burning Smell or Discolored Outlets: If you ever notice a faint burning smell (especially one like melting plastic) near outlets, switches, or your breaker panel, stop and investigate immediately. This can indicate a serious problem that needs to be addressed immediately, lest you risk starting an electrical fire inside your home.
- Sparking Outlets or Switches: A small spark when plugging in a device isn’t always dangerous and can even be common. However, if outlets or switches spark frequently, produce large or loud sparks, or accompany the spark with a burning smell or smoke, it could indicate damaged wiring or a short circuit within the wall.
- Outlets or Switch Plates That Feel Warm: Outlets and switches that feel warm to the touch during use could indicate a serious electrical issue that needs to be resolved immediately. In most cases, this is due to an overheated wire that has melted the insulation.
- Rodent Damage: Rodents such as mice and squirrels love to chew on insulation and electrical wires, especially in attics, basements, and inside wall cavities. Chewed wiring from mice can lead to a whole host of issues, including exposed wires, sparks, and short circuits.
The Problem with Outdated Wiring
Outdated wiring is one of the most common home inspection issues found in Northeast Pennsylvania, specifically knob-and-tube and aluminum wiring.
In the former instance, the issue with knob-and-tube wiring comes when new insulation is installed near exposed wires and connections. According to InterNACHI–the leading organization for home inspectors–”(Knob-and-tube) K&T wiring is designed to dissipate heat into free air, and insulation will disturb this process. Insulation around K&T wires will cause heat to build up, and this creates a fire hazard.”
Again, any type of wiring is subject to its own issues, which is why adding in additional controls is important for minimizing risks.
Modernizing Your Electrical System
In addition to common electrical faults and issues, our home inspectors also frequently note common improvements homeowners should make to outlets when buying or selling a home.
For example, we will point out any two-pronged outlets we find that lack sufficient grounding, which are at greater risk for electrical shock and fires.
We also recommend that all homes install ground-fault circuit interrupters in required areas by code, especially any room where water is present.
These simple investments can make your home safer and reduce the risk of an electrical fire or accident.
The Importance of Home Inspections for Outdated Electrical Systems
A professional home inspection can help you avoid serious injuries or repairs that can result from a faulty or outdated electrical system. We recommend a home inspection anytime you buy or sell a home in Northeast Pennsylvania or whenever one of the potential issues above has been spotted.
Contact Mountain to Valley Home Inspections today to schedule your home inspection and protect your home and your family.
FAQs
Are older homes more at risk for electrical fires?
Yes. Older homes are more likely to have outdated wiring, worn insulation, ungrounded outlets, and electrical systems that weren’t designed to handle modern power demands — all of which increase the risk of electrical fires.
How often should I have my home’s electrical system inspected?
For homes over 30 years old, it’s wise to schedule an electrical inspection every few years — especially before major renovations, after purchasing a home, or if you notice any signs of trouble.

7 Benefits of a Water Sample Test in Northeast Pennsylvania
According to one survey, over 26% of Pennsylvania residents rely on private wells for drinking water in the commonwealth.
Unlike public water utilities, which are cleaned with advanced filtration systems and disinfectants, well water is often unfiltered and not treated using any chemicals.
One of the most important tasks of owning a private well is to conduct frequent water sample testing to protect your health and get informed of potential pathogens hiding in your water.
Since most properties with private well systems also rely on septic systems, a combination of water sample testing and septic inspections is especially important, as effluence from septic tanks is one of the most common causes of contamination.
Learn more about why water sample testing is crucial for all homeowners in Pennsylvania, regardless of whether they get their water from a private well or public utility.
What Is Water Sample Testing?
Water sample testing is the process of collecting and analyzing a sample of your drinking water to check for the presence of contaminants and assess overall water quality.
Water samples are sent to a laboratory for testing to detect the presence of harmful bacteria, heavy metals, chemicals, and excess minerals — most of which can’t be seen, smelled, or tasted.
7 Benefits of Water Sample Testing in Northeast Pennsylvania
Water testing can provide early detection of any harmful substances lingering in your water supply or plumbing that can adversely impact your health and home.
Here are seven reasons to get a water sample test in Northeast Pennsylvania.
1. Protect Your Family’s Health
Well water contamination can occur from several sources, including runoff from melting snow, stormwater, and wastewater effluents.
Unfortunately, contaminants like lead, arsenic, nitrates, bacteria, and even viruses can sneak into your water supply without any obvious signs, leading to chronic symptoms that include:
- Gastrointestinal issues
- Developmental delays in children
- Reproductive problems
- Increased risk of cancer
However, well water is not the only water source that can become contaminated. While public water is required to meet certain regulatory standards, old pipes, filtration systems, and humidifiers can become contaminated and end up getting you sick. Getting routine water sample tests will help avoid these unknowns and protect your family’s health against possible toxic exposure.
2. Well Water Isn’t Regulated Like City Water
Private well owners are entirely responsible for their well water management. The first step toward identifying problems associated with your well water is to perform a water sample test.
The EPA recommends well owners test their water at least once a year or more frequently if:
- You’ve had recent flooding or construction near your well
- You notice a change in taste, odor, or color
- A household member develops unexplained health issues
Sampling your well water is essential for catching bacteria, nitrates, and other naturally occurring or human-made contaminants early.
3. Aging Plumbing Can Introduce Contaminants
On the other hand, even if your city’s water system is modern and well-maintained, your home’s internal plumbing might not be. Homes built before the 1980s often contain lead pipes, solder, or fixtures that can leach lead and heavy metals into your drinking water.
Lead is particularly dangerous for young children, infants, and pregnant women, and it often enters your water after treatment during its journey through aging pipes.
Remember that not all public water is maintained to the same standards, nor does it come from the same sources. Some water may be more acidic than others, which can accelerate the degradation of your pipes and water filtration systems.
4. Detect Hidden Chemical Contamination
If you are generally worried about your health and water quality, then a water sample test may be helpful in identifying many common chemicals found in public water, including:
- Pesticides and herbicides
- Industrial solvents
- PFAS (“forever chemicals”)
- Radon gas in groundwater
- VOCs (volatile organic compounds)
These contaminants can enter water supplies from agricultural runoff, manufacturing facilities, or household chemicals, impacting well water and public water systems alike.
Long-term exposure to these chemicals can be harmful, and the only way to detect them is through periodic testing.
5. Protect Your Appliances and Plumbing
Beyond electricity and gas, water is by far the most ubiquitous and important resource used in homes today. In addition to drinking water, your water is also used for bathing, washing dishes, and washing clothes.
Therefore, poor water quality doesn’t just affect your health — it also impacts your plumbing system, fixtures, and appliances.
For example, high mineral content (commonly known as “hard water”) can cause limescale buildup in pipes, water heaters, and washing machines and reduce the lifespan of these appliances.
Water sample tests provide a detailed overview of your water’s mineral content so that you can adjust your filtration system to protect your plumbing and appliances.
6. Test Before Buying or Selling a Home
If you’re buying a new home, especially one with a private well, a water test should be part of your inspection process.
Not only is a water sample test essential for your health and safety, but it can also point to possible issues with your septic system and plumbing that will require future repairs.
7. Gain Peace of Mind
While many people would prefer to avoid another expense in today’s economy, water sample testing is quick and affordable and can save you lots of money on future repairs or health issues over time.
Most importantly, it can help answer a lot of unknowns when it comes to your drinking water and health. If you are suffering from unexplained medical ailments, then a water sample test can be an important step to fixing any unknown issues.
When Should You Test Your Water?
If you have private well water, we recommend testing your water at least every one to two years to ensure that there are no changes to the water content due to runoff or effluents.
For individuals with public drinking water, this can be done at a longer interval, like every two to five years.
With that said, you should consider testing your water if:
- You’re buying or selling a property.
- You rely on a private well.
- You live in an older home.
- You notice changes in water taste, color, or smell.
- You’ve recently completed plumbing repairs.
- You live near farms, factories, or known contamination sites.
- You’re pregnant, have young children, or have a compromised immune system.
For municipal water, review your local water utility’s annual Consumer Confidence Report (CCR), but remember: that report covers the water as it leaves the treatment plant — not after it’s traveled through miles of pipes to your home.
For full-spectrum water results in Northeast Pennsylvania, contact the experts at Mountain to Valley Home Inspections for your water sample testing.
FAQs
Why is water quality important?
Water quality directly impacts your health, home, and overall well-being. Contaminated water can carry harmful bacteria, chemicals, and heavy metals that may cause both short-term illnesses and long-term health issues. Beyond health, poor water quality can also damage plumbing systems, stain fixtures, reduce appliance lifespans, and affect the taste and smell of your drinking water. Testing ensures you’re aware of any risks and can take action to protect your household.
How often should I test my drinking water?
If you use a private well, the EPA recommends testing at least once a year for bacteria, nitrates, and other common contaminants. If you’re on city water, review your local water utility’s annual report, but you may still want to test your home’s water if you notice changes in taste, smell, or color — or if you live in an older home with aging pipes.
What should I do if my water test results show contamination?
Solutions depend on the type of contaminant. In many cases, installing a certified filtration system, repairing plumbing, disinfecting your well, or using bottled water for drinking and cooking can solve the problem. If contamination is severe, consult with a water treatment professional or local health department for guidance.
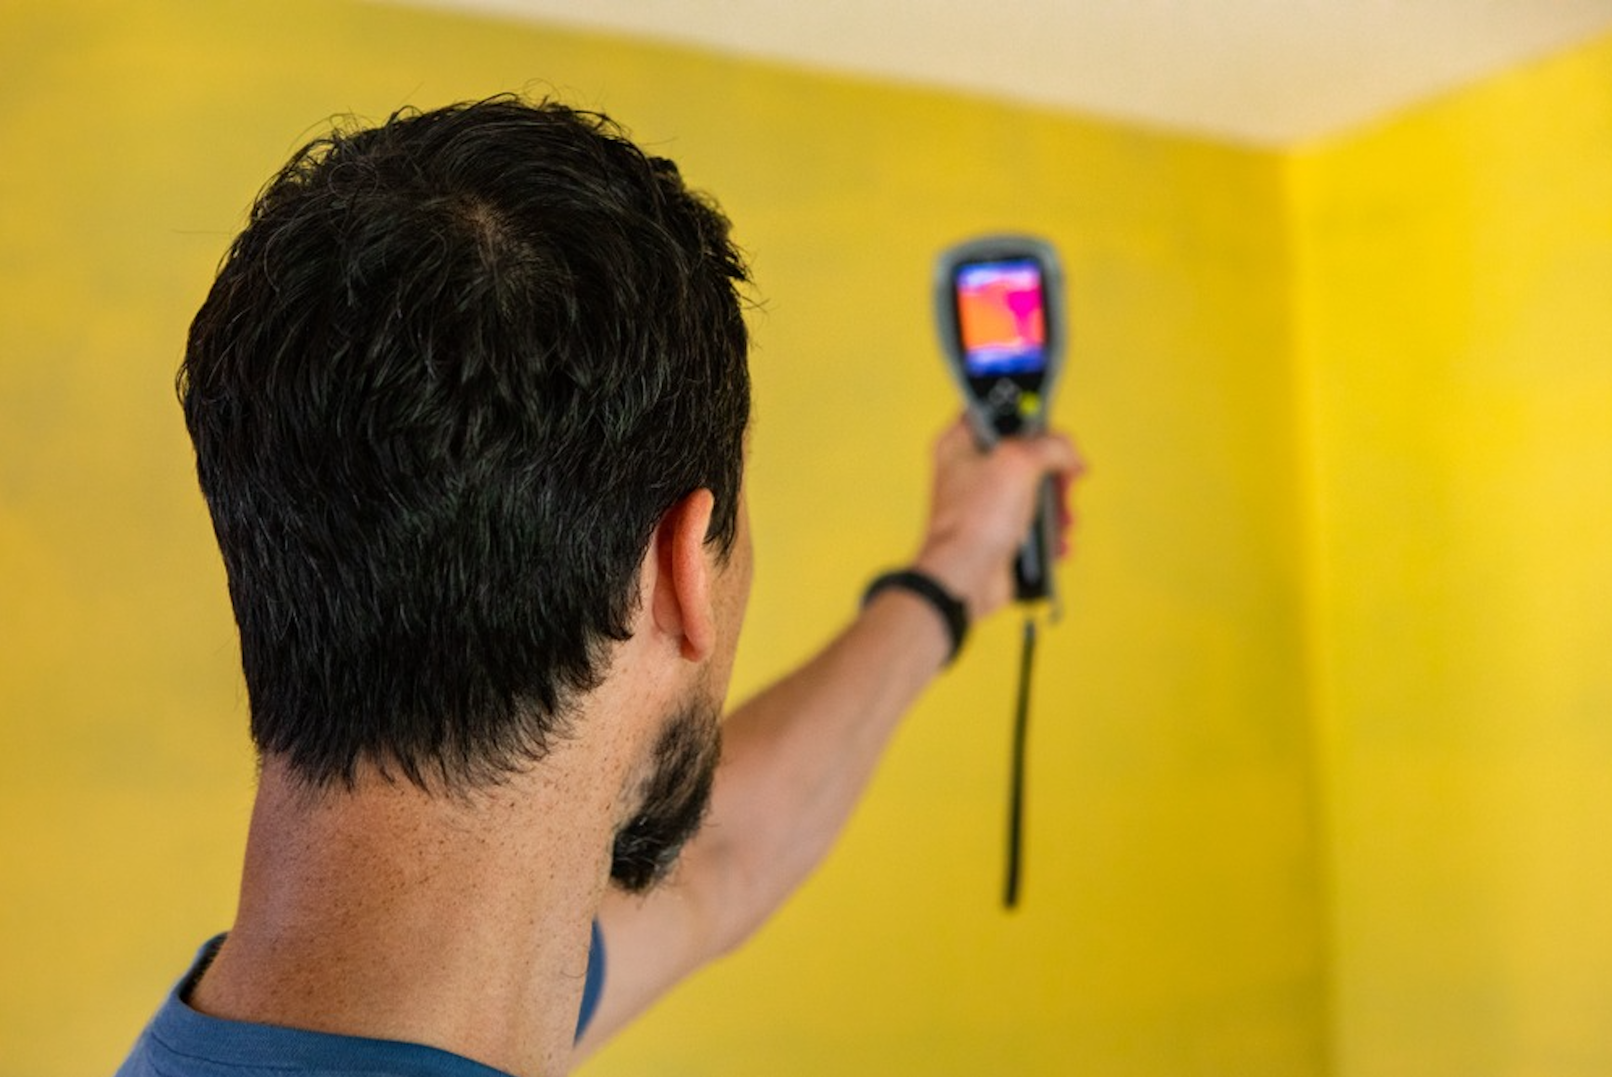
6 Reasons to Get Professional Air Quality Testing - Especially in Older Homes
The charm of older homes in our great area will never cease to amaze us. But underneath that old architecture, a dark secret may lie.
Mold, mildew, lead paint, and other VOCs are common issues found in many older homes across Northeast Pennsylvania.
While some laws and disclosures have attempted to cut down on the presence of lead paint and asbestos, particularly older homes may still have these dangerous substances within them.
Poor ventilation found in attics, bathrooms, and kitchens in older homes also creates the perfect environment for mold. And we don’t need to mention the harm that basement flooding can do to air quality in a home.
Professional air quality testing is a crucial step in identifying and mitigating potential hazards in an older home. Whether you’re living in a historic property— or considering purchasing or selling one— here are nine reasons why you should invest in air quality testing.
What Is an Air Quality Test?
An air quality test is a professional assessment that measures the presence of pollutants, allergens, and harmful substances in indoor air. This testing helps identify contaminants such as mold spores, volatile organic compounds (VOCs), carbon monoxide, asbestos fibers, and dust particles.
Professionals use specialized equipment to collect air samples and analyze them for harmful substances that could impact respiratory health, cause allergies, or lead to long-term illnesses.
The results provide homeowners with a clear understanding of potential air quality issues and recommendations for improving indoor air conditions.
Air quality tests are particularly important for older homes, where outdated building materials, aging ventilation systems, and hidden moisture issues can contribute to poor indoor air.
Professional air quality testing can detect problems that aren’t visible to the naked eye, allowing homeowners to take proactive measures to improve air circulation, remove contaminants, and create a healthier living environment.
6 Reasons to Get an Air Quality Test
Getting a professional air quality test is essential for your health and can also protect your home by identifying potential issues that may be hidden.
1. Identifying Hidden Mold and Mildew
Moisture intrusion and poor ventilation can lead to the presence of mold and mildew, which may be hidden from plain view and remain undetected for years.
Unfortunately, older homes are more likely to have moisture issues due to aging plumbing, roof leaks, or poor ventilation. This excess moisture can lead to mold and mildew growth, triggering allergies and respiratory issues.
Professional air quality testing can detect mold spores in the air, even if visible mold isn’t present. Identifying and addressing mold early can prevent costly remediation and health problems and point to potential leaks or moisture issues that may cause other problems in your home.
2. Detecting Asbestos Fibers
Many homes built before the 1980s contain asbestos fibers in their insulation, ceiling tiles, or siding materials. While asbestos isn’t automatically toxic on its own, when disturbed, it can become airborne and cause severe lung diseases.
Unfortunately, many people may be unaware they have asbestos in their homes or fail to disclose it when selling them.
Air quality testing can determine if asbestos fibers are present, helping homeowners take necessary precautions before renovations or repairs.
3. Checking for Lead Dust Contamination
Lead-based paint was widely used in homes before it was banned in 1978, but can still be found in several homes in Pennsylvania today. According to the EPA, 69% of homes built between 1940 and 1969 are likely to contain lead-based paint, and 87% of those built before 1940 are also likely to contain lead-based paint.
Lead-based paint can cause several harmful health effects, including:
- Developmental delays in children
- Neurological issues
- Kidney and cardiovascular problems
Professional air testing can provide extra assurance by identifying harmful lead contaminants, allowing you to remove them before occupying or buying a home.
4. Identifying Carbon Monoxide Risks
Old homes often have outdated heating systems, fireplaces, or gas appliances that can produce carbon monoxide (CO). Because CO is an odorless and deadly gas, undetected leaks pose a severe health risk. Symptoms of CO poisoning include:
- Dizziness and headaches
- Nausea
- Confusion and fatigue
Air quality testing can detect unsafe levels of carbon monoxide beyond home testing kits that ensure your home’s ventilation systems are functioning properly.
5. Checking for Volatile Organic Compounds (VOCs)
Many old homes contain building materials, adhesives, and finishes that release volatile organic compounds (VOCs) into the air and can lead to respiratory issues. Some common sources include oil-based paints, old carpeting, adhesives, and stored chemicals.
An air quality test can identify high VOC concentrations that may be impacting your long-term health.
6. Radon Detection
Radon is a silent gas that has been linked to cancer development and other detrimental health effects. Unfortunately, 40% of homes in Pennsylvania have been linked to unsafe levels of radon exposure.
Conducting a radon test can be a lifesaver. Eliminating radon often requires a radon mitigation system installed in your basement or the lowest level of your home.
7. Testing for Poor Ventilation and Stale Air
Finally, we recommend air quality testing for older homes that have poor ventilation or older HVAC systems. Poor ventilation can lead to increased humidity, lingering odors, mold, dust, and much more.
A professional assessment can determine if your home needs better airflow solutions, such as upgraded ventilation systems or air purifiers.
How Much Does an Air Quality Test Cost?
The national average for an air quality test costs around $420, though this depends heavily on several factors:
- Home Size: The size of the home and amount of rooms or surfaces that need to be tested will greatly influence pricing.
- Hazards Tested: Prices vary between different types of air quality tests, with mold and radon testing trending on the higher side of the spectrum.
To get the most accurate air quality testing for your home, contact the experts at Mountain to Valley Home Inspections.
FAQs
Why is air quality testing important in an old house?
Older homes are more likely to have air quality issues due to outdated materials, aging ventilation systems, moisture problems, and hidden pollutants like asbestos or lead dust. Testing helps ensure a safe and healthy indoor environment.
What are common indoor air pollutants found in old homes?
Common pollutants include mold spores, asbestos fibers, lead dust, radon gas, carbon monoxide, volatile organic compounds (VOCs), pet dander, and dust mites.
Can I use a DIY air quality test instead of hiring a professional?
DIY kits are available, but they often provide limited results. Professional testing offers more accurate and detailed analysis, especially for hazardous substances like asbestos, radon, and mold.

Foundation Inspections in Northeast PA: 7 Things Experts Look For
The foundation provides structural integrity for the rest of the home, yet many homeowners tend to neglect it, especially when it comes to easy fixes.
Whether it’s reinforcing a mortar wall or fixing your downspouts to drain further away from your home, you’d be surprised how such little fixes can add decades to your foundation.
Finding foundation issues can be uncomfortable for homeowners as repairs can be among some of the most expensive homeowners will make.
Foundation issues not only point to other issues within the home but could threaten to lead to additional issues, such as cracked walls, separated frame members, and sloping floors.
Foundation inspections are often included in home inspection reports when buying or selling a home. Still, getting a separate foundation inspection may be ideal if you suspect issues in your current home.
If you are concerned about potential foundation issues, read more to learn about the importance of a foundation inspection and whether you need one.
What Is a Foundation Inspection?
A foundation inspection assesses the stability and condition of a home’s foundation, identifying common issues based on the construction of the foundation and local environmental concerns.
Due to the rapid freeze-thaw cycles throughout the winter in the Northeast and the general amount of rain in the Scranton area, foundation issues are very common. From shifting soil to water intrusion, it’s not uncommon for residents to experience heavy volumes of water in their basement or crawl space during extreme weather events.
Consider that many older homes weren’t built to the standards we expect today and often don’t provide enough room for drainage for downspouts, leading to water buildup around the foundation.
A foundation inspection identifies common issues associated with foundations, as well as causes and fixes that can improve the longevity of the foundation. Keep in mind that foundation inspections aren’t just limited to the actual foundation but encompass the exterior foundation walls, basement, crawl space, and even the walls inside your home.
Common Types of Foundations in Northeast Pennsylvania
Considering the foundation type and some exterior factors, your foundation inspector can better determine what to look for in an inspection. In Northeast Pennsylvania, there are generally five common foundation types, which vary based on when and where the home was built.
- Basement Foundations: The most common foundation structure found locally. This foundation typically features poured-on concrete or stone walls (pre-1930s) that may be subject to cracks or water intrusion due to hydrostatic pressure or gaps in the exterior walls.
- Crawl Space Foundation: Also known as a stem-walled foundation, this foundation is made of the same materials and is slightly elevated off of the ground to prevent contact with moisture. However, crawl spaces are often subject to mold and the foundation floors can sink if the soil is not properly compacted.
- Slab On Grade Foundation: Often found in mobile homes, this type of foundation offers no additional living space and is cheap to build. These foundations can often crack due to direct contact with the ground and any surrounding water.
- Pier and Beam: Found in flood-prone areas, such as near the Susquehanna River, this type of foundation is similar to a stem-walled foundation and can suffer from the same issues.
7 Things Experts Look For During a Foundation Inspection
Foundation issues are common in both older and newer homes in the area, but they are not automatically causes for concern. In our experience, the most common foundation issues we find are:
1. Foundation Cracks and Gaps
Foundation cracks can be a sign of water intrusion, increased hydrostatic pressure, or the wearing away of foundation materials. However, not all cracks are created equal, and understanding which type of crack you have will determine how serious the issue is.
- Vertical Cracks: Often caused by natural settling, these cracks are fairly common and not typically cause for concern.
- Horizontal Cracks: A sign of serious pressure against the foundation, these cracks indicate separation of the foundation materials and often result from soil expansion or poor compaction.
- Stair-Step Cracks: Common in brick or block foundations, these cracks can indicate movement or shifting and should be considered fairly worrisome.
Your inspector will also check for widening cracks, which may suggest ongoing movement requiring immediate attention.
2. Uneven or Sloping Floors
An uneven floor indicates foundation movement and can be observed all throughout the house. Inspectors use leveling tools to measure slope variations on different floors to determine if the foundation is shifting or sinking. Freeze-thaw cycles often contribute to this movement by allowing the surrounding soil to expand and contract, thus shifting the foundation.
3. Sticking Doors and Windows
Another key sign of foundation issues can be observed elsewhere in your home around the window and door frames. In extreme cases, visible gaps in the door or window frame will prevent these parts from latching or moving correctly.
4. Bowing or Leaning Walls
An extreme and obvious sign of a foundation issue is bowing or bulging foundation walls, which can indicate extreme soil pressure or water buildup around the foundation.
Hydrostatic pressure from excessive moisture can push walls inward, leading to cracks or tilted walls.
5. Water Intrusion and Drainage Issues
While some water intrusion may be common for residents in flood-prone areas, it’s a major source of concern. A foundation inspection will take into consideration past water intrusion to determine if any cracks or issues exist.
Some signs of water intrusion in a basement or crawl space include water stains, mold, and excess humidity.
6. Exterior Foundation Exposure and Soil Conditions
When inspecting the outside, an inspector will note any obvious issues, such as visible cracks or gaps in the foundation. They might also inspect the soil surrounding the foundation, taking into consideration any tree roots that may impact it or downspouts that drain directly into it.
7. Chimney and Brickwork Condition
Finally, another major sign of foundation settling and poor stability could be a leaning chimney or cracked brickwork. Your inspector will evaluate whether chimney shifts are related to general foundation issues or independent settling.
When Should You Get a Foundation Inspection?
A foundation inspection is an important part of home ownership. It should be done every five to ten years or at the first sign of an issue, such as visible cracks or settling elsewhere in the house.
A foundation inspection is also necessary when buying or selling a house. It can help avoid expensive repairs and reassure others that the home is in good condition.
Costs of Foundation Inspections in Northeast Pennsylvania
According to This Old House, foundation inspections cost between $300 and $1000. However, the cost will depend on the size of the home, its location, and the type of foundation. Basement and crawl space foundations cost slightly more than slab foundations.
If you’re looking for the best foundation inspection service for your money, contact the pros at Mountain to Valley Home Inspections for a free quote!
FAQs
What Are Common Causes of Foundation Issues in Northeast Pennsylvania?
Foundation issues can result from several environmental factors and homeowner neglect. These include:
- Freeze-thaw cycles causing soil expansion and contraction
- Poor drainage leading to water damage
- Tree roots disturbing the foundation
- Natural settling over time
Can I Perform a DIY Foundation Inspection?
While homeowners can spot visible cracks or moisture issues, a professional inspection is essential for detecting deeper structural problems.
What Are Signs that I Need Foundation Repair?
- Large or widening foundation cracks
- Bowing basement walls
- Doors and windows that no longer close properly
- Persistent water damage in the basement or crawl space

7 Practical Tips to Prevent and Stop Mold in Your House
Mold can be extremely difficult to spot, and many people go through months of allergy-like symptoms before identifying the cause. This is not only a health concern but can cost you much in time and money if you’re going to sell your home.
Mold, often found behind walls, ceilings, and floors, typically requires a separate and specialized inspection to identify and remediate. Unfortunately, remediation costs can total thousands and greatly diminish a home’s value.
Mold is often a symptom of deeper problems in your home, such as water leaks, excess humidity, and poor ventilation. Due to the rapid temperature shifts experienced in Pennsylvania, anything from cracked shingles to a frozen pipe can lead to water intrusion and subsequent mold.
Stopping mold requires understanding its typical causes and fixing structural issues within your home that contribute to it.
This guide will discuss everything you need to know about mold prevention, including common causes, prevention tips, and the importance of routine inspections.
The Dangers of Mold Exposure
Mold exposure can lead to various health issues, especially for individuals with allergies, asthma, or weakened immune systems. Common symptoms include coughing, sneezing, skin irritation, and eye discomfort.
Prolonged exposure to mold spores can even cause respiratory problems and, in severe cases, lead to chronic lung conditions. However, not all types of mold are the same, so it’s essential to identify the specific strain within your home.
Certain types of mold, such as Stachybotrys chartarum (black mold), produce mycotoxins that may contribute to neurological symptoms and other serious health concerns.
Preventing mold growth through proper ventilation, moisture control, and timely remediation is essential for maintaining a safe indoor environment.
Signs You Have Mold in Your Home
Again, mold can be tricky to spot and often requires a total home inspection, including behind existing surfaces, to identify mold.
However, there may be some clues or hints of mold hiding right behind your walls that you may not be aware of.
- Musty Odor – A persistent, earthy, or damp smell, especially in basements, bathrooms, or other humid areas, could indicate mold growth, especially if there is no other explanation.
- Water Damage or Stains – Discoloration on walls, ceilings, or floors often indicate hidden mold growth or the possibility of mold.
- Peeling or Bubbling Paint/Wallpaper – Moisture behind walls can cause paint or wallpaper to deteriorate, indicating that mold is hiding underneath.
- Warped or Soft Flooring – Mold and moisture damage can make wood floors buckle or carpets feel damp, even if existing water damage has been cleaned up.
- Increased Allergy Symptoms – Sneezing, coughing, itchy eyes, or worsened asthma indoors may indicate mold spores in the air.
- Persistent Respiratory Issues – Chronic coughing, congestion, or breathing difficulties without a clear cause are often a clear and dangerous sign of mold.
- Excess Humidity or Condensation – Constant dampness, condensation on windows, or high indoor humidity create ideal mold conditions, which should warrant inspection.
- Visible Mold Growth – Patches of black, green, white, or brown mold on walls, ceilings, or other surfaces.
If you do spot any of the following signs of mold in your home, reach out to a local home inspection company to get a mold inspection immediately.
The Importance of Mold Inspections
A professional mold inspection is the only way to detect and address mold issues before they become severe.
A mold inspection goes beyond a traditional home inspection. It uses advanced tools and techniques, such as thermal imaging cameras and moisture meters, to detect areas where mold is bound to be present and spot any strains hidden behind structures.
The benefits of getting a mold inspection are essential for homeowners or house hunters.
- Early Detection – Identifies mold problems before they spread and lead to structural damage.
- Health Protection – Ensures indoor air quality remains safe for you and your family.
- Accurate Identification – Determines the type of mold present and the best course of action for removal.
- Prevention of Future Growth – Experts provide recommendations to prevent mold from returning.
Furthermore, a mold inspection company may be able to identify the source of moisture intrusion, such as a leaking roof or pipe that needs to be repaired to prevent future mold growth.
7 Ways to Stop and Prevent Mold in Your Home
Given these dangers, homeowners need to practice proper home maintenance to prevent future mold growth. Stopping mold growth also helps protect the structural integrity of your home and prevent moisture intrusion, which can lead to a host of additional problems.
1. Control Indoor Humidity Levels
Mold thrives in humid environments and the humid summers can be the perfect breeding grounds for mold if you are not careful. Typically, basements and attics with little ventilation suffer the most from excess humidity and mold growth.
To keep mold at bay, maintain indoor humidity levels between 30-50% using dehumidifiers, air conditioners, and proper ventilation, such as opening a window.
2. Improve Ventilation
Proper airflow prevents excess moisture buildup. Think about what areas of the home are the most subject to moisture and humidity (i.e., bathrooms, kitchens, laundry rooms). Consider installing exhaust fans or keeping windows open while showering or cooking to prevent moisture buildup.
3. Fix Leaks Immediately
Leaky pipes, roofs, or windows create moisture-prone areas perfect for mold growth. If you’ve had a past leak, be sure to get a mold inspection to determine if any mold has developed underneath the surface. Often, homeowners will vacuum the water and dry the area but won’t take any steps to clean up any mold that may have developed.
4. Dry Wet Areas Promptly
If you spot any areas of your home where there is water buildup, such as on the edge of a bathtub or a window sill after a storm, dry and vacuum the area immediately. This can prevent mold and damage to these areas, which are extremely common within the home.
5. Use Mold-Resistant Products
When renovating or building, opt for mold-resistant drywall, paints, and insulation materials to minimize the risk of mold growth in the future. This can help prevent future mold growth and make remediation and prevention easier.
6. Clean and Maintain Gutters
Clogged gutters can cause water to overflow and seep into your home’s foundation or walls. They can also lead to roof damage, which can invite leaks. Therefore winterizing your gutters is an essential part of fall home maintenance and can help prevent moisture intrusion in your home.
7. Monitor and Maintain HVAC Systems
Your heating and cooling system is another common but overlooked source of mold exposure in the home. It’s also one of the most dangerous as it filters in air throughout your home. Be sure to change filters regularly and schedule routine HVAC inspections to prevent mold growth within ducts and vents.
Schedule a Mold Inspection Today
If you are a Northeast Pennsylvania resident who fears they might have mold inside their home or are purchasing an older home and want to be sure, schedule a mold inspection today.
Our team follows the latest standards of mold care and inspection developed by the IAC2 Mold Inspection Standards of Practice to ensure the most accurate results. Not only do our mold inspections protect your health and your home, but they also give you peace of mind.
FAQs
How quickly does mold grow after a water leak?
Mold can start growing within 24-48 hours after moisture exposure if conditions are favorable.
Do air purifiers help with mold?
Air purifiers with HEPA filters can help remove airborne mold spores, but they do not eliminate mold growth on surfaces.
Can I remove mold myself, or do I need a professional?
Small mold patches (under 10 square feet) can often be cleaned with household solutions like vinegar, bleach, or hydrogen peroxide. Larger infestations require professional remediation.

Home Maintenance Checklist: Avoid Expensive Repairs Every Season
A bad home inspection report is the most common reason for failed real estate transactions. The most oft-cited home inspection errors we see repeatedly result from homeowner neglect.
From inefficient HVAC systems that could be fixed from routine servicing to foundation issues caused by backed-up gutters, homeowners play a vital role in their homes’ health and structural integrity.
Therefore, a home maintenance checklist is essential for keeping your home in good condition and avoiding costly repairs.
In addition to the essentials, like cleaning your house and swapping out broken appliances, homeowners are responsible for a whole host of seasonal tasks, from power washing and cleaning gutters to servicing their HVAC system and roof.
This guide will walk homeowners through essential home maintenance tasks, including seasonal and long-term home maintenance, that can keep their homes in top shape.
Seasonal Home Maintenance Checklist
Seasonal or quarterly home maintenance is essential to keeping your interior and exterior clean, functional, and pest-free. Inspecting your home and performing routine maintenance also helps keep you familiar with it so you can spot issues or changes before they become troublesome.
Spring Home Maintenance
Springtime is an essential time for home maintenance projects in Northeast Pennsylvania. Not only is it the traditional season for spring cleaning, but as the ground begins to thaw, the rains come down, and plant life returns, there are many things you might need to fix or tweak from cold weather damage.
Exterior Maintenance
- Inspect the roof – Look for loose or missing shingles, leaks, or winter storm damage.
- Clean gutters and downspouts – Remove leaves and debris that accumulate in the fall to prevent water damage.
- Check your HVAC system – Schedule a professional inspection and replace filters to prepare it for the warmer months.
- Inspect windows and doors – Check for drafts and re-caulk as necessary. It’s not uncommon for some foundation/frame shifting to occur, especially as the ground softens.
- Test outdoor faucets and irrigation systems – Repair leaks and ensure proper function.
- Service your lawn equipment – Sharpen mower blades and check oil levels.
- Inspect foundation and exterior walls – Look for new cracks or signs of settling. Doing this every spring will make you aware of any new issues.
- Seal gaps and cracks – Proactively prevent pests and allergens from entering your home by sealing all openings.
- Prune trees and plants – Prevent overgrowth, weeds, and pests by pruning plants back to stems.
- Test sump pumps – Pour water down sump pumps to ensure proper functioning for the rainier months.
Interior Maintenance
- Flush the water heater – Remove any insulation from the water heater and have it flushed for service.
- Vacuum the dryer vent – Remove any loose lint in the dryer vent.
- Spring cleaning – Remove clutter from storage areas, including the basement and attic.
- Install/inspect insulation – The mild months are a great time to replace or inspect your home’s insulation for damage or mold.
- Reverse ceiling fans – Create optimal airflow and temperature distribution for the warmer months.
Summer Home Maintenance
Summer is a great season to begin home construction and exterior projects. However, homeowners must also contend with the increased activity of thunderstorms and humidity during this time.
Exterior Maintenance
- Power wash exterior surfaces – Clean siding, driveways, decks, and patios with a power washer. Be sure to get behind shutters as well.
- Inspect and repair fences, decks, and porches – Stain, seal, or repair as needed to prevent wear or degradation.
- Prepare for storms – Trim overhanging branches and check storm drains.
- Repair or resurface the driveway – Repair any cracks in your driveway and resurface as needed.
Interior Maintenance
- Check and clean exhaust fans – Ensure bathroom and kitchen exhausts are working properly, especially as humidity rises.
- Service the air conditioner – Clean or replace filters monthly for efficiency and get your system cleaned to prevent mold or coolant leaks.
- Inspect plumbing for leaks – Check under sinks, around toilets, and outside faucets.
- Check attic ventilation – Ensure proper airflow to prevent heat buildup that can lead to mold and termites.
Fall Home Maintenance
Like spring, fall is a very important month when it comes to winterizing your home and also cleaning up excess debris from leaves and plants.
Exterior Maintenance
- Rake or mow leaves – Dispose of leaves in any way possible to prevent pests and dead grass.
- Clean and inspect chimneys and fireplaces – Remove soot and debris to prevent fire hazards and prepare for winter.
- Check heating systems – Service the furnace or boiler before winter to avoid interruptions in service.
- Inspect and clean gutters – Prevent ice dams by removing leaves and debris.
- Drain outdoor faucets and sprinkler systems – Prevent pipes from freezing by draining all outdoor pipes and disconnecting outdoor hoses.
- Inspect weather stripping – Replace worn-out seals on doors and windows to prevent cool air from penetrating your home during the winter.
- Store firewood away from the house – Prevent pests like termites and cockroaches by keeping all wood stored away from the house and removing any branches from your yard.
- Clean window wells – Remove debris buildup along window wells to prevent pests.
Interior Maintenance
- Test carbon monoxide and smoke detectors – Replace batteries if needed.
- Steam carpets and floors – Clean up from summer traffic by getting any carpets or floors professionally cleaned.
Winter Home Maintenance
Winter maintenance is mostly interior-focused, as it is difficult for many people to perform projects on their homes once the temperature dips below freezing.
- Inspect insulation – Check the attic and basement for adequate insulation and look for drafts in your house.
- Reverse ceiling fans – Set them to rotate clockwise for better heat distribution.
- Check for ice dams – Remove snow buildup from the roof and gutters to prevent leaks.
- Inspect pipes for freezing risks – Keep cabinets open for warm air circulation and wrap any exposed pipes with insulating materials.
- Test emergency power sources – Ensure generators and backup heating sources work.
- Stock up on winter essentials – Keep ice melt, salt, and shovels handy for outdoor snow maintenance.
Monthly Home Maintenance Essentials
In addition to seasonal home maintenance tasks, there are also several monthly tasks that we would like to familiarize homeowners with to keep their homes in proper condition.
- Test smoke and carbon monoxide detectors – Press the test button to ensure functionality and protect your home from potential disasters.
- Inspect and clean HVAC filters – Replace dirty filters monthly to keep clean air pumping through your air systems.
- Check water softener and refill if needed – Extend plumbing life by inspecting any water softeners you may be using.
- Clean garbage disposal – Use vinegar and ice cubes to remove odors and keep your disposal working in tip-top shape.
- Inspect and clean drains – Pour boiling water or vinegar to prevent clogs–research pipe cleaners to determine if they are safe for your pipes.
- Check fire extinguisher pressure – Ensure your extinguisher is fully charged and accessible.
- Run water in unused sinks and tubs – Prevent sewer gases from entering your home and mineral buildup in pipes.
Longer-Term Home Maintenance
In addition to seasonal or annual home maintenance tasks, long-term maintenance tasks play a crucial role in ensuring the proper functioning of essential appliances and structures within your home. These tasks can range from every 5 to 30 years, depending on the lifespan of the appliance or structure.
- Repaint exterior and interior walls – Experts recommend repainting interior trim and walls about every 3-5 years to keep paint fresh, while exterior paint can be repainted every 5-10 years.
- Replace your HVAC System – HVAC units can last anywhere from 10-40 years and even longer with proper maintenance. If you notice problems, get it inspected immediately.
- Upgrade insulation – Fiberglass and cellulose insulation lasts about 10-25 years on average, with spray foam lasting longer. Replace once the insulation has degraded or no longer meets recommended R-values.
- Replace hot water heaters – Water heaters typically last 8-12 years and require frequent replacement.
- Refinish hardwood floors – Restore shine and prevent damage by getting your hardwood floors refinished every 7-10 years.
- Pump and inspect your septic tank: Get your septic tank inspected every 5-10 years and get it pumped every 3-5 years to prevent backflows.
- Reseal windows and doors – Prevent drafts and energy loss by resealing window and door frames every few years or once gaps are noticed.
- Recaulk bathrooms and kitchens – Bathroom caulk and silicone sealant only last between 5-10 years, requiring replacement or resealing.
- Inspect and replace roofing – Asphalt shingles typically last 20-30 years but should be inspected regularly.
By following these home inspection maintenance tasks, you can keep your home in pristine condition and avoid costly issues. Once it comes time to sell, you and the prospective buyer will be thankful for the effort and care you placed in your home.
FAQs
When should I have my HVAC system serviced?
It’s recommended to service your HVAC system at least twice a year—once in the spring for air conditioning and once in the fall for heating.
How often should I inspect my roof?
You should inspect your roof at least twice a year (spring and fall) and after major storms to check for damage.
How often should I clean my gutters?
Gutters should be cleaned at least twice a year—once in the spring and once in the fall—to prevent clogs and water damage.
How do I know if my home needs new insulation?
Signs of poor insulation include high energy bills, inconsistent indoor temperatures, and drafts. An energy audit can help determine if you need to upgrade insulation.

9 Signs You May Have Foundation Damage Issues
Chances are, if you’re buying a home with a bad foundation, more problems may be hiding under the surface for future repairs.
Unfortunately, foundation repair is among the most expensive home repairs and, in extreme cases, can even lead to the demolition of the home.
While some natural settling will occur over time, neglect from homeowners or extreme environmental conditions can damage a foundation and disrupt a home’s equilibrium.
In most cases, foundation issues can be caught early and fixed without significant repairs. This reiterates the importance of getting a qualified home inspection and periodically checking your foundation for issues.
Common Types of Foundations in Northeast Pennsylvania
The foundation type in your home often reflects the era in which it was built, local building codes, and environmental conditions.
In Northeast Pennsylvania, you can find a variety of different foundation types, from stone foundations built over a century ago to modern concrete slab foundations, with the most common being:
- Basement Foundations: Found in a majority of older and modern homes alike, basements provide additional storage or living space. Foundation walls can be composed of several materials, from concrete to stone. While most basement foundations are sturdy, they are prone to moisture issues due to Northeast Pennsylvania’s rainy seasons and heavy snowmelt.
- Crawl Space Foundations: Homes with elevated foundations–often found along the Susquehanna River—provide a buffer between the home and the ground, preventing flooding from excess water flow. These foundations are very sturdy but require more maintenance than other foundations.
- Slab-on-Grade Foundations: In newer homes, concrete slash foundations are poured directly into the ground, providing no basement or crawl space. While generally sturdy, these foundations are prone to greater shifting due to the natural settling of the surrounding soil and hydrostatic pressure.
- Stone Foundations: Older homes may have stone or rubble foundations, which add historic charm but can deteriorate without proper maintenance. If properly graded and maintained, these foundations can last long and may still hold up today.
Each foundation type has unique vulnerabilities. Recognizing yours can help you determine the appropriate preventive measures and solutions for potential issues.
What Causes Foundation Issues?
Foundation problems don’t occur overnight. They often result from environmental, structural, and homeowner neglect.
Foundation issues can take many forms, from deteriorated basement walls that allow water to seep through to shifting soil that causes uneven floors.
Generally, some factors in Northeast Pennsylvania that contribute to foundation damage include:
- Soil Movement: The region’s expansive clay soils absorb water and expand, pushing against the foundation. Conversely, dry periods cause the soil to shrink, creating voids.
- Water Damage: Improper drainage, clogged gutters, and leaking pipes can saturate the soil, leading to erosion or hydrostatic pressure against the foundation walls.
- Freeze-Thaw Cycles: During cold winters, water in the soil freezes and expands, exerting upward pressure on the foundation. When it thaws, the soil settles unevenly.
- Tree Roots: Trees planted too close to a home can cause damage. As roots grow, they can shift soil or directly impact foundation walls.
- Construction Errors: Poor design, inadequate materials, or rushed construction can result in a weak foundation from the start. We’ll often find that many older homes lack the proper foundation support needed to support their home.
9 Signs You May Have Foundation Damage
Unfortunately, many homeowners are not trained to spot foundation problems until they start to impact daily life and result in noticeable cracks and shifts in the home’s interior. Some signs that homeowners should be aware of over time include:
1. Cracks in Walls or Floors
As your home settles, it’s natural to spot cracks on your walls, ceiling, and floors. However, not all cracks are created equal.
For example, vertical cracks are considered innocuous and a natural part of foundation settling. However, vertical cracks that extend from the wall to the ceiling or floor could be worrisome and indicate issues with the foundation.
Horizontal cracks are equally concerning as they could indicate rapid shifting in one area of the foundation compared to another.
Finally, stairstep cracks, especially along masonry objects, will indicate uneven settling and a more extensive problem that warrants investigation.
2. Uneven or Sloping Floors
Uneven settling in different areas of the home will cause the house to shift on different axis points, causing floors to slope. It’s essential to look for other signs of foundation damage, as sloping or buckling floors could also be a problem with the floor joist or subfloor underneath.
3. Sticking Doors and Windows
One of the most common signs of foundation damage that homeowners tend to ignore is sticking windows and doors.
Doors and windows that no longer fit their frames or are difficult to open and close may signal a structural shift. If you notice doors that don’t open properly or even have slightly shifted frames that don’t allow the striker to hit the latch plate, it could indicate the sinking or settling of the foundation.
Another sign to look for is foggy windows, which could result from a damaged seal due to the foundation settling.
4. Bowed Walls
If you have a basement foundation, look at your walls to see if they are bowing, cracking, or bulging in different spots. This could indicate hydrostatic pressure from outside soil that has saturated, shifted, and expanded.
5. Gaps Around Doors or Window
Look for gaps between walls and door and window frames, which indicate uneven settling. This is common in older homes and easily visible during the day when light can pierce through these openings.
6. Water Intrusion
While moisture in basements or crawl spaces is very common in areas prone to flooding by the river or even up on a hill, like Clarks Summit and Pittston, it could eventually eat away at your foundation. Look for signs of water damage, such as cracks in the wall, deterioration, or staining of the floors.
7. Chimney Movement
A leaning or cracking chimney often indicates foundation instability. Chimneys are heavy and rely on a solid base. Have a chimney expert examine the top and interior of your chimney for signs of damage.
8. Foundation Cracks
Visible cracks on the exterior foundation walls, particularly horizontal ones, clearly indicate trouble. These will be visible on the floor or walls of your foundation.
9. Persistent Musty Odor
Finally, dampness from foundation leaks can lead to mold and mildew growth, creating an unpleasant smell in the home. Regularly check moisture in your basement or crawl space and look for water intrusion after rain or snow events.
The Importance of a Foundation Inspection
A home’s foundation provides support for the rest of the house. Unfortunately, once your foundation starts to experience problems, you will most likely notice problems in other areas of your home.
For this reason, getting a foundation inspection at the first sign of a problem is important to identify the cause and fix any lingering issues.
A professional foundation inspection is an investment in your home’s longevity and value. Whether you are buying or selling a home or are concerned about your existing foundation, a home foundation inspection is essential for your safety and peace of mind. A home inspection will check for foundation issues and any issues pertaining to the foundation, such as poor drainage or broken window seals.
FAQs
Does homeowners’ insurance cover foundation repairs?
It depends on the cause. Insurance often covers sudden damage from earthquakes or floods but typically excludes gradual damage from soil movement or water intrusion. Review your policy for specifics.
What can I do to prevent foundation problems?
Ensure proper drainage around your home, maintain a consistent moisture level in the soil, and avoid planting trees too close to the foundation. Regularly clean gutters and downspouts to direct water away from your foundation.
How often should I inspect my foundation?
Visually inspect your foundation twice a year—once in the spring and once in the fall. Professional inspections should be scheduled every few years or whenever you notice potential warning signs.