
How to Winterize Your Water Heater in NEPA
Winterizing a water heater in Northeastern Pennsylvania takes five steps. Set the thermostat to 120°F, flush the sediment from the tank, test the temperature and pressure relief valve, insulate the tank and the first six feet of pipe, and check the anode rod. Together, they take an afternoon, and they are the same items a home inspection looks at when it reports on a water heater’s condition.
Winter is when water heaters fail, because it is when they work hardest. This guide explains why NEPA winters are hard on them, walks through the five steps, compares tank and tankless units in cold weather, lists the signs a unit is near the end of its life, and covers what to do with the water heater if the home will sit empty until spring.
Why is winter hard on NEPA water heaters?
Winter is hard on water heaters because the water entering the tank is much colder, so the unit runs longer to deliver the same hot shower. Every gallon has to be raised more degrees than it does in July. Recovery time stretches, burners and elements cycle more often, and any weakness in an older unit shows up under that load.
Location adds to it. Most NEPA water heaters sit in unheated basements, garages, or utility rooms, where a cold room pulls heat out of the tank and the pipes around the clock. The U.S. Department of Energy calls water heating the second largest energy expense in a home, at about 18 percent of energy use, and standby loss in a cold basement is part of that bill. The heating equipment in the same room is under the same seasonal strain, which is covered in Does a Home Inspection Include the Furnace?
What is the winter checklist for a water heater?
The winter checklist is five steps, done before the first hard freeze. Each one either lowers the load on the unit or catches a failure before it happens.
1. Set the thermostat to 120°F
Set the water heater to 120°F. The Department of Energy describes 120°F as a temperature considered safe for most of the population, and it reports that a heater set at 140°F can waste $36 to $61 a year in standby heat losses. The lower setting also slows mineral buildup and corrosion in the tank and pipes. Resist the urge to turn it up in January, since insulation solves the same complaint without the cost.
2. Flush the sediment
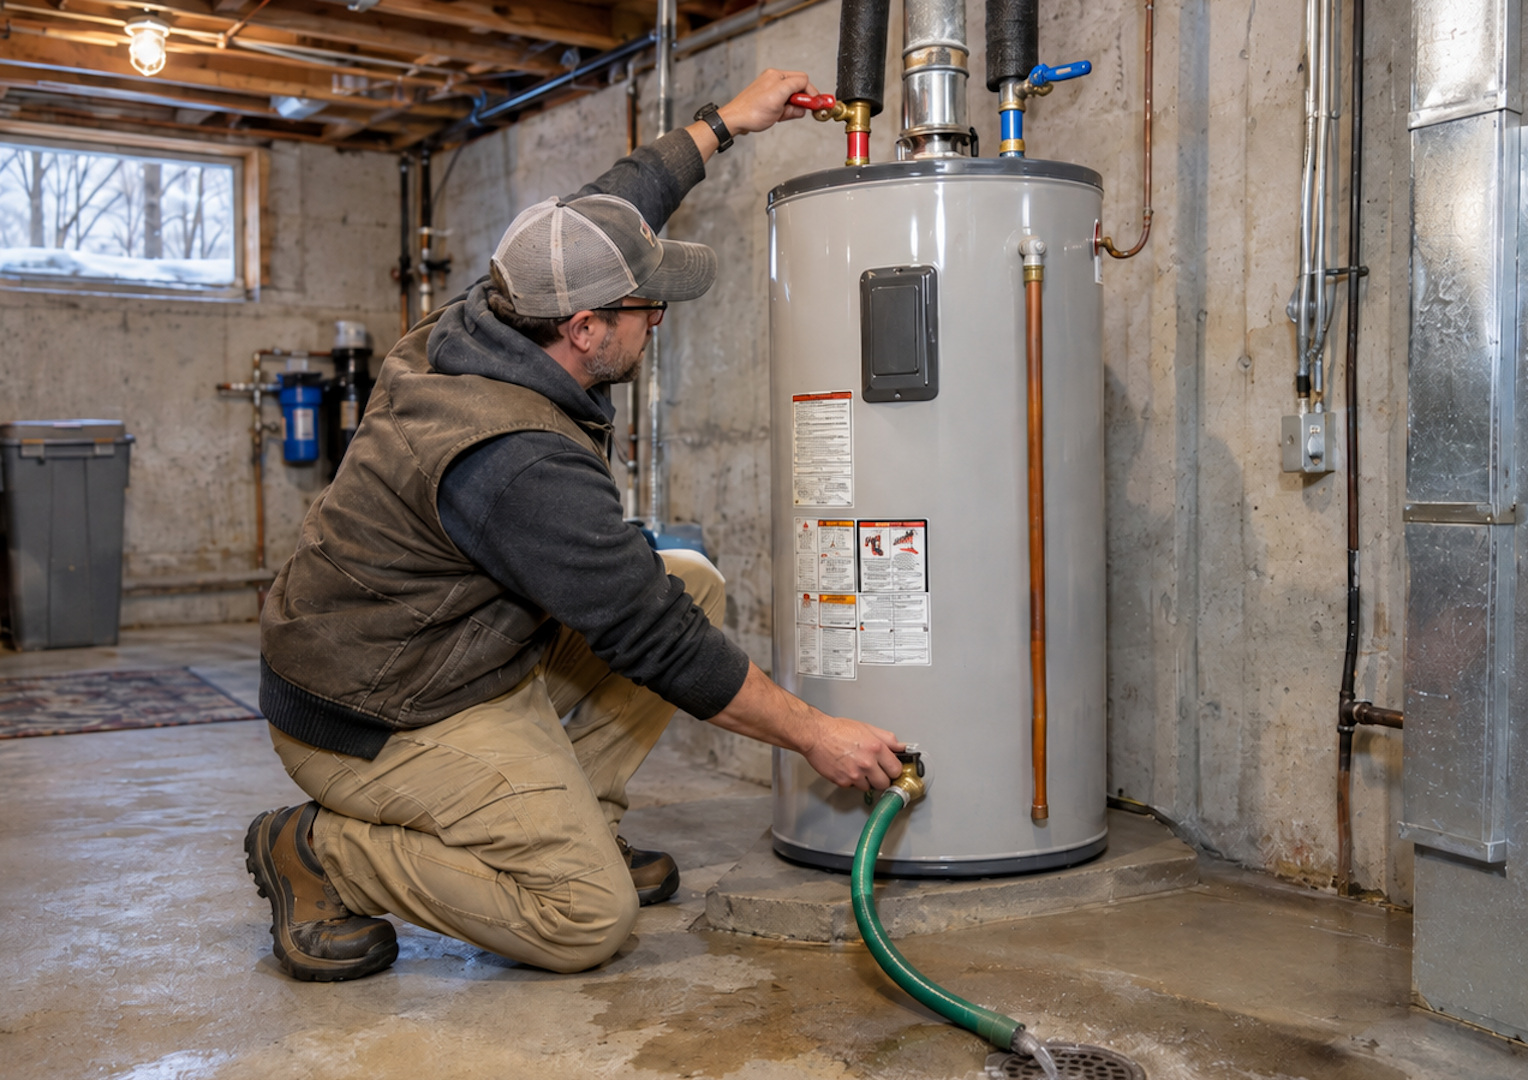
Drain sediment from the tank before winter. Minerals settle at the bottom, and the Department of Energy notes that sediment impedes heat transfer and lowers efficiency, recommending that a quart of water be drained from the tank every three months. Attach a hose to the drain valve near the bottom, run it to a floor drain or bucket, and drain until the water runs clear. A tank that has never been flushed may need a full drain, with the power or gas turned off first.
3. Test the temperature and pressure relief valve
Test the temperature and pressure relief valve, usually called the T&P or TPR valve. It is the safety device that opens if temperature or pressure in the tank climbs too high. Lift the lever briefly with a bucket under the discharge pipe. Water should flow and then stop cleanly when you release it. A valve that does nothing, or one that keeps dripping afterward, needs to be replaced by a plumber, and on an old valve that has never been tested it is best to let the plumber run the test.
4. Insulate the tank and the first six feet of pipe
Insulate the tank if it feels warm to the touch, and insulate the pipes. The Department of Energy reports that insulating a storage tank can save 7 to 16 percent a year in water heating costs. Its weatherization guidance calls for pipe insulation of at least R-3 on the first six feet of both the hot and cold lines, kept at least six inches back from the draft hood or vent on a gas unit. Follow the manufacturer’s instructions, and keep insulation clear of the vent, the burner compartment, and the relief valve.
5. Check the anode rod
Check the anode rod every few years. It is a sacrificial metal rod inside the tank that corrodes so the steel does not. Once it is eaten down to the core wire, the tank itself starts to rust. Replacing a spent rod is one of the few repairs that extends the life of a tank, and a plumber can check it during a flush.
How do tank and tankless water heaters compare in winter?
Tank and tankless units both lose performance in winter, in different ways. A tank stores heat and loses some of it to a cold room. A tankless unit stores nothing, so it has to lift colder incoming water to temperature in a single pass, which lowers the flow it can deliver.
| Factor | Storage tank | Tankless (on-demand) |
| Cold incoming water | Longer recovery between showers | Lower flow rate at the same temperature |
| Standby heat loss | Loses heat to a cold basement or garage, reduced by insulation | Very little, since no water is stored |
| Freeze risk | Low for a tank in use, higher for the exposed pipes around it | The unit and its condensate line can freeze if power is lost or the unit sits in an unheated space |
| Efficiency (DOE) | Baseline | 24 to 34 percent more efficient in homes using 41 gallons or less a day, 8 to 14 percent in homes using about 86 gallons |
| Typical service life | 6 to 12 years (InterNACHI), 10 to 15 years (DOE) | More than 20 years (DOE) |
| Winter maintenance | Flush, relief valve test, insulation, anode rod | Descale per the manufacturer and confirm freeze protection has power |
The service-life numbers differ by source because water quality and maintenance vary. InterNACHI’s life expectancy chart lists a conventional water heater at 6 to 12 years and notes that the mineral content of water can shorten it. The Department of Energy says most storage water heaters last 10 to 15 years and that tankless units can last more than 20. In homes with hard or mineral-heavy well water, plan around the low end.
How can you tell a water heater is near the end of its life?
A water heater near the end of its life shows it in four ways, which are age, rust, noise, and leaks. Any one of them heading into winter is a reason to budget for replacement instead of waiting for a cold-morning failure.
- Age. Find the manufacture date on the data plate. A tank older than 10 to 12 years is past the service life most sources expect.
- Rust. Rusty hot water, rust streaks on the tank, or corrosion at the fittings and the bottom seam.
- Rumbling or popping. Sediment hardened on the tank floor traps water beneath it, and the noise is that water boiling through.
- Leaks. Moisture or a puddle at the base. A leaking tank cannot be repaired.
A unit that fails usually leaks, and the water goes wherever the tank sits. In a finished basement that means wet flooring and drywall, and the damp conditions that lead to mold in the home. Catching the signs in November costs a service call. Missing them can cost a basement.
What do inspectors note about water heaters, and why do buyers ask about age?
Inspectors note the water heater’s type, fuel, capacity, venting, safety valve, and visible condition, and buyers ask about age because it sets the replacement clock. Under the InterNACHI Standards of Practice, the inspector inspects the water heating equipment, including the energy source, the venting connections, and the temperature and pressure relief valve, and describes the capacity if it is labeled. The standards do not require an inspector to determine a unit’s age or life expectancy, or to operate the relief valve.
Mountain to Valley goes a step further and reports the age from the data plate when it is legible, along with photos of rust, leaks, improper venting, or a missing discharge pipe on the relief valve. That one line in the report matters at the negotiating table. A 14-year-old water heater is not a defect, but it is a known near-term cost, and buyers use it when they ask for a credit. For the findings that come up most often, see the 11 most common issues found in a home inspection report.
When should you replace a water heater instead of repairing it?
Replace a water heater when the tank leaks, when it is past its expected service life and needs a repair, or when the tank itself shows rust. Repairs make sense on younger units with a failed part, such as a thermostat, heating element, gas valve, or relief valve. They do not make sense on a tank that is corroding from the inside.
Timing matters as much as the decision. Replacing an aging unit in November is a scheduled job. Replacing it after it fails in January is an emergency call, with water on the floor and no hot water in the house. If the unit is in the upper half of its age range and showing any of the four signs, replace it on your schedule.
How do you drain a water heater if the home will sit empty this winter?
If a home will sit vacant or unheated this winter, drain the water heater. A unit in regular use handles cold well, but a tank and its pipes left full in an unheated house can freeze. Expanding ice damages the system and leads to leaks, burst pipes, mold, and even cracks in the foundation. This applies to seasonal homes, vacant listings, and estates waiting to sell.
Start with safety. Shut off the water supply to the heater. Turn off the gas and the pilot on a gas unit, or switch off the breaker on an electric one, before any water leaves the tank.
- Step 1. Drain the tank. Attach a garden hose to the drain valve near the bottom and run it to a floor drain, a bucket, or outdoors. Open a hot faucet upstairs to let air in, and drain until the tank is empty.
- Step 2. Open the faucets. Open every faucet in the house, including the basement fixtures, and leave them open until the water stops. This clears the hot water lines.
- Step 3. Insulate the tank and pipes. Wrap the tank in a water heater blanket and insulate the pipes leading to it, so the unit is protected if any water remains.
Draining the water heater is one part of closing up a house. The supply lines need the same attention, which is covered in how to prevent your pipes from freezing, and the exterior needs its own pass, starting with gutter maintenance for NEPA homes. The home maintenance checklist lists the rest of the seasonal tasks.
Get ahead of winter
Five steps and an honest look at the unit’s age will carry most NEPA water heaters through winter. If you are buying a home this season, a Mountain to Valley inspection documents the water heater’s age, venting, relief valve, and visible condition with photos, so you know what you are taking on before you close.
FAQs
What temperature should a water heater be set to in winter?
Set it to 120°F year-round. The Department of Energy describes 120°F as safe for most of the population, and a higher setting adds standby heat loss without solving a cold-basement problem. Insulating the tank and pipes is the better fix.
How often should I flush my water heater?
The Department of Energy recommends draining a quart of water from the tank every three months to remove sediment. A fuller flush before winter is a good habit in homes with mineral-heavy water.
How long does a water heater last?
InterNACHI’s life expectancy chart lists a conventional water heater at 6 to 12 years. The Department of Energy says most storage units last 10 to 15 years and tankless units can last more than 20. Hard water and skipped maintenance shorten those ranges.
Does a home inspection include the water heater?
Yes. Under InterNACHI standards the inspector inspects the water heating equipment, including the energy source, venting connections, and relief valve, and describes the capacity if labeled. Mountain to Valley also reports the unit’s age when the data plate is legible.
Should I drain my water heater for winter?
Only if the home will be vacant or unheated. A water heater in a lived-in, heated home should stay full and running. In a seasonal or vacant home, shut off the water and power or gas, drain the tank, and open the faucets.

Does a Home Inspection Include the Chimney? NEPA Guide
Yes. A home inspection includes the chimney and fireplace, within defined limits. Your inspector checks the readily accessible and visible parts, from the masonry and cap outside to the firebox and damper inside, and reports what needs correction. What a home inspection does not include is the inside of the flue, and in Northeastern Pennsylvania’s coal-era homes, that is where the expensive problems hide.
That limit matters most right now. Fireplace season in NEPA starts in November, and a chimney that sat unused all summer is about to carry heat, smoke, and combustion gases again. This guide covers what inspectors check, what falls outside a home inspection, why older NEPA chimneys carry more risk, the two real dangers, how wood stoves and inserts are handled, and when to order a Level 2 chimney inspection before you close.
What does a home inspector check on a chimney and fireplace?
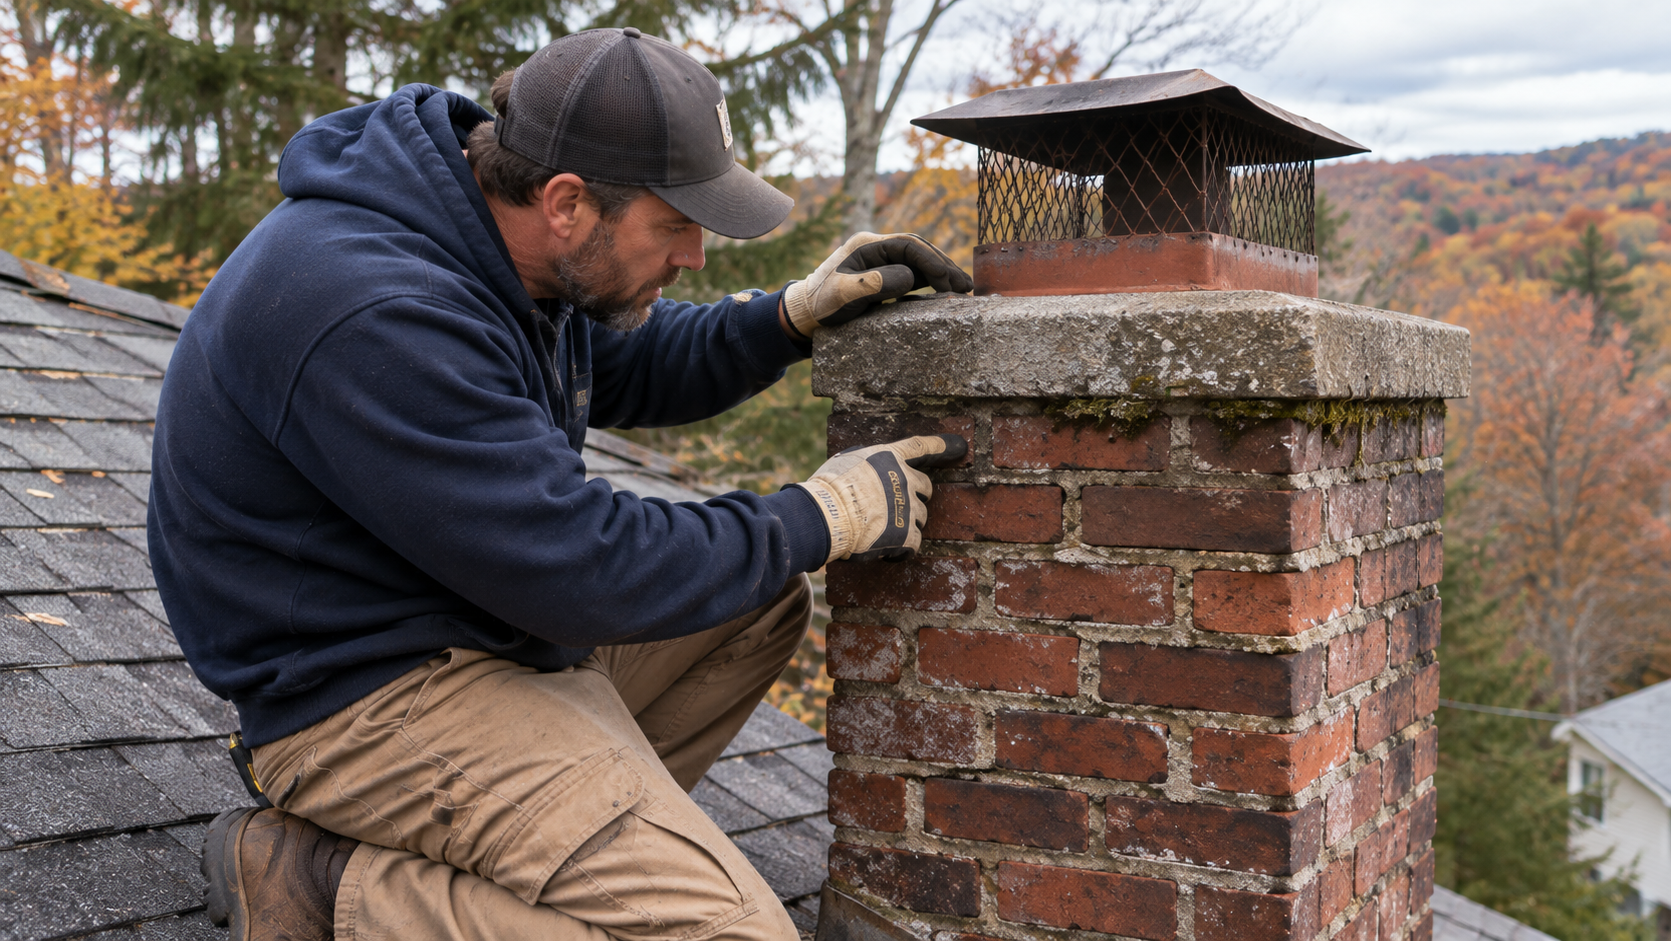
A home inspector checks every part of the chimney and fireplace that can be seen and reached without tools or dismantling. Under the InterNACHI Standards of Practice, the inspector inspects the readily accessible and visible portions of the fireplaces and chimneys, the lintels above the fireplace openings, the damper doors, and the cleanout doors and frames. The chimney is also viewed from outside as part of the roof, along with its flashing. At a NEPA home, that covers the following.
- Exterior masonry. Cracked or spalling brick, missing mortar, leaning, and staining.
- Crown and cap. The concrete crown that sheds water and the cap that keeps rain and animals out.
- Flashing. The metal seal where the chimney meets the roof, which is a common leak point.
- Firebox and hearth. Joint separation, damaged firebrick, and deterioration of the hearth or hearth extension.
- Damper. Opened and closed when it is accessible and manually operable.
- Visible flue opening. Obvious blockage, heavy soot, or missing liner that can be seen from the firebox with a flashlight, without a camera.
- Clearances and alarms. Combustibles too close to the opening, and whether smoke and carbon monoxide alarms are present in the room.
The standards also tell the inspector what to report as needing correction. That list includes joint separation or damage in the hearth and firebox, a damper that will not open and close, and the lack of a smoke detector or carbon monoxide detector in the same room as the fireplace. Each finding goes into the report with photos. On steep or tall roofs, Mountain to Valley uses a drone under FAA certificate #4118345 to photograph the crown, cap, and flashing, the same way we handle a roof inspection during a home inspection.
What does a home inspection not cover on the chimney?
A home inspection does not cover the interior of the flue. The InterNACHI standards state that the inspector is not required to inspect the flue or vent system, inspect the interior of chimneys or flues, determine the need for a chimney sweep, perform a smoke test, or perform an NFPA-style inspection. The reason is practical. Most of a flue is hidden inside the masonry, and seeing it takes a camera and a trained chimney professional.
The NFPA-style inspection the standards refer to comes from NFPA 211, the national standard for chimneys, fireplaces, and vents. It defines three levels of inspection, which the Chimney Safety Institute of America summarizes for homeowners. The table shows how a home inspection compares with each level.
| Inspection | What it covers | When it applies |
| Home inspection | Readily accessible and visible parts of the fireplace and chimney, damper operation, cleanouts, exterior masonry, cap, and flashing. No flue interior. | Every purchase, as part of the full inspection |
| Level 1 chimney inspection | Readily accessible parts of the chimney and its connections. Confirms the chimney is sound and free of obstructions and combustible deposits. | A chimney in continued service under the same conditions |
| Level 2 chimney inspection | Everything in Level 1, plus accessible attics, crawl spaces, and basements, clearances to combustibles, and the flue interior by video scan or other means. | Sale or transfer of a property, a change in fuel or appliance, or after a chimney fire or other damaging event |
| Level 3 chimney inspection | Everything in Levels 1 and 2, plus concealed areas, which can mean removing parts of the chimney or the building. | When a Level 1 or Level 2 points to a hidden hazard |
The two inspections work together. The home inspection tells you the chimney’s visible condition and whether anything points to a deeper problem. The Level 2 puts a camera through the flue and answers the question a home inspection cannot.
Why are older NEPA chimneys higher risk?
Older NEPA chimneys are higher risk because most were built for coal and have been asked to do different jobs since. A chimney that vented a coal furnace in 1925 may now serve an oil boiler, a gas water heater, a wood stove, or nothing at all. Each change affects how the flue performs, and few of those changes came with an inspection.
- Unlined flues. Many coal-era chimneys were built with bare brick and no clay tile or metal liner. Without a liner, heat and gases reach the masonry and the framing around it.
- Coal-to-oil and gas conversions. A flue sized for a coal furnace is often too large for a modern oil or gas appliance. Exhaust cools before it leaves, moisture condenses inside, and the acidic water eats the mortar from within.
- Deteriorated mortar. A century of freeze-thaw cycles opens joints and loosens brick, most visibly above the roofline.
- Abandoned flues. Chimneys left open after a heating upgrade let in water and animals, and an old flue is sometimes reused later without anyone checking it.
Clay flue tile is durable, but it does not last forever. InterNACHI’s life expectancy chart lists chimney flue tile at 40 to 120 years, a metal chimney cap at 10 to 20 years, and a mortar cap at about 15. In a home built before 1940, original tile is at or past that range. That is one reason chimneys sit alongside heating and old electrical wiring on the list of common issues when buying an older home in NEPA. Boroughs with dense pre-war housing, including Forty Fort and West Pittston, show these conditions often.
Why are creosote and carbon monoxide the two real dangers?
Creosote and carbon monoxide are the two real dangers because one starts fires and the other poisons people, and neither is visible from the living room. Creosote is the flammable residue that wood smoke leaves on flue walls. It builds with every fire, and once it ignites, a chimney fire can crack flue tile and spread to the framing.
The fire data are consistent. NFPA’s home heating fire research shows an average of 38,881 home heating equipment fires a year from 2019 through 2023, causing 432 deaths, 1,352 injuries, and $1.1 billion in property damage annually, with fires peaking between December and February. An earlier NFPA analysis of 2012 to 2016 data found that failure to clean equipment was the leading factor in home heating fires and that fireplaces or chimneys were involved in 32 percent of them.
Carbon monoxide is the second danger. The EPA lists leaking chimneys and furnaces, and back-drafting from furnaces, gas water heaters, wood stoves, and fireplaces, among the sources of carbon monoxide in homes. A blocked, oversized, or deteriorated flue lets exhaust spill back into the house instead of rising out of it. The same chimney often vents the heating system, so a flue problem is also a venting problem for the equipment covered in Does a Home Inspection Include the Furnace? That is why the standards have your inspector report a missing smoke or carbon monoxide detector in the fireplace room.
How are wood stoves, pellet stoves, and inserts inspected?
Wood stoves, pellet stoves, and fireplace inserts are inspected visually, with more limits than an open fireplace. The inspector reports the visible condition of the appliance, the hearth protection, the clearances to walls and furniture, and the visible connector pipe. Under the InterNACHI standards, the inspector is not required to move inserts or stoves, operate gas fireplace inserts, light pilot flames, ignite fires, or inspect automatic fuel-fed devices, a category that includes pellet stoves.
Inserts deserve extra attention because they hide the firebox and the flue connection behind a steel surround. An insert vented into an old, oversized masonry flue without a properly sized liner is a common setup in older homes and a known cause of heavy creosote. The only way to confirm how an insert is connected is to pull it or scan the flue, and both jobs belong to a chimney professional. If the stove or insert is a main heat source, ask the seller for the installation paperwork and the date of the last sweep.
When should you order a Level 2 chimney inspection before closing?
Order a Level 2 chimney inspection any time you are buying a home with a chimney you plan to use. NFPA 211 calls for a Level 2 upon the sale or transfer of a property, which makes a purchase the textbook case. The standard is not part of your Agreement of Sale, so nobody orders it for you. It has to be scheduled inside your inspection contingency period, alongside the home inspection.
A Level 2 moves from a good idea to a priority when the home inspection report shows any of the following.
- A home built before 1940, or any chimney with no visible liner.
- A fuel conversion, such as coal to oil, oil to gas, or a wood stove or insert added to an old fireplace.
- Cracked, spalling, or leaning masonry, or a damaged crown.
- Heavy soot or creosote visible in the firebox or at the damper.
- Water stains on the ceiling or walls near the chimney.
- No record of a sweep or inspection from the seller.
If the scan finds damaged tile or a missing liner, get a written estimate from the chimney company before your contingency deadline. A relining estimate attached to a repair request gives you the same footing as any other documented defect. The steps are the ones covered in how to negotiate repairs after a home inspection in PA.
Know the chimney before you light the first fire
A home inspection gives you the chimney’s visible condition, photos of the parts you cannot see from the ground, and a clear statement of what needs a specialist. Mountain to Valley inspects the chimney and fireplace on every home inspection under InterNACHI standards and uses a drone for crowns and caps that are unsafe to reach. If the report points to the flue, you will know in time to bring in a Level 2 before closing.
FAQs
Does a home inspection include the chimney?
Yes. Under InterNACHI standards the inspector inspects the readily accessible and visible portions of the fireplaces and chimneys, the damper, the lintels, and the cleanouts, and views the chimney and flashing from outside. The interior of the flue is not part of a home inspection.
Does a home inspector look inside the flue?
No. The InterNACHI standards state that the inspector is not required to inspect the flue or the interior of chimneys. A Level 2 chimney inspection by a chimney professional scans the flue interior with a camera.
Is a Level 2 chimney inspection required when buying a house in Pennsylvania?
NFPA 211 calls for a Level 2 inspection upon the sale or transfer of a property. It is a national standard, and it is not a step your Agreement of Sale triggers automatically, so the buyer needs to order it during the inspection contingency period.
How often should a chimney be cleaned and inspected?
NFPA recommends that heating systems and chimneys be cleaned and inspected every year by a qualified professional. Schedule it before fireplace season, since home heating fires peak between December and February.
Can I use a fireplace that has not been used in years?
Not until it has been inspected. An unused chimney can hold nests, fallen tile, or a deteriorated liner, and none of that is visible from the firebox. Have a chimney professional perform a Level 2 inspection before the first fire.