
Does a Home Inspection Include the Roof? (NEPA, 2026)
Yes, a home inspection includes the roof, within defined limits. Your inspector evaluates the roof as one of the major systems of the house, but a general inspection is not the same as a roofing contractor’s teardown.
Here is what that means for a buyer in Northeastern Pennsylvania. The inspector reports on the visible, accessible condition of the roof and flags problems that need closer inspection or repair.
Knowing the roof’s condition before you close protects you from one of the most expensive repairs a home can need.
This guide covers what your inspector checks, how NEPA weather shortens roof life, when a drone is used, how long each roof material lasts, and the red flags that signal costly repairs. Updated July 2026.
Does a home inspection include the roof?
Yes. The roof is part of a standard home inspection. Under the InterNACHI Standards of Practice that MTV follows, the roof covering, flashing, and roof drainage are all within scope.
What the inspection is not is a warranty or a guarantee. An inspector documents the roof’s condition on the day of the inspection. Homes in Pennsylvania are not passed or failed. The report gives you the facts so you and your agent can decide how to proceed.
That distinction matters because the roof drives negotiations. A roof near the end of its life is a five-figure future cost, and the inspection is what tells you that before you own it.
What does an inspector check on the roof?
The inspector looks at the parts of the roof that keep water out and the parts that fail first. Each is reported with photos.
- Shingles or roof covering: Missing, cracked, curling, or lifted shingles, and granule loss that signals age.
- Flashing: The metal seals around chimneys, walls, and penetrations are common leak points.
- Valleys: The channels where two roof planes meet and where water concentrates.
- Penetrations: Vents, pipe boots, skylights, and chimneys, where seals crack over time.
- Gutters and drainage: Whether water is carried away from the roofline and foundation.
- Structural signs: Sagging or uneven planes that can point to deeper problems.
The inspector also notes the roof’s apparent age and material, which feed into the lifespan estimate later in this guide.
How does NEPA weather shorten roof life?
Northeastern Pennsylvania subjects roofs to a harsh cycle every year. The same forces that make the region beautiful also wear roofs out faster than a mild climate would.
Three forces do most of the damage. Snow load adds weight that stresses the structure and the shingles. Ice dams form when attic heat melts snow that refreezes at the eaves, forcing water back under the shingles. Freeze-thaw cycles repeatedly expand and contract roofing materials, which loosens seals and lifts shingles.
Together, these pull down the low end of any roof’s expected life. For a deeper look at winter damage and how to spot it, see our guide on how snow and ice damage a NEPA roof.
Walked, drone, or ground: which inspection does your inspector use?
Not every roof can or should be walked. The method depends on the roof’s pitch, height, material, and the weather that day.
- Ground inspection: Used when a roof is too steep, too high, or too fragile to walk safely. The inspector assesses from the ground with optics.
- Walked inspection: Used when the roof is safely accessible. Walking allows a close look at seals and soft spots.
- Drone inspection: Used for steep, tall, wet, or fragile roofs where walking is unsafe. A drone captures close, high-resolution images of every plane.
This is where MTV differs from many inspectors. Mountain to Valley operates under an FAA airman certificate (license #4118345), so a licensed pilot can fly a drone to inspect a roof that others would only view from the ground. That means fewer blind spots on exactly the roofs that are hardest to assess. Learn more about the advantages of drones for home inspections.
How long should your roof last? Lifespan by material
Roof material sets the baseline for how long a roof lasts, and NEPA’s freeze-thaw cycle tends to pull the low end lower. The figures below reflect typical service life published by InterNACHI.
| Roof Material | Typical Service Life (InterNACHI) |
|---|---|
| 3-tab asphalt shingles | About 20 years |
| Architectural asphalt shingles | About 30 years |
| Wood shingles and shakes | About 30 years |
| Metal | About 40 to 80 years |
| Slate | About 60 to 150 years |
| Clay or concrete tile | About 100 years |
Use these as a starting point, not a promise. A 15-year-old asphalt roof in NEPA that has weathered heavy snow and ice may have far less life left than its age suggests. The inspection is what tells you where a specific roof falls on this range.
What are the red flags that signal costly roof repairs?
Some findings are minor. Others point to a repair or replacement you should price before closing. Watch for these on the report.
- Widespread granule loss or bald, brittle shingles.
- Active leaks, or water stains on ceilings, in the attic, or on the sheathing.
- Damaged or missing flashing around chimneys, walls, and valleys.
- Sagging rooflines, which can point to structural or moisture damage.
- Cracked vent boots and failed seals at penetrations.
- Gutters pulling away from the fascia, which often means rot behind them.
For a fuller breakdown of what these defects look like, see our guide on common roof problems and how to spot them.
What does a roof inspection not cover?
A roof inspection has limits, and knowing them keeps your expectations accurate. Under the InterNACHI Standards of Practice, an inspector is not required to walk a roof that is unsafe to access, and does not guarantee the future performance or remaining life of the roof.
The inspection also does not include the interior of flues or chimneys, and it is not a substitute for a roofing contractor or structural engineer when major damage is suspected. If a serious concern is flagged, that is the next step. You can see how the roof fits the full process in the Pennsylvania home inspection checklist for buyers.
Get the roof inspected before you buy
The roof is the most weather-exposed system on the house and one of the most expensive to replace. A home inspection tells you its condition while you can still act on it.
Buying a home in Northeastern Pennsylvania? Mountain to Valley Home Inspections uses drone technology and follows InterNACHI standards to give you a clear read on the roof.
FAQs
Does a home inspection include the roof?
Yes. The roof covering, flashing, and drainage are part of a standard home inspection under InterNACHI standards. The inspector reports the roof’s condition but does not guarantee its future performance.
Will the inspector walk on my roof?
Sometimes. The inspector walks a roof only when it is safe to do so. For steep, tall, or wet roofs, MTV uses a drone or a ground assessment instead.
How long does a roof inspection take?
The roof portion is a small part of the full inspection. The whole home inspection usually runs a few hours depending on the size and condition of the property.
Can a home inspection tell me exactly how many years my roof has left?
No. The inspector estimates remaining life from the material, age, and visible condition, but no one can guarantee an exact number. Material lifespan ranges are a starting point.
Do I need a separate roofer if the inspection finds a problem?
Often, yes. If the report flags a serious defect, a licensed roofing contractor gives a repair scope and cost. The inspection tells you when that step is worth taking.

Do You Need to Test Well Water When Buying a NEPA Home?
Yes. If the home you are buying in Northeastern Pennsylvania runs on a private well, test the water before you close. A standard home inspection does not test what comes out of the tap, and Pennsylvania does not test private wells for you.
Here is why that matters. Penn State Extension reports that about half of the private water systems it has tested fail at least one drinking water standard. Many of those problems have no taste, smell, or color. The only way to find them is a lab test.
This guide covers what a well water test checks, why NEPA wells carry extra risk, when to test, and how to read your results.
Do you need to test well water before buying a home in NEPA?
Yes, and the reason is simple. A private well is not monitored by any government agency. Penn State Extension makes it clear that testing a private supply is the owner’s voluntary responsibility, and no one routinely tests it for you.
Public water is different. A public utility tests its water on a schedule and reports the results. With a private well, that job passes to you the day you take ownership.
Test before you close, not after. A pre-purchase test tells you the true condition of the water while you can still negotiate repairs, treatment, or price. After closing, any problem and its cost become yours.
Why do private wells in NEPA carry extra risk?
Northeastern Pennsylvania combines rural geology, farmland, and a long mining history. Each of those land uses can affect what ends up in a well.
Penn State Extension links common well pollutants to activities on the land surface, including mining, agriculture, and industry. In a former anthracite region like NEPA, past mining is one of the land uses that warrants a closer look at metals and acidity.
Farm runoff adds another risk. Fertilizer and animal waste raise nitrate levels, which are a specific health concern for infants under six months of age.
Age is a factor too. Pennsylvania has no statewide construction standards for private wells, so an older well may have a cracked casing, a failed surface seal, or a missing cap. Any of those lets surface water and bacteria into the supply.
What does a private well water test check?
A good pre-purchase panel checks for health risks and for problems that damage plumbing. At a minimum, test for the following:
- Total coliform bacteria and E. coli: Coliform signals a pathway for contamination. A positive E. coli result points to human or animal waste and is the more serious finding.
- Nitrates: Common near farmland. High levels are dangerous for infants and for pregnant women.
- Lead: Often comes from older plumbing and fixtures rather than the groundwater itself.
- Arsenic: Occurs naturally in some Pennsylvania groundwater. Penn State Extension notes a health standard of 0.01 mg/L and finds elevated arsenic in roughly 2 to 6 percent of the private supplies it studies.
- pH: Low, acidic water corrodes pipes and can leach lead and copper into your water.
- Total dissolved solids and hardness: These affect taste, staining, and the life of your appliances.
If the property sits near a specific land use, add tests for that risk. A gas station, a former industrial site, or heavy agriculture nearby all call for a wider panel.
Standard home inspection vs. well water testing
A home inspection and a water test answer two different questions. One looks at the house and its systems. The other looks at what you drink.
| Feature | Standard Home Inspection | Private Well Water Test |
|---|---|---|
| What it checks | Roof, structure, and visible systems | Bacteria, nitrates, metals, and water chemistry |
| Water quality | Not included | The entire focus |
| Who performs it | A licensed home inspector | A PA DEP accredited laboratory |
| When to do it | During the inspection period | During the inspection period, before closing |
| What it protects | The condition of the property | The health of your household |
A full picture of the property needs both. You can review the systems an inspection does cover in our Pennsylvania home inspection checklist.
When should you test your well water?
Test at the moments when contamination is most likely. Penn State Extension and the Pennsylvania Department of Environmental Protection point to a clear list.
Test your well water when:
- You are buying or moving into the home.
- It has been a year or more since the last bacteria and nitrate test.
- The taste, color, or smell of the water changes.
- The area has flooded, or a nearby septic system has failed.
- You have repaired or replaced part of the well system.
For ongoing ownership, Penn State recommends testing every year for total coliform and E. coli, and every three years for pH and total dissolved solids. The Pennsylvania DEP also recommends testing private well water once a year.
Home test strips vs. certified lab testing
Store-bought strips are convenient, but they cannot do the job that matters here. They give rough readings for a few basics such as pH and hardness.
Strips cannot reliably detect bacteria, nitrates, arsenic, or organic chemicals. Those results determine whether the water is safe to drink.
Use a laboratory accredited by the Pennsylvania DEP. An accredited lab collects or supplies the appropriate containers, uses the correct methods, and provides results you can act on. Professional water testing removes the guesswork before you commit to the home.
How do you read your well water results and what comes next?
Compare each result to its drinking water standard. Primary standards cover health risks such as bacteria, nitrate, lead, and arsenic. Secondary standards cover nuisance issues such as iron, staining, and odor. Private wells are not covered by the EPA, so these standards are a benchmark rather than a rule someone enforces for you.
If bacteria show up, the standard first step is shock chlorination, which is a measured dose of chlorine used to disinfect the well. If bacteria return, the well has a physical problem such as a cracked casing that needs repair, not just more chlorine.
If a chemical result is high, match the treatment to the contaminant. Nitrate, arsenic, and lead each call for a different system, so identify the problem before buying any equipment.
Keep the well and the septic system in mind together. If the home has a private well, it very likely has an on-lot septic system, and the two are connected risks. A septic inspection belongs on the same checklist as a water test.
Test the water before you buy
A private well is a benefit and a responsibility. Testing before you close is a small step that protects your health and your budget for years.
Buying a NEPA home with a private well? Mountain to Valley Home Inspections offers professional water testing across Northeastern Pennsylvania.
FAQs
Does a home inspection include well water testing?
No. A standard home inspection checks the house and its systems, not the quality of the water. Well water testing is a separate service performed through a certified laboratory.
How much does it cost to test well water in Pennsylvania?
Basic bacteria testing is inexpensive, while a wider panel that adds metals and chemistry costs more. The price is small next to the cost of treating a problem you did not know about.
How often should I test a private well?
Penn State Extension recommends testing every year for total coliform and E. coli, and every three years for pH and total dissolved solids. Test right away if the water changes or after a flood.
Can I use a home test kit instead of a lab?
Home kits are fine for quick spot checks, but they cannot reliably detect bacteria, nitrates, or arsenic. For results you can rely on, use a PA DEP accredited laboratory.
The water looks and tastes fine. Do I still need a test?
Yes. Many of the most serious contaminants, including bacteria, nitrates, and arsenic, have no taste, smell, or color. A lab test is the only way to find them.

Do I Need a Radon Inspection On a New Home in NEPA?
You should absolutely get a radon inspection when buying or selling a home, as Northeast Pennsylvania is home to some of the highest radon concentrations in the nation.
After smoking, radon is the second leading cause of lung cancer in the United States.
Radon is an invisible, odorless, radioactive gas that naturally occurs in soil and can seep into properties through cracks in the foundation, posing severe long-term health risks if left unaddressed.
According to the Pennsylvania Department of Environmental Protection, 40% of homes in Pennsylvania have radon levels above the EPA-recommended level of 4.0 pCi/L. According to one chart, all counties in Northeast Pennsylvania sit in the highest-potential radon exposure zone.
Radon testing is not included in traditional property evaluations and requires a specialized professional test, costing around $420 on average.
While DIY radon tests are available online, radon levels fluctuate throughout the home, often giving inaccurate readings. Professional tests include longer-term monitoring to provide an accurate assessment of radon levels in your home.
In this article, we will break down how professional radon testing works, why radon is an important health concern in the commonwealth, and why to avoid DIY kits.
Why Is Radon Exposure Dangerous?
Radon is a silent gas found in all soil and rock. The end product of radioactive decay, radon can destroy lung tissue when inhaled in large quantities.
Radon gas itself is chemically inert, meaning it does not readily react with other elements. However, it is highly unstable and radioactive.
As radon decays in the indoor air, it breaks down into solid radioactive particles known as radon progeny or “radon daughters” (including polonium-218 and polonium-214).
These microscopic heavy metal particles attach themselves to ambient dust, smoke, and moisture droplets, which are easily inhaled deep into the respiratory tract. Once trapped in the lungs, these particles continue to decay rapidly, releasing a specific type of ionizing radiation known as alpha particles.
Symptoms of radon often don’t manifest until lung cancer has progressed to later stages, making early testing essential for mitigating long-term effects.
Due to its unstable nature, radon can differ in quantity among homes on the same street block or neighborhood.
How Common Is Radon in Northeast Pennsylvania?
Pennsylvania is widely recognized by environmental agencies as one of the most severe radon hot spots in the United States. According to the Pennsylvania Department of Environmental Protection (DEP), roughly 40% of homes tested across the Commonwealth have radon concentrations exceeding the EPA’s action level of 4.0 pCi/L.
The vast majority of NEPA counties are classified by the EPA as Zone 1, indicating the highest statistical potential for severe, elevated indoor radon levels.
| County | EPA Risk Zone | Average Tested Indoor Radon Level | Regional Risk Context |
| Wyoming County | Zone 1 (Highest Risk) | 20.0 pCi/L | 5 times the EPA action limit; tied for the highest county average in PA. |
| Susquehanna County | Zone 1 (Highest Risk) | 16.0 pCi/L | 4 times the EPA action limit; heavy concentrations across rural and residential areas. |
| Lackawanna County | Zone 1 (Highest Risk) | 12.0 pCi/L | 3 times the EPA action limit; extreme risk throughout Scranton and surrounding valley municipalities. |
| Monroe County | Zone 1 (Highest Risk) | 8.5 pCi/L | More than double the safe threshold; highly prevalent in the Poconos region. |
| Luzerne County | Zone 1 (Highest Risk) | 6.8 pCi/L | Significantly elevated above safe levels; highly volatile footprint across Wilkes-Barre and Hazleton. |
| Wayne County | Zone 2 (Moderate Risk) | 6.0 pCi/L | Still exceeds the EPA action level despite a lower macro-zone classification. |
According to the PA Radon Hub, testing in Easton reveals radon levels averaging around 8.52 pCi/L, and in Bethlehem, 6.44 pCi/L.
The extreme prevalence of radon gas in Northeast Pennsylvania is entirely driven by the region’s unique subsurface geology. The bedrock throughout the region contains vast formations of granite, dark shale, and uranium-bearing crystalline structures.
As the naturally occurring uranium in this rock decays over millions of years, it breaks down into radium, which further degrades into radon gas.
Since radon is a gas, it migrates upward through porous soil, easily entering residential properties through foundation cracks, sump pumps, and construction joints.
How Does Radon Testing Work?
Radon testing determines the level of radon gas in your home by the amount of picocuries per liter (pCi/L). According to EPA standards, anything above 4 pCi/L is considered dangerous.
Radon testing can be administered either by a professional certified by the National Radon Proficiency Program (NRPP) and the National Radon Safety Board (NRSB) or by an at-home kit provided by your state agency.
There are generally two types of radon tests that can be administered for short-term or long-term readings:
- Passive Testing: A charcoal canister is sent to a lab to determine the amount of radon exposure.
- Active Testing: An electronic device collects radon readings over a long period of time (90 days or more) to determine the amount of exposure.
If unsafe levels of radon are found in the home, an active test will be employed for further observation.
Is Radon Testing Included in My Home Inspection?
A standard home inspection does not include radon testing.
In Pennsylvania, for example, individuals administering radon tests for a real estate transaction must be specifically certified by the Department of Environmental Protection (DEP).
A standard home inspection license does not legally authorize an inspector to conduct official radon testing or interpret the results for a real estate contingency.
Be sure to look for proper credentials when hiring a radon inspector in Northeast Pennsylvania.
Should I Trust DIY Radon Testing Kits?
The single biggest flaw of a DIY radon test kit is its reliance on the person setting it up.
To get an accurate reading, strict “closed-house conditions” must be maintained for 12 hours before the test begins and throughout the testing period (usually 48 hours to a week). This means keeping all windows closed and limiting the opening of exterior doors to brief, necessary entries and exits.
Certified radon inspectors do not use charcoal canisters or liquid scintillation vials found in hardware store retail kits. Instead, they utilize advanced, calibrated Continuous Radon Monitors (CRMs).
These specialized electronic devices offer distinct advantages that a DIY kit simply cannot replicate:
- Hourly Data Tracking: Rather than providing a single, ambiguous average at the end of the week, a CRM records radon levels, temperature, relative humidity, and barometric pressure every single hour. This detailed data mapping allows professionals to spot unusual spikes or anomalies.
- Anti-Tamper Technology: Professional CRMs are equipped with internal motion sensors and data loggers. If someone moves the device, opens a window (causing a sudden drop in temperature or a spike in barometric pressure), or tries to interfere with the environment, the report will flag the exact hour and nature of the disruption. This legally protects the integrity of the test results for both buyers and lenders.
- Rapid, Certified Results: Real estate contracts have tight inspection windows, often requiring all testing to be completed within 10 to 14 days of signing. With a DIY kit, you have to mail the device to a third-party laboratory and wait days for processing. A professional inspector can download the CRM data immediately upon concluding the 48-hour test, delivering a certified, comprehensive report on the spot.
Ultimately, while a DIY kit might save a few dollars upfront, the financial and physical risks of a false negative are far too high. Investing in a professional radon inspection ensures that your data is legally admissible, completely accurate, and safe from human error or interference.
FAQs
What is radon?
Radon is a naturally occurring, radioactive gas that is produced by the breakdown of uranium in soil, rock, and water. It is invisible, odorless, and tasteless, making it undetectable without specialized testing. Radon can enter homes through cracks and gaps in the foundation and accumulate to dangerous levels.
Why is radon dangerous?
Radon is the second leading cause of lung cancer in the United States, responsible for approximately 21,000 lung cancer deaths annually. When inhaled, radon gas releases radioactive particles that can damage lung tissue over time, increasing the risk of lung cancer. The risk is especially high for smokers exposed to elevated radon levels.
How does radon enter my home?
Radon enters homes through cracks and openings in the foundation, walls, floors, and around pipes. It can also be released from well water. Because it comes from the ground, radon is often found in higher concentrations in basements or lower levels of a home, but it can be present at any level.
How can I tell if my home has high radon levels?
Radon is completely invisible, odorless, and tasteless, meaning there are absolutely no physical warning signs. The only definitive way to know if your home has high radon levels is to perform a dedicated radon test using either a professional continuous radon monitor or a certified testing kit.
What is a “safe” level of radon?
Biologically speaking, there is no entirely safe level of radon exposure, as any amount of radiation carries a minor risk of cellular mutation. However, the EPA has established an action level of 4.0 pCi/L (picocuries per liter of air).
If a home tests at or above 4.0 pCi/L, the EPA strongly recommends installing a radon mitigation system. Even if your results fall between 2.0 pCi/L and 4.0 pCi/L, you should still consider mitigation to lower the risk further.
If a home has high radon, can it be fixed?
Yes, absolutely. High radon levels are a very common issue, and they can be reliably fixed by installing a radon mitigation system.
The most common method is a sub-slab depressurization system, which uses a dedicated vent pipe and an inline fan to draw radon gas out from beneath your foundation and safely vent it to the air above your roofline, preventing it from entering your living spaces.
Who pays for radon mitigation during a home sale?
In a typical real estate transaction, the cost of installing a radon mitigation system is entirely negotiable between the buyer and the seller. However, if a professional test reveals levels at or above 4.0 pCi/L, it is customary for the buyer to request that the seller cover the costs of remediation before closing.
A seller will usually either hire a certified mitigation contractor to install the system prior to the final walkthrough or provide a financial credit to the buyer at closing to cover the expense.
7 Reasons Home Buyers Should Get a Mold Inspection in NEPA
A mold inspection is necessary when buying a home in Northeast Pennsylvania because traditional home inspections do not cover comprehensive mold evaluations.
While standard home inspectors check for visible structural issues, they are not equipped to detect hidden fungal growth, toxic spores, or dormant moisture pockets trapped behind walls.
Given that the National Institute for Occupational Safety and Health (NIOSH) estimates that mold is present in up to 47% of U.S. residential homes, investing in a specialized mold assessment is essential to protecting your health and avoiding thousands of dollars in unexpected remediation costs.
While you may not think of mold exposure too much in the cold climate of Northeast PA, the high humidity of summer, combined with the poor ventilation that many older homes, unfortunately, provide, can make any home the perfect breeding ground for mold.
Discover seven essential reasons why a dedicated mold inspection is a must for every homebuyer. You will learn the critical differences between mold inspection and testing, along with actionable strategies for using these findings to negotiate a better deal before closing.
What Is a Mold Inspection?
A mold inspection is a thorough examination of a property designed to detect three important things:
- The presence and extent of mold exposure in the home.
- The species of mold and its threat level to human health.
- Potential sources of moisture or water damage that is accelerating the proliferation of mold growth.
During an inspection, our team of trained technicians will look at common areas where mold tends to be present, such as:
- Attics
- Basements
- Bathrooms
- HVAC Systems
What most of these areas have in common is close proximity to moisture and, typically, poor ventilation.
Once we uncover mold in your home, it will be sent out for testing to determine its severity.
Mold Inspection vs. Testing
A mold inspection identifies the physical presence and the source of moisture that causes mold, while mold testing determines the specific type and concentration of mold spores in the air or on a surface.
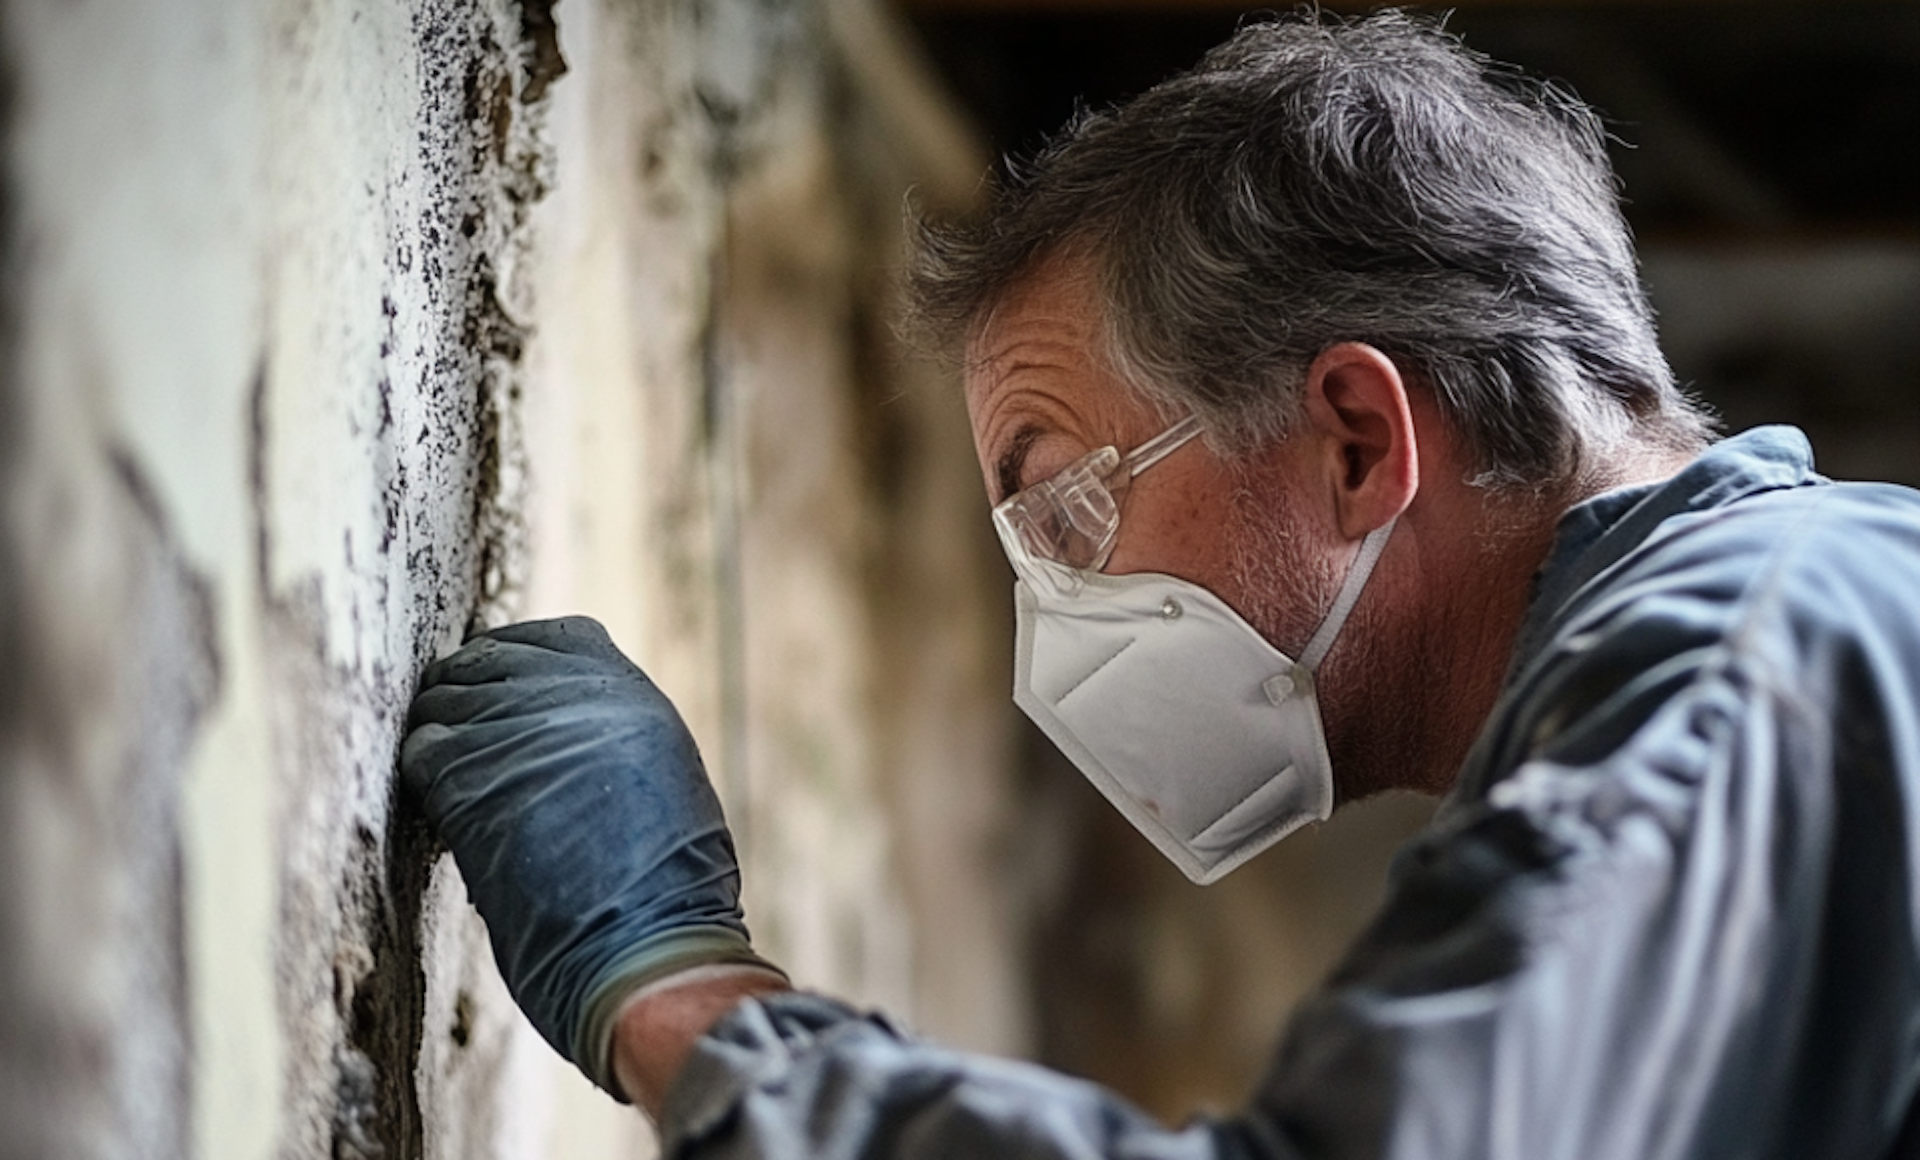
A professional mold inspection is a visual and physical assessment of a property to locate hidden dampness, water damage, and visible fungal growth in high-risk areas like attics, basements, and crawlspaces.
Conversely, mold testing involves collecting physical samples (such as air cassettes, tape lifts, or swab samples) and sending them to a laboratory to assess whether mold levels are abnormally high or dangerous.
| Mold Inspection | Mold Testing | |
| Primary Goal | Find where the mold is growing and what is causing it. | Identify the specific mold species and spore concentration levels. |
| Method | Visual assessment, moisture meters, and thermal imaging. | Air sampling, surface swabs, and laboratory analysis. |
| When Needed | Before buying a home, after a leak, or if you smell a musty odor. | To prove a problem exists for legal/insurance reasons, or post-remediation. |
| Outcome | A roadmap for fixing the underlying moisture issue. | A laboratory report detailing the exact fungal strains present. |
Are Mold Inspections Included in Home Inspections?
No, mold inspections are generally not included in a standard home inspection.
A typical home inspection is a non-invasive, visual evaluation of a property’s overall structure and major systems, such as the roof, plumbing, electrical, and HVAC.
While a standard home inspector will note visible mold or apparent water damage if they encounter it, they are not qualified, equipped, or contractually required to look for hidden mold, perform specialized moisture testing, or collect air and surface samples.
Is a Mold Inspection Necessary in NEPA?
A mold inspection is highly necessary in Northeast Pennsylvania (NEPA) due to the region’s humid continental climate, aging housing stock, and frequent seasonal flooding.
While mold is a risk anywhere, NEPA’s unique environmental and architectural factors create a perfect breeding ground for indoor fungal growth.
- Humid Summers and Heavy Snow: NEPA experiences intense seasonal shifts. Muggy summer months keep indoor humidity elevated, while winter snowmelt can overload gutters and cause water to seep into attics or ice-damaged roof eaves.
- Aging Infrastructure: Many communities in NEPA feature homes built over half a century ago. These older properties often have outdated stone foundations, aging roofs, and degraded basement waterproofing that easily lets in moisture.
- Coal Region Terrain: Local landscape features, such as high water tables and homes built directly into hillsides, often create hydrostatic pressure. This forces groundwater straight through porous concrete and block foundations into basements and crawlspaces.
- History of Flooding: Properties situated near the Susquehanna River lie in a floodplain, which can leave dormant mold spores behind walls if previous remediation wasn’t handled meticulously.
Given these localized risks, relying on a standard home inspection isn’t enough to guarantee a dry environment. Investing in a specialized mold inspection in NEPA is the best way to uncover hidden moisture problems, safeguard your respiratory health, and prevent costly structural remediation down the road.
7 Reasons Every Home Buyer Should Get a Mold Inspection
Every home buyer should get a specialized mold inspection to uncover hidden biological hazards, protect their health, and avoid unexpected, costly remediation bills after closing.
While buying a house is an exciting milestone, failing to inspect for mold can trap you in a home with structural damage and poor air quality. Relying solely on a general property assessment leaves a massive blind spot in your due diligence.
Here are the seven critical reasons why a dedicated mold inspection is a non-negotiable step for home buyers:
1. Past Water Damage May Be Deliberately (or Accidentally) Masked
When a house is put on the market—especially a recently renovated or flipped home—sellers can easily hide severe, active mold infestations behind a fresh coat of paint.
Sellers are legally required to disclose known defects, but they may genuinely be unaware of a slow leak inside a wall cavity, or they may have simply painted over a water stain without properly treating the underlying fungal growth.
A specialized mold inspection uses advanced diagnostic tools to look past fresh cosmetic cover-ups, ensuring you don’t inherit a masked environmental hazard that surfaces months after closing.
2. Protects Your Health
Indoor mold exposure is a major health hazard that significantly compromises indoor air quality. Inhaling or touching mold spores can trigger a variety of health issues, including:
- Chronic allergy-like symptoms (sneezing, coughing, watery eyes)
- Severe asthma attacks
- Persistent headaches and fatigue
- Unexplained skin rashes
For children, the elderly, or individuals with weakened immune systems, long-term exposure can cause debilitating respiratory issues.
A professional inspection can identify dangerous, toxic strains, such as Stachybotrys chartarum (commonly known as toxic black mold), before you move your family inside.
A mold inspection and testing can identify toxic species of mold, such as Stachybotrys (also known as black mold, to determine if remediation is required.
3. Uncovers Potential Water Damage
Mold is a major red flag for potential water damage in your home.
Mold requires moisture to proliferate, so the presence of mold may indicate a possible leak or poor ventilation that prevents excess humidity from leaving the home.
4. Mold Can Weaken Structural Integrity
Water damage can warp wooden structures and cause cracks in concrete, weakening the structural integrity of your home. But did you know that mold can also damage surfaces and degrade their integrity?
Mold feeds on organic materials like cellulose, so significant mold exposure behind drywall or floorboards can weaken these structures over time.
5. Mold Cleanup Can Be Expensive
According to Architectural Digest, homeowners can expect to pay around $2,230 for mold remediation. When factoring in other closing costs, furnishing your home, and possibly paying for other repairs, this is an expense that most home buyers simply can’t afford.
6. Buyers Can Negotiate a Better Deal
Discovering mold before you sign the final paperwork gives you significant leverage at the negotiating table.
Armed with an official mold inspection report, you can request that the current seller cover the full cost of professional remediation before closing, or ask for a price reduction so you can manage the cleanup yourself with your preferred contractor.
Performing a mold inspection, along with other important inspections, such as radon or water quality, can help buyers avoid expensive repairs and protect their investment.
7. Provides Helpful Advice for Future Mold Prevention
Our team of trained inspectors provides our clients with comprehensive advice on remediation and prevention so that they can avoid mold growth in their new homes.
Performing a separate mold inspection may not be something you budgeted for, but it can help you save money, protect your investment, and preserve your health.
FAQs
What does a mold inspection involve?
A mold inspection involves a visual assessment of the property, moisture readings, and sometimes air or surface sampling to detect the presence of mold spores. Inspectors will check common areas where mold grows, such as basements, attics, bathrooms, and HVAC systems.
How much does a mold inspection cost?
The cost of a mold inspection typically ranges from $300 to $1,000, depending on the size of the home and the extent of the inspection. While this may seem like an added expense, it is minimal compared to the potential costs of mold remediation.
Can I perform a mold inspection myself?
While you can check for visible signs of mold and moisture, a professional mold inspection is recommended. Professionals have the tools and expertise to detect hidden mold and assess potential risks that you may not notice.
How long does a mold inspection take?
A professional mold inspection typically takes between 1 and 3 hours to complete. The exact duration depends heavily on the property’s square footage, the accessibility of areas such as crawlspaces and attics, and whether the inspector needs to collect physical air or surface samples.
Once the physical assessment is complete, laboratory processing for any collected samples usually takes an additional 2 to 5 business days before a final, detailed report can be delivered.
Can you sell a house with mold in Pennsylvania?
Yes, you can legally sell a house with mold in Pennsylvania, provided that the mold is fully and accurately disclosed to potential buyers.
According to Pennsylvania’s Real Estate Seller Disclosure Law, sellers must disclose any known environmental hazards, material defects, or past water infiltration issues on the standard seller disclosure form. Failing to disclose known mold problems can lead to severe legal liabilities and lawsuits for fraud or misrepresentation after closing.
Does a musty smell always mean there is mold?
Yes, a persistent musty smell almost always indicates the active growth of mold or mildew fueled by hidden moisture. The characteristic “musty” odor is caused by Microbial Volatile Organic Compounds (mVOCs), gases released by fungi as they grow and reproduce.
Even if there is no visible staining on your walls or ceilings, a strong musty scent is a primary warning sign that mold is actively thriving out of sight within wall cavities, under floors, or inside HVAC ductwork.
Is mold covered by home insurance?
Home insurance only covers mold remediation if the fungal growth was caused by a sudden and accidental peril that is already covered by your policy. For example, if a water pipe suddenly bursts and causes a mold outbreak before it can be dried, your homeowner’s insurance will likely cover the cleanup costs.
However, insurance policies strictly exclude mold coverage if the growth is the result of long-term neglect, poor ventilation, lack of maintenance, or regional surface flooding (which requires separate flood insurance).
[/vc_column_text]

Does the Buyer or Seller Pay for the Home Inspection?
In Northeastern Pennsylvania (NEPA), the buyer almost always pays for the home inspection. Since the inspection is designed to protect the buyer’s investment and reveal any hidden structural, mechanical, or safety issues before closing, it is considered a standard buyer’s expense.
While a buyer typically covers the upfront cost, there are a few common real estate exceptions in the NEPA market:
- Seller Concessions: In a buyer’s market, a buyer may negotiate to have the seller credit the inspection costs back to them as part of the final closing concessions.
- Pre-Listing Inspections: Some sellers choose to pay for their own inspection before putting their home on the market to catch problems early and streamline the selling process.
- Specialty Testing: While buyers pay for standard home inspections, additional tests, such as advanced radon testing, septic evaluations, or specific pest inspections, can occasionally become negotiation points depending on the property’s location and loan requirements.
Understanding who covers these upfront fees is just the first step in navigating the local real estate market.
In this article, we will break down exactly how much you can expect to pay for a home inspection in NEPA, who is responsible for the repairs found during the process, and how you can use your inspection report as a powerful tool at the negotiating table.
Does the Buyer or Seller Pay for the Home Inspection?
In most real estate transactions, the buyer pays for the home inspection because the inspection is performed to protect the buyer’s interests before closing.
According to Ruby Home, 88% of buyers nationwide conduct a home inspection, and 86% of those inspections reveal problems requiring repairs.
The buyer chooses the inspection company, schedules the inspection, and uses the findings to evaluate the property’s condition before moving forward with the purchase.
In some situations, sellers may choose to pay for a pre-listing inspection before putting the property on the market. This allows the seller to identify problems early, make repairs in advance, and reduce the risk of delays during escrow.
Pre-listing inspections are common in competitive markets where sellers want to streamline the transaction process.
Who pays for the inspection ultimately depends on the terms negotiated in the purchase agreement, but the buyer is responsible for the majority of residential home sales.
How Much Does a Home Inspection Cost?
The average home inspection costs $342 nationwide and between $200 and $500 in Pennsylvania. However, total upfront costs will vary depending on the property’s specific characteristics, including.
- Property Size: Larger properties with more square footage take longer to thoroughly evaluate, increasing the inspector’s fee.
- Age of the Home: Older houses often feature complex, outdated, or historical structural and mechanical systems that require a more intensive review.
- Geographic Location: Local market rates and the distance an inspector has to travel to the property can impact pricing.
- Condition and Complexity: Properties with visible degradation, complex layouts, or detached structures may require additional time on-site.
Unlike a real estate deposit, home inspection fees are non-refundable.
You are paying for the inspector’s time and professional evaluation, meaning the fee cannot be recovered if you are unsatisfied with the findings or choose to walk away from the property.
Who’s Responsible for Home Inspection Repairs?
In most cases, the seller will be responsible for performing any repairs on a home to complete the transaction.
In Pennsylvania, home inspectors are forbidden from providing specific quotes on home repairs, and these prices are to be negotiated by the seller and the third-party providing them.
When Does the Home Inspection Take Place?
A home inspection typically takes place within 5 to 10 days after a purchase agreement is signed and the home goes under contract.
Real estate contracts include a strict inspection contingency period, meaning the buyer must quickly schedule and complete the evaluation to ensure they can negotiate repairs or back out of the deal if major defects are found.
While the standard timeline hinges on the binding contract, the exact timing depends on who initiates the inspection:
Buyer’s Inspections
In a traditional real estate transaction, the buyer requests a home inspection shortly after the seller accepts the buyer’s offer.
The home inspection enables the buyer to uncover any issues that may affect the home’s final price and use this information to negotiate a better rate.
Most importantly, the home inspection ensures the buyer that any investment they make will not be burdened by unexpected repairs that could harm them financially after the sale of the home.
Benefits of Buyer’s Inspections
- Protects buyers from repairs that can be made before the completion of the sale.
- Gives buyers peace of mind that they will not be saddled with repairs they cannot afford.
- Allows buyers to negotiate a lower price if there are issues uncovered.
- Provides buyers with an unbiased view of the home, even if the seller has performed their own inspection.
Pre-Listing Inspections
In recent years, many sellers have opted to perform pre-listing inspections in order to market their homes to buyers and avoid any costly repairs that could derail the closing process.
This is typically performed before listing the home to avoid costly delays that may inhibit the seller’s ability to move forward with their own separate home purchase.
Benefits of Pre-Listing Inspections
- Expedite the sale of home to buyers who may choose to forgo an inspection if one has already been provided.
- Make the home more attractive to buyers, which could end up raising the final sales price.
- Avoid costly delays that may threaten the sale of the home and also inhibit the seller’s ability to move forward with any separate transactions that depend on this one.
Do Sellers Typically Get a Copy of the Inspection?
In most cases, the seller will not be provided with a copy of the inspection report if the buyer pays for it.
The seller will be notified of any repairs or issues that the buyer finds unsatisfactory. This is why we urge sellers to perform a pre-listing inspection so they can get their own copy to compare against anything that may come up on the buyer’s inspection and use during negotiation.
If the seller and buyer share the inspection cost as part of closing, the seller will be provided with a copy.
How to Use a Home Inspection Report to Your Advantage
Buyers can leverage the findings of a home inspection as a strategic negotiating tool to request price reductions, seller repair credits, or direct fixes before closing.
Rather than viewing the report as a simple pass-or-fail document, buyers and sellers should use findings to finalize fair property values and protect their financial investments.
Here is how both parties can strategically utilize the inspection report:
- Secure Cold, Hard Cash (Price Reductions): If major defects such as a failing roof or outdated wiring are uncovered, buyers can negotiate a lower purchase price, keeping more cash in their pockets to handle post-closing renovations.
- Request Repair Credits (Concessions): Instead of making the seller fix the issues, buyers can ask for closing cost credits. This allows the buyer to control the quality of the work by hiring their own contractors later.
- Demand Direct Fixes: For critical safety hazards, such as structural issues or severe plumbing leaks, buyers can submit a formal repair amendment requiring the seller to complete and pay for the repairs using licensed professionals before the final walkthrough.
- Walk Away Safely: If the inspection reveals catastrophic or budget-breaking issues, a properly written inspection contingency allows the buyer to cancel the contract entirely and recoup their earnest money deposit without penalty.
In negotiation, knowledge is power; therefore, we recommend that both buyers and sellers conduct their own home inspections. While it may seem redundant, it empowers both parties during negotiations, and a pre-listing inspection can expedite the sale of the home by allowing the seller to address any repairs before the closing process.
Most importantly, it will provide both parties with greater peace of mind.
If you need a thorough and honest home inspection in NEPA, trust only the best. Trust an InterNACHI-certified home inspection from Mountain to Valley Home Inspections. Contact us today for your free quote!
FAQs
Is a home inspection required by law in Pennsylvania?
No, home inspections are not legally mandated by the state of Pennsylvania. However, they are highly recommended and are standard additions to real estate purchase agreements as an optional contingency clause to protect the buyer’s financial interests.
Can a buyer cancel a home purchase after an inspection in PA?
Yes. If your real estate contract includes an explicit inspection contingency, you can legally back out of the deal without losing your earnest money deposit. This clause allows buyers to walk away safely if the inspector uncovers severe or budget-breaking defects that the seller refuses to fix.
Are mold and radon testing included in a standard home inspection?
No, traditional home inspections in NEPA do not include comprehensive evaluations for mold or radon gas. While a general inspector will note visible water damage or obvious fungal growth, advanced testing, such as air sampling, surface swabbing, and continuous radon monitoring, must be ordered separately as specialized add-on services.
How long does a typical property evaluation take?
For an average-sized single-family home, a thorough inspection takes a few hours to complete on-site. The exact timeframe depends heavily on the overall square footage, the age of the property, the complexity of its mechanical systems, and how easily the inspector can access areas like the attic or crawl space.
Should the buyer attend the home inspection?
Yes, it is highly recommended that buyers attend the inspection, typically toward the end of the walkthrough. Being present allows you to see the noted defects in real time, understand the true severity of the issues, and ask the inspector direct maintenance questions that a written report cannot fully convey.
Do sellers have to repair every issue found in the report?
No, sellers are under no legal obligation to fix every defect uncovered during the inspection. The inspection report simply serves as a fresh negotiation tool; while sellers often agree to repair major safety hazards or structural code violations to keep the deal alive, smaller cosmetic issues are usually left to the buyer.
What happens if an inspector cannot access certain parts of the home?
If an area is blocked by heavy storage, furniture, locked doors, or loose pets, the inspector will mark that specific section as uninspected in the final report. To resolve this, the buyer must typically request a re-inspection after the seller clears the obstruction, which can add extra time to the closing timeline and incur an additional fee.
What Is a Septic Inspection? Here’s Why You Need One
A septic tank inspection is a professional evaluation of an underground wastewater treatment system to ensure its structural integrity, proper functional flow, and safety.
In Northeast Pennsylvania (NEPA), a standard septic inspection typically costs between $200 and $900, with an average of $550, depending on the size of the tank and whether locating or uncovering the access lids requires extra labor.
Around 26% of Pennsylvania homes have septic tank systems, with the majority of septic tanks found in rural areas and older homes, such as those in Berwick, Danville, and Mount Pocono.
On average, septic tanks last 20-40 years, depending on maintenance and other environmental factors.
Frequent septic tank inspections every 5 to 10 years can extend your septic tank’s lifespan and help protect you from potential leaks and backflows that could contaminate your well water.
If you’re purchasing a home in Northeast Pennsylvania, it’s essential to conduct a septic tank inspection to protect you from future repairs, as these are not included in standard home inspections.
This guide will discuss the importance of septic tank inspections and what to look for in a septic tank inspector.
How Do Septic Tanks Work?
Septic systems separate effluent (liquid waste) from wastewater and discharge solid matter into a drain field, where it is reabsorbed into the soil.
Each septic tank consists of a large concrete or polyethylene basin that holds wastewater and pumps that divert and discharge effluent to its intended location.
Septic tanks are common in areas without municipal sewage systems and are considered environmentally sustainable when properly maintained.
Unfortunately, these basins can crack or fracture over time due to environmental conditions and soil compaction. Pumps can also become clogged or dirty as they wear out from normal use.
Homeowners who don’t clean their pumps and filters or get routine inspections of their septic systems could leave them vulnerable to damage that could become costly or to backflows that cause sewage to seep out of the system.
What Is a Septic Tank Inspection?
A septic inspection evaluates the condition of your septic tank sewage system. An inspector will examine key elements of the tank, including the basin, drain field, and piping, to ensure they are free from blockages, leaks, or other potential problems.
There are typically two levels of septic inspections you should be aware of:
- Visual Inspections: These are often part of routine maintenance checks or a general home inspection. They involve a simple examination of the tank’s surface conditions to look for signs of leakage and ask questions about the system’s performance.
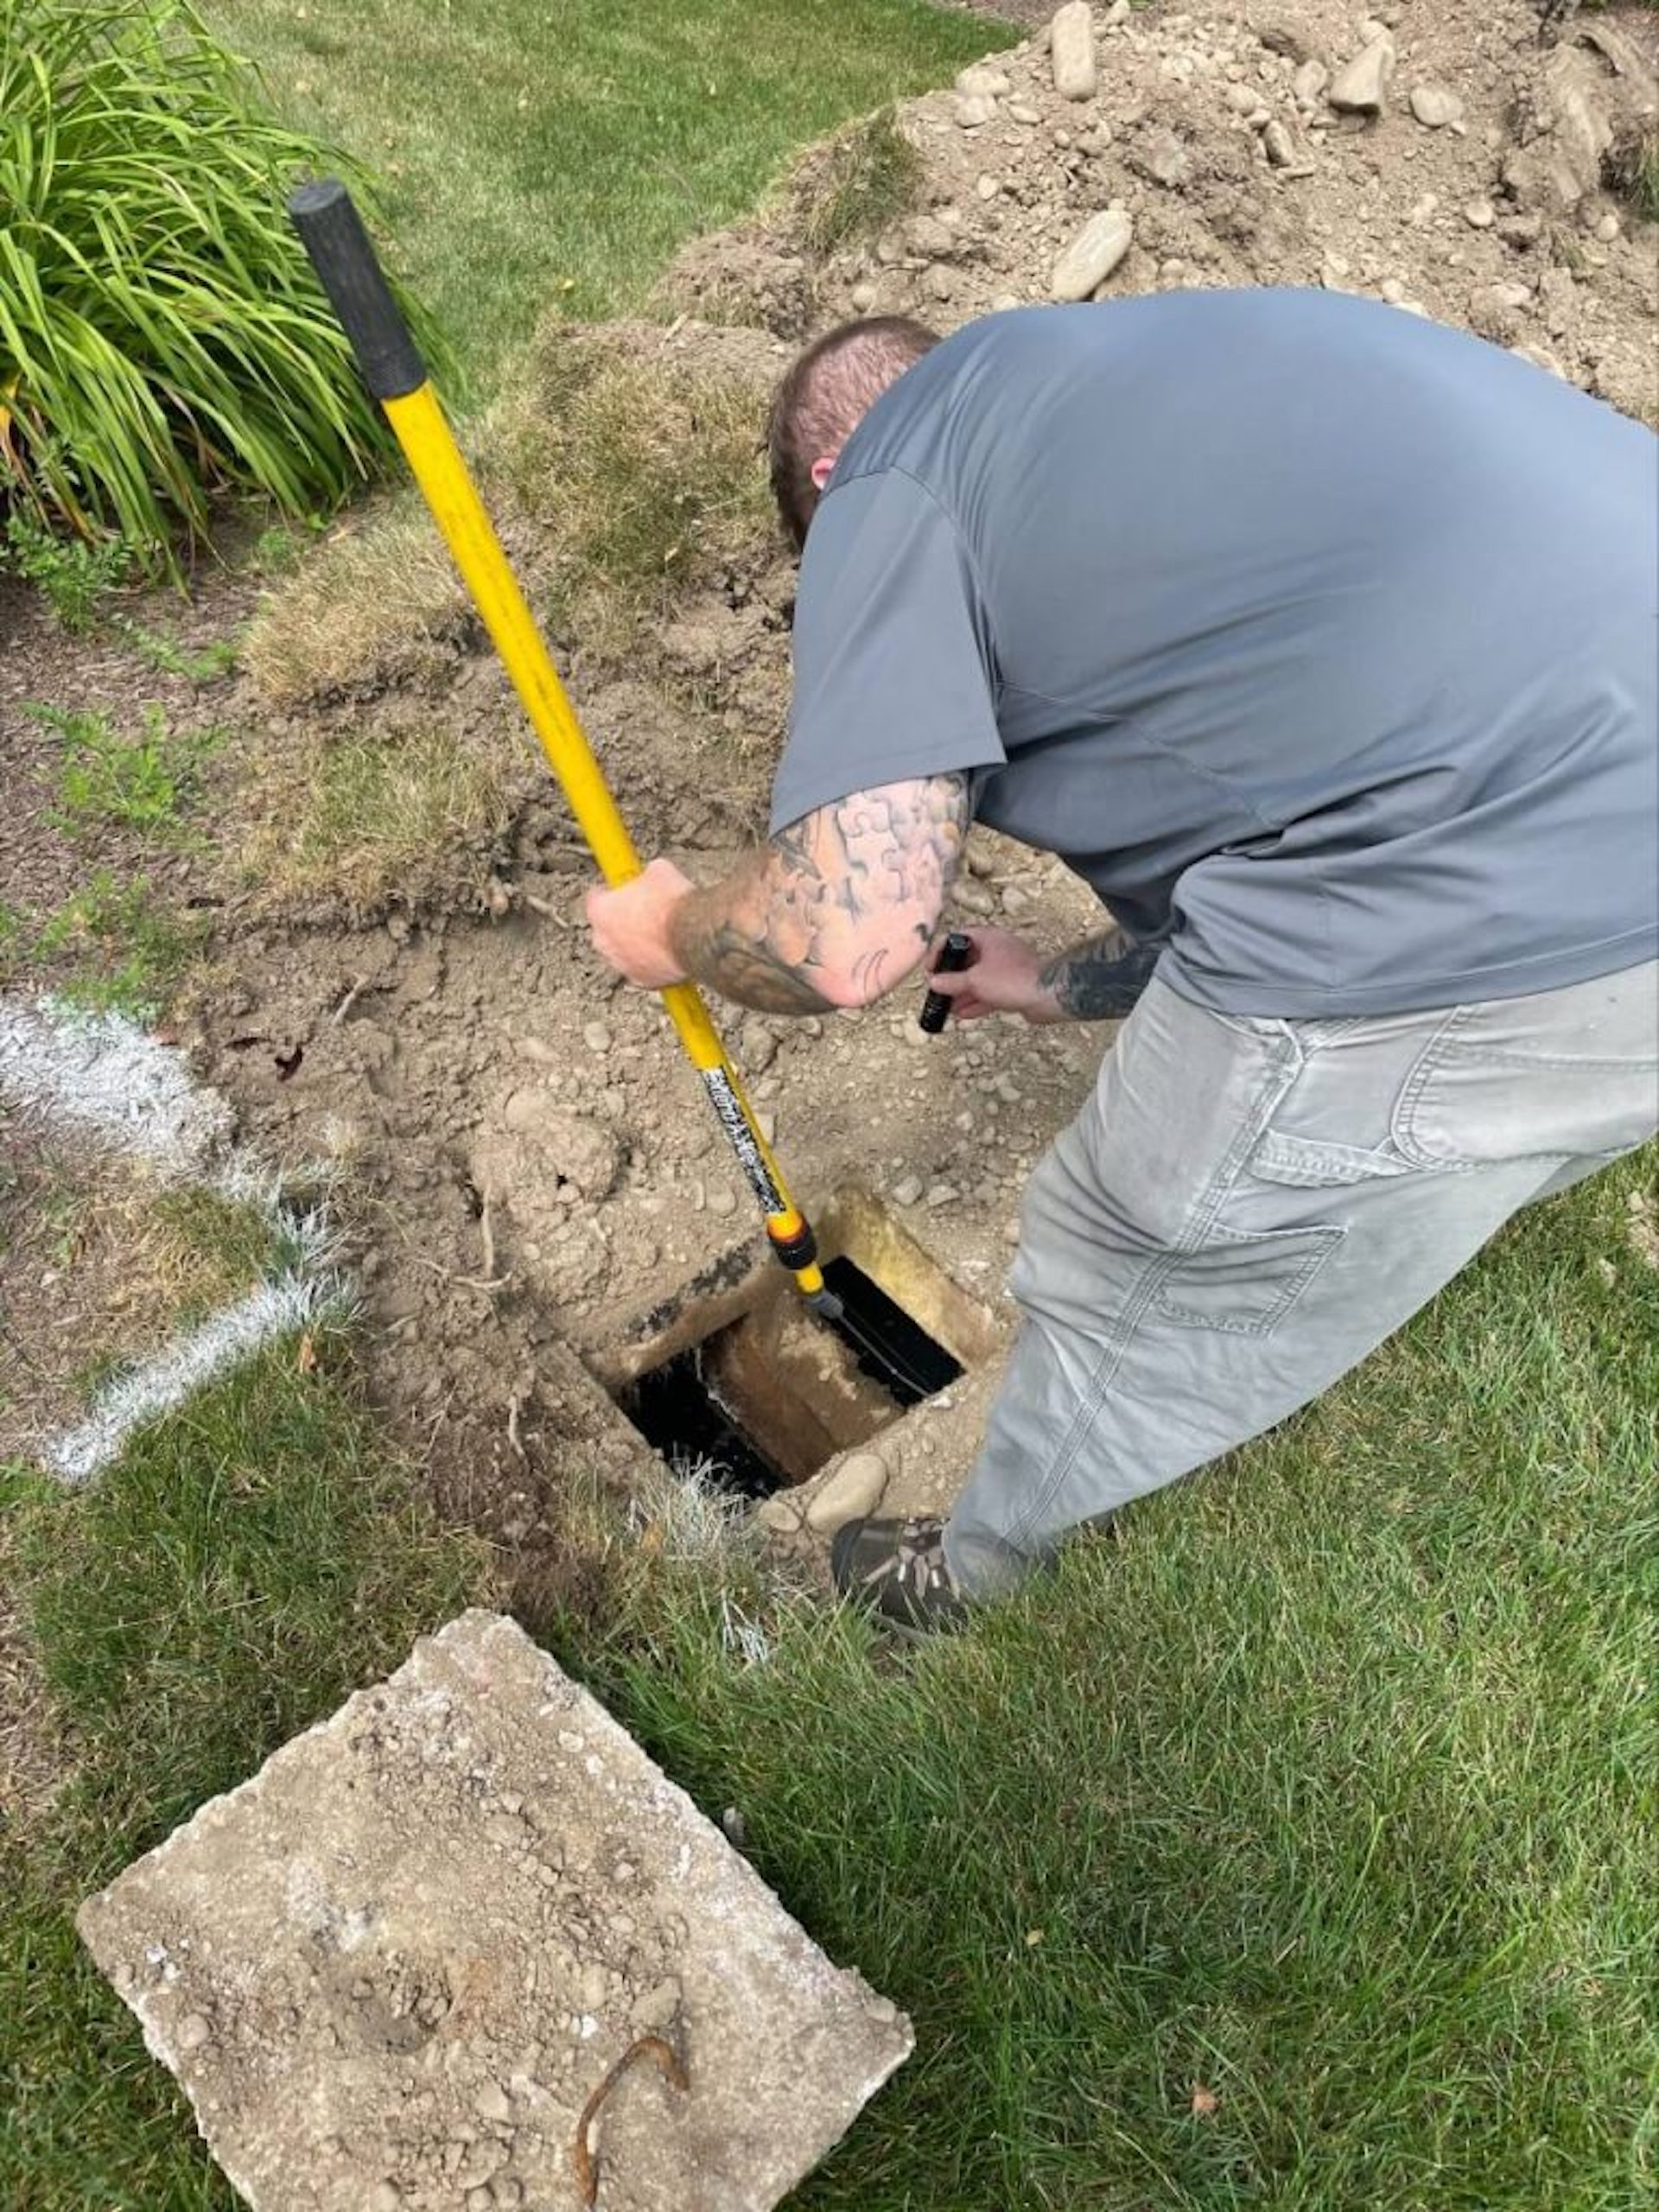
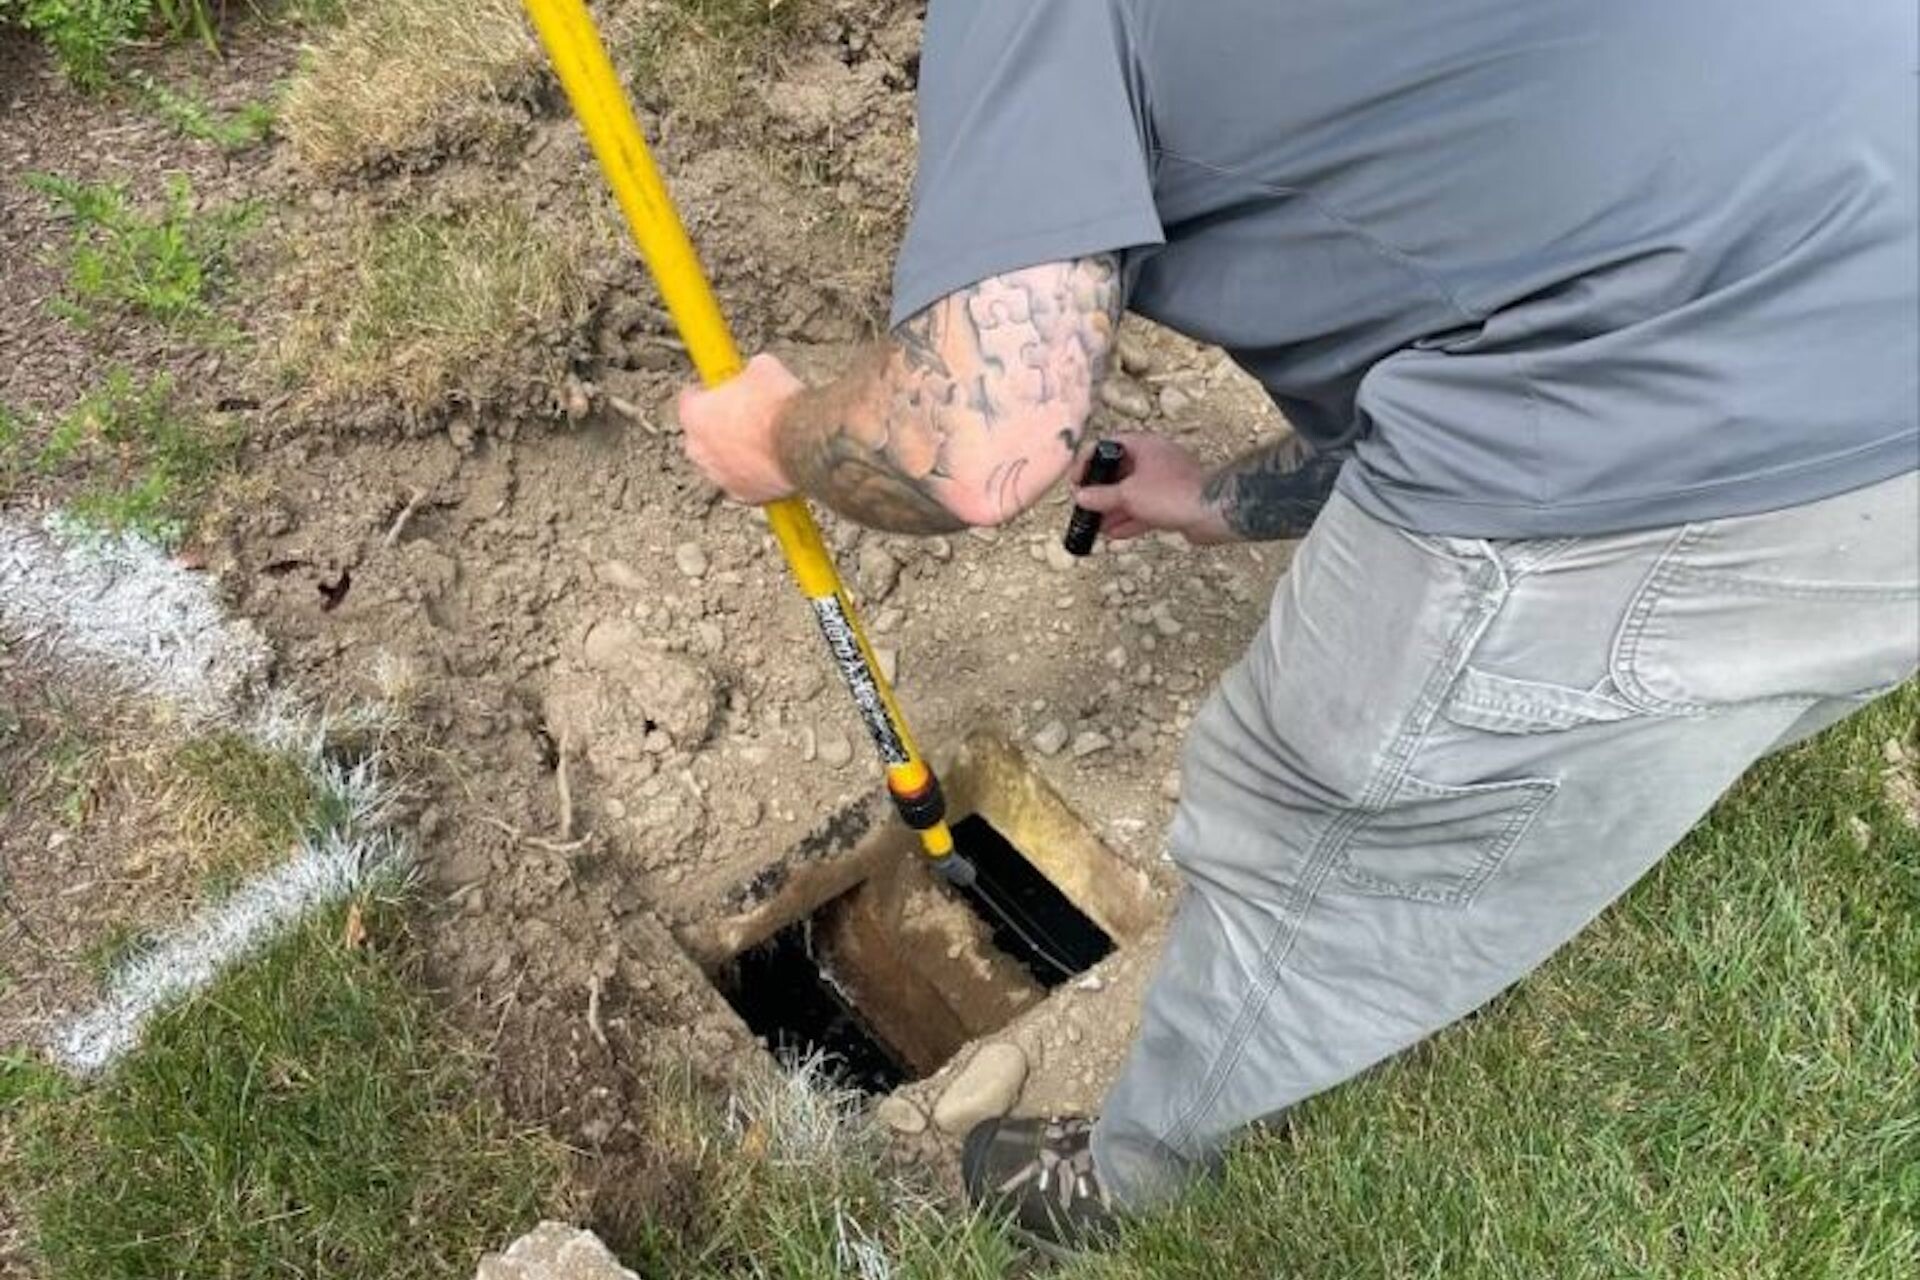
- Full Inspections: A comprehensive septic inspection is a separate inspection that involves opening the tank, checking sludge levels, examining the drain field, and possibly using cameras to inspect pipes and other internal mechanisms.
A full septic inspection is always recommended when purchasing a home with a septic tank system, as a visual inspection alone does not provide sufficient detail to evaluate the system’s condition.
Why Do You Need a Septic Inspection?
A septic inspection should never be avoided, as repairs can be costly, and the potential hazards could be life-threatening.
1. Prevention of Costly Repairs
According to Forbes, the average cost of a septic tank repair is around $1,775. However, more extensive repairs could end up costing thousands of dollars more.
A septic inspection allows you to avoid repairs by negotiating with the seller to pay for them or by subtracting them from the home’s total cost.
2. Visual Inspections Don’t Go Far Enough
Visual inspections and general home inspections cannot provide an accurate assessment of a septic tank’s condition, as most of its components are internal and buried underground.
A comprehensive septic system inspection goes deep beneath the soil to provide a full 360-degree view of your system by evaluating:
- Internal components: Inspecting mechanical parts like internal pumps, floats, and baffles.
- Structural integrity: Checking the tank walls for cracks, leaks, or signs of backflow.
- Absorption area: Assessing the health and drainage capacity of the drain field (leach field).
3. Health and Safety Concerns
A malfunctioning septic system can pose serious health risks, including backflow that mixes sewage with groundwater.
If your home relies on well water, this can severely impact the quality of your family’s drinking water and put your health at risk. A septic inspection can prevent such issues, ensuring that your system is treating wastewater safely and effectively.
4. Extending the Life of Your Septic System
Regular septic inspections help extend the life of your system by catching problems early.
Well-maintained septic systems can last for decades, but neglecting inspections can shorten their lifespan significantly and leave you on the hook for costly repairs.
By having your system inspected and pumped on a recommended schedule (usually every 5-10 years), you can ensure it continues to operate efficiently for years to come.
How Much Does a Septic Tank Inspection Cost in NEPA?
In Northeast Pennsylvania, a standard residential septic tank inspection typically costs between $200 and $900.
The final price depends largely on the tank size, whether the access lids are already open, and whether specialized digital camera equipment is required to evaluate the lines.
If the system needs to be pumped simultaneously, which is highly recommended for a complete internal inspection, homeowners should budget an additional $250 to $500.
Cost Breakdown of Septic Services in Northeast PA
The table below outlines the average estimated costs for septic inspections and related maintenance services across NEPA:
| Service Type | Estimated Cost Range (NEPA Average) | What It Includes / Factors |
| Visual / Transfer Inspection | $200 – $350 | Basic surface walkthrough, dye testing, and structural check of an already exposed tank. Often required for real estate transactions. |
| Full Diagnostic Inspection | $400 – $700 | Locating and excavating lids, running electronic line locators, checking baffles, and testing absorption field flow. |
| Advanced / Large System Inspection | $700 – $900 | Comprehensive evaluation of large-capacity, multi-compartment, or commercial-grade tanks, including complex engineered or alternative mound systems. |
| Septic Tank Pumping | $250 – $500 | Pumping out solids and liquid effluent. Price varies by tank capacity (e.g., 1,000 vs. 1,500 gallons). |
| Camera Line Inspection | $150 – $300 (Add-on) | Threading a specialized fiber-optic camera through the pipes to look for root intrusion, clogs, or collapsed lines. |
| Lid Excavation / Digging Fee | $50 – $150 | Charged if the inspector has to manually shovel or bring in equipment to uncover buried access ports. |
Key Factors That Affect Your Total Cost
- Accessibility: If your tank’s access lids are buried deep underground and aren’t marked, expect to pay extra for the labor required to locate and dig them up. Installing standard risers can eliminate this fee for future inspections.
- Real Estate Requirements: If you are buying or selling a home in NEPA, mortgage lenders or local municipalities may require a specific regulatory certification (such as a PSMA inspection), which can sometimes carry a premium over a routine maintenance check.
- System Type and Size: Standard gravity-fed systems are the least expensive to inspect. If your property uses an advanced engineered system, an aerobic treatment unit (ATU), or a large multi-compartment tank, the extra complexity will push your total invoice toward the higher end of the $900 spectrum.
How Often Should You Get a Septic Tank Inspection?
For the average residential property, you should get a septic tank inspection every 3 to 5 years.
This timeline ensures that critical components are evaluated frequently enough to catch minor structural wear, hairline cracks, or minor baffle deterioration before they evolve into catastrophic, costly system failures.
More frequent inspections should be scheduled for septic systems that contain the following:
- Advanced Mechanical Components: If your property uses an engineered system, an aerobic treatment unit (ATU), or electrical effluent pumps, these moving parts experience faster wear and tear than standard gravity-fed systems.
- High Occupancy or Heavy Water Use: Large families, properties with frequent guests, or homes using multiple water-intensive appliances generate a higher volume of wastewater through the system daily, requiring closer monitoring.
- Older Systems: If your septic system is approaching the 20- to 30-year mark, periodic checks become vital for monitoring the natural degradation of concrete or plastic components.
Outside of your standard maintenance schedule, real estate transactions should always include a septic inspection to protect buyers from unknown costs.
In some cases, local lenders may require a specialized PSMA-certified inspection within a specific window (usually 30 to 90 days) prior to closing the sale.
How to Choose a Septic Tank Inspector
Choosing the right septic inspector is essential for maintaining your septic system and avoiding costly repairs.
Here are some tips for searching for a septic inspector in Northeast PA.
- PSMA Certification: The Pennsylvania Septage Management Association (PSMA) is a professional certification for septic system inspectors, ensuring they are trained in best practices for evaluating septic systems. PSMA-certified inspectors must complete rigorous training and pass exams that test their knowledge of how septic systems operate and how to identify potential problems. Certified inspectors adhere to the highest industry standards, which can give you confidence in the quality and accuracy of their inspections.
- Industry Experience: Septic systems are complex, buried environments. An experienced inspector possesses the hands-on knowledge required to detect subtle warning signs, such as minor baffle deterioration or early-stage drain field saturation, that an inexperienced general home inspector would likely miss.
- Actionable Reporting: Avoid inspectors who only provide a simple pass/fail checklist. Look for a professional who provides a detailed, comprehensive overview of your system’s current health, along with clear, actionable maintenance advice to help you maximize your tank’s lifespan.
Septic Tank Maintenance Tips
Routine inspections are your first line of defense, but daily habits dictate the true lifespan of your system. Incorporating these essential maintenance practices will prevent premature failures and save thousands of dollars in emergency repairs:
1. Commit to Regular Pumping
While an inspection tells you the health of your system, septic tank pumping physically removes the accumulated sludge and scum layers before they can overflow into your drain field. Most residential systems in NEPA require pumping every 3 to 5 years, depending on household size and water usage habits.
2. Protect Your Drain Field
The absorption area (or leach field) relies on porous soil to naturally filter wastewater. To prevent soil compaction and pipe damage, adhere to the following rules:
- Never park vehicles or drive heavy equipment over the drain field.
- Avoid planting trees or large shrubs nearby, as aggressive root systems can invade, clog, and crack underground pipes.
- Direct runoff away from the area by ensuring gutters, downspouts, and sump pumps do not discharge excess water onto the absorption field.
3. Guard Your Drains Against Household Toxins
Your septic tank is a living ecosystem fueled by beneficial bacteria that break down organic waste. Introducing harsh chemicals can wipe out these bacteria, causing solid waste to build up rapidly.
- Never flush: Baby wipes, feminine hygiene products, paper towels, dental floss, cigarette butts, or cat litter. Even items labeled “flushable” do not break down quickly enough for a septic system.
- Limit chemical usage: Minimize the use of heavy-duty drain cleaners, bleach, antibacterial soaps, latex paint, and motor oils.
- Use your garbage disposal sparingly: Disposals send finely chopped food scraps into the tank, drastically increasing the sludge accumulation rate and forcing you to pump the system much more frequently.
4. Practice Smart Water Efficiency
An overloaded system cannot process waste effectively. When a household runs multiple water-heavy appliances simultaneously, it can flood the tank, pushing undecomposed solids straight out into the drain field.
- Space out laundry loads throughout the week instead of doing them all on a single day.
- Fix leaking faucets and running toilets immediately to avoid constantly adding unnecessary gallons to the system.
5. Create a Regular Inspection Schedule
Establishing a recurring timeline with a certified professional ensures your system’s structural elements, baffling, and soil conditions are evaluated under normal operating conditions. Catching a minor hairline crack or a slow-draining field early prevents a minor fix from turning into an emergency system replacement.
Mountain to Valley Home Inspections is a PSMA-certified inspector with decades of experience servicing septic systems and all home inspection needs. Contact us today for your free quote on a septic tank inspection in NEPA.
FAQs
How often should I have a septic inspection?
You should have your septic system inspected every 3 to 5 years. It is best practice to schedule your inspection alongside your routine tank pumping. Larger households, properties utilizing advanced electrical pumps, or systems over 20 years old may require more frequent, biennial (every 2 years) checkups to catch failures early.
What does a full septic inspection involve?
A comprehensive septic inspection involves locating and uncovering the tank’s access lids, measuring the internal scum and sludge layers, and physically examining structural components like the baffles and filters. The inspector will also run flow tests and evaluate the absorption area (drain field) for signs of soil saturation, pooling water, or system backflow.
What is a PSMA certification?
A PSMA certification means an inspector has been formally trained, tested, and credentialed by the Pennsylvania Septage Management Association. This certification ensures the technician adheres to strict, uniform state standards for evaluating on-lot wastewater systems, providing a level of thoroughness that standard home inspectors cannot replicate.
Do I need to pump my septic tank before an inspection?
No, you should not pump your tank immediately before an inspection. The inspector needs to see the wastewater at its normal operating level to check for proper flow, blockages, and backflow from the drain field. However, it is highly recommended to have the tank pumped during or immediately after the inspection so the technician can clearly examine the empty tank’s floor and walls for structural cracks.
Can a home inspector check a septic system?
A standard home inspector can only perform a basic visual walkthrough or a dye test, which does not provide an accurate assessment of a buried system. Because the critical components are underground, you need a specialized inspector—ideally one with a PSMA certification—who has the tools and expertise to locate, dig up, and run full diagnostics on the tank and drain field.
What are the warning signs that my septic system is failing?
Common warning signs of a failing septic system include slow-draining toilets or sinks, gurgling noises in your plumbing, sewage odors in your yard, and patchiness or unusually lush, vibrant green grass over the drain field. Severe indicators include standing water or soggy soil near the tank area and actual sewage backing up into your home’s lowest drains.
Are septic tank inspections required to sell a home in Pennsylvania?
While Pennsylvania state law does not universally mandate a septic inspection for every property transfer, most municipal ordinances, mortgage lenders, and buyers require one before closing a sale in NEPA. Real estate contracts typically specify a PSMA-certified inspection to ensure the system is functioning correctly and to protect all parties from immediate, costly repair liabilities.
Should I Get a Home Inspection on a New Build in NEPA?
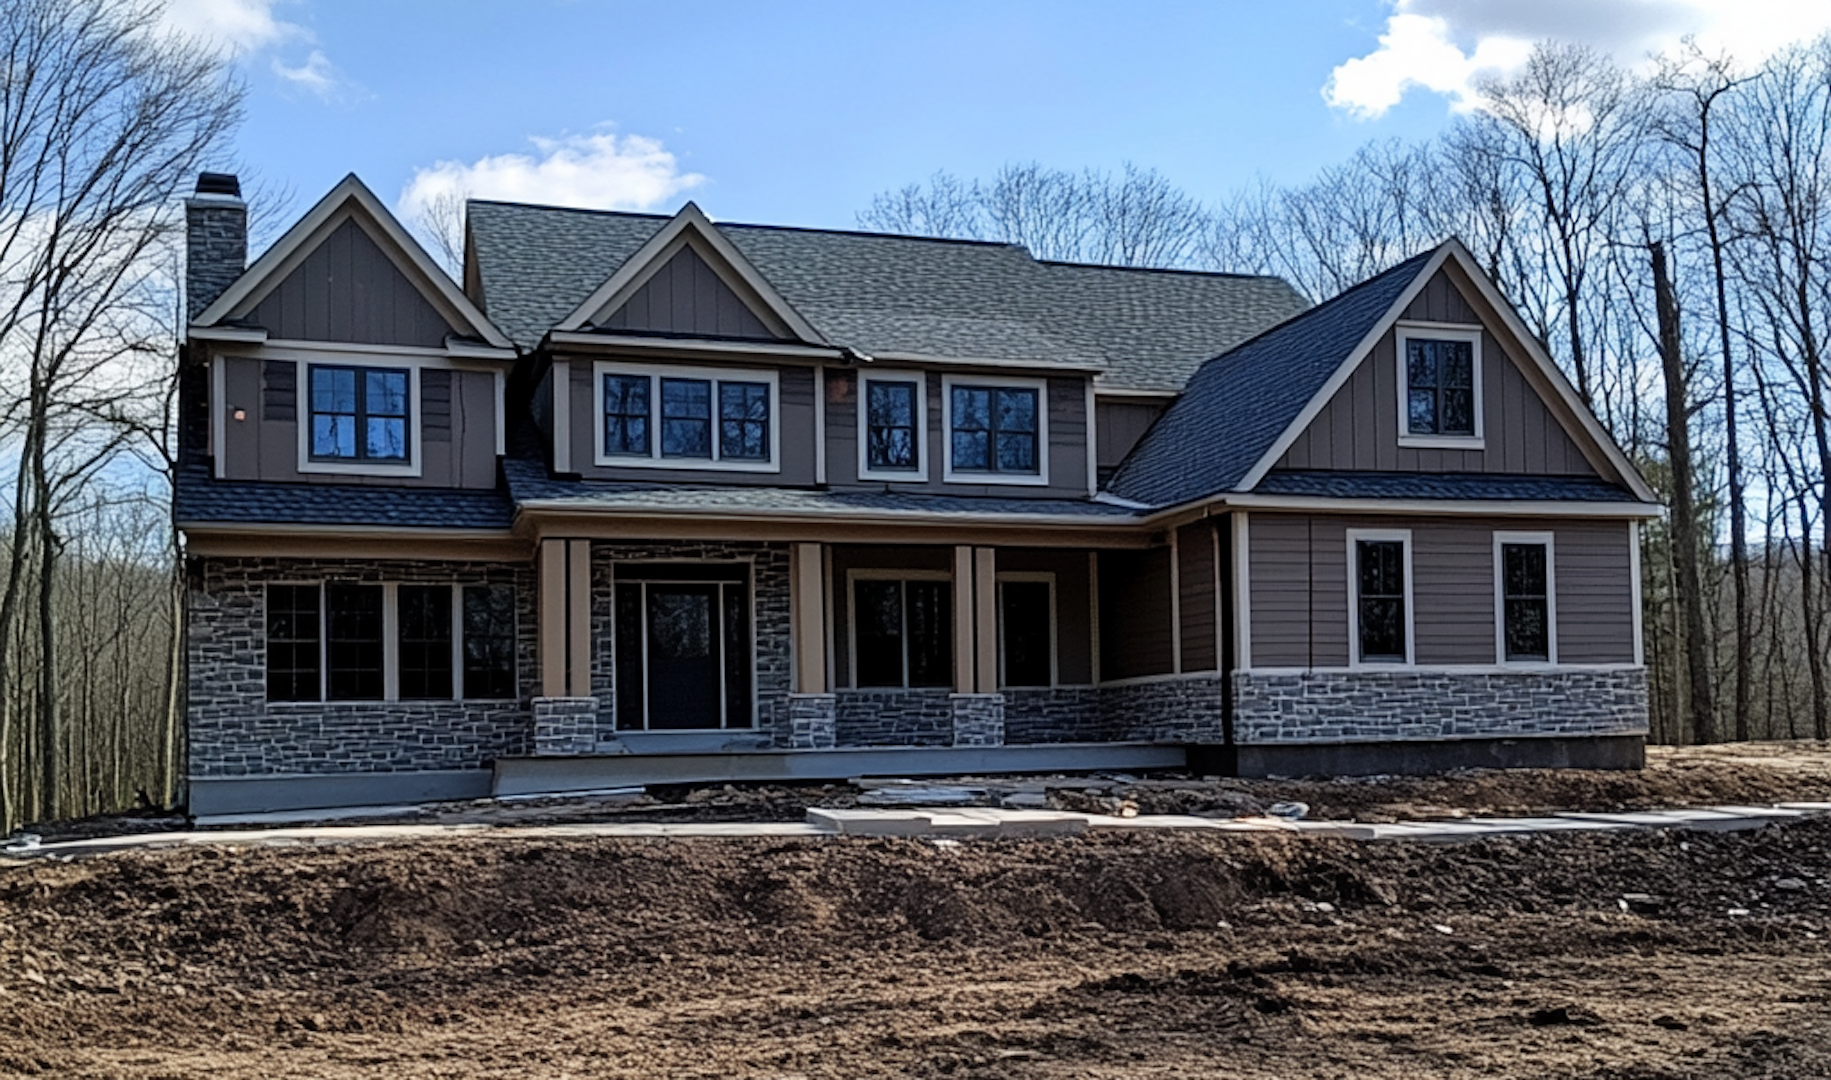
Buyers in Northeast Pennsylvania should get a home inspection for a new build to ensure their home is free of defects and to catch any issues before their builder’s warranty expires.
While new construction homes use modern construction standards, the finished product is rarely perfect. According to data from the National Association of Realtors, 65% of buyers who inspected their new builds found issues, and 24% did not pass the first inspection.
Take the recent example of a Sheetz in Clarks Summit, which was fully constructed but will never open due to a retaining wall issue caused by the developer.
While municipal code inspectors ensure a property meets minimum safety standards, they often spend as little as 15–20 minutes on-site, frequently missing the craftsmanship flaws and system imbalances that lead to expensive long-term repairs.
This guide explores why a third-party evaluation is your best defense against builder oversight. We cover the most common new-home pitfalls, the specific checklist our inspectors use to protect your investment, and how to navigate repairs before your warranty expires.
Do I Need an Inspection on a New Construction Home?
Yes, a new construction home inspection is recommended anytime you’re looking to buy a new build. In fact, as we’ll explain below, we recommend getting multiple inspections during the home’s first year to proactively address issues that may arise over the home’s life.
It’s a common misconception that new homes don’t need to be inspected because they are built to higher standards and follow local municipal code. However, code enforcement officers only inspect for very specific building requirements and don’t offer much judgment regarding craftsmanship.
Poor craftsmanship or quality materials can lead to significant issues in just about every part of the home if proper QA or an inspection doesn’t catch these.
A third-party home inspection works in your favor, giving you an unbiased, detailed report of what’s right and wrong with a new build before you finalize the sale or run out of warranty coverage.
Are Municipal Code Inspections a Substitute for a Home Inspection?
Municipal code inspections are not a substitute for a professional home inspection and only cover the minimum construction requirements related to safety code.
For example, code inspections will ensure that gas lines are pressure-treated or that certain building standards are met for ADA compliance in commercial buildings, but will not inspect the condition of the roof or foundation for structural flaws.
While both evaluations are essential during the home-buying process, they operate under different standards and have distinct objectives.
| Feature | Municipal Code Inspection | Private Home Inspection |
| Primary Focus | Minimum safety and building code compliance. | Comprehensive quality and condition assessment. |
| Scope | Basic structural, electrical, and fire safety. | In-depth evaluation of all systems (HVAC, roof, drainage). |
| Duration | Often 15–30 minutes per site. | Typically 2–4 hours for a thorough review. |
| Goal | Ensuring the home is “legal” to inhabit. | Protecting the buyer’s long-term investment. |
When to Get a New Construction Home Inspected
Ideally, a new-construction home should be inspected three times during construction and after construction: pre-drywall, final walkthrough, and post-purchase.
1. Pre-Drywall Inspection
This inspection should occur before any insulation and drywall are installed. This allows the inspector to see behind the walls and check the framing, plumbing, wiring, and HVAC layout. If there’s a problem, it will be much easier to correct now than after finishes are applied.
2. Final Walkthrough Inspection (Before Closing)
A full property inspection should be done just before you move in to check all visible systems and finishes, ensuring they were completed correctly and meet safety and performance standards.
These inspections give you a window of opportunity to request repairs or hold back final payment until issues are corrected, so don’t skip them.
3. Post-Purchase: A 1-Year Inspection
Many issues with new-construction homes may not manifest until after the homeowner has occupied the house for a few months. Since most new construction homes come with a builder’s warranty covering workmanship and materials for one year, it’s essential to have an inspection before your warranty expires to address any issues and save money.
If you want to build a new home or purchase a new construction home, don’t wait for a proper home inspection. Mountain to Valley’s home inspections can help you proactively address repairs before purchasing a new build or your warranty expires, so you save money and have peace of mind.
Common Issues Found in New Construction Homes
The most common issues found in new-construction homes in NEPA are related to craftsmanship, such as cosmetic flaws, as well as structural issues stemming from foundation settlement and soil compaction.
Based on our data from the field of inspecting both newer and older homes in NEPA, we’ve learned what issues commonly plague new homes and where exactly to look to find these issues that other inspectors might miss. That said, here are five common issues we find in new-construction homes in the area.
1. Improper Foundation Settlement
It can be difficult to tell how a new foundation will settle with time and affect the home’s overall structure. However, many key signs, such as stair-step cracks and cracked drywall, may indicate settlement issues.
Foundations are among the most expensive repairs to make, so identifying these issues early, before you are liable for their repairs, is critical.
2. Plumbing Leaks or Poor Drainage
While builders are responsible for the house’s main structure, much of the “guts” of the home will be outsourced to contractors. Unfortunately, one of the most common flaws we find with substandard contractor work is plumbing errors, such as leaks, improperly caulked fixtures, and cheap materials.
3. HVAC Imbalances
HVAC systems are among the most costly to repair and maintain, so it’s important that any new systems are installed properly and error-free. Some common issues our inspectors find with HVAC work include improper ductwork, which can lead to leaks and imbalances that damage the system over time and reduce your energy efficiency.
4. Poorly Installed Roofs
Even new roofs can suffer from common issues associated with old roofs, including popped nails, missing flashing, or inadequate attic ventilation. While you may not notice leaks or damage right away, this will quickly accelerate your roof’s deterioration. This is also one of the most difficult flaws to identify without a proper home inspection, which is why a roof inspection on new builds is so critical.
5. Craftsmanship Issues
While minor cosmetic flaws are expected, larger craftsmanship issues can signal a rushed build or poor supervision. We frequently find improperly installed flooring, uneven drywall finishes, and poorly fitted trim or cabinetry.
These gaps and misalignments can lead to drafty rooms, premature wear and tear, and a lower resale value down the line. A professional inspection ensures these finishing touches actually meet the high standards you paid for.
New Construction Home Checklist: What Inspectors Look For
A new construction home inspection covers many of the same essentials as an inspection on an older property, but with extra focus on build quality and craftsmanship. Even brand-new homes can have issues that stem from rushed work, subcontractor errors, or overlooked details
Here are the key areas a home inspector will evaluate, along with the types of questions they’ll be asking during a new construction inspection:
- Foundation and Grading: Are there any signs of poor settling, like cracked walls or ceilings? Does the ground slope away from the home? Are downspouts and drainage systems directing water properly?
- Roof and Attic: Are the shingles installed correctly? Are nail pops visible? Is flashing properly sealed? Is the attic well-ventilated to prevent moisture buildup or energy loss?
- Insulation: Is insulation installed evenly and according to local energy code standards? Are there gaps, compression, or missing areas that could affect performance?
- HVAC System: Is the HVAC system properly sized for the home? Are ducts sealed and delivering balanced airflow to every room?
- Electrical System: Are GFCI and AFCI outlets installed where required? Are outlets and switches correctly wired? Is the breaker panel clearly labeled and safe?
- Plumbing System: Are there any signs of leaks at fixtures or under sinks? Is the water pressure consistent? Are drains and venting systems functioning properly?
- Windows and Doors: Are all windows and doors square and opening smoothly? Is weather stripping in place to prevent drafts? Are locks and latches secure?
- Floors and Walls: Are floors level and free of creaks or movement? Are there any visible blemishes, nail pops, or cracks in the drywall?
- Appliances and Fixtures: Are all installed appliances functioning correctly? Have they been installed according to the manufacturer’s specifications?
- Code Compliance: Are all permits on file and up to date? Does the home meet current building codes and include a valid certificate of occupancy?
Even if everything looks brand new, hidden issues can lurk behind finished walls or under flooring, making them difficult and expensive to repair later. Getting a new home inspection helps rectify these issues before your warranty expires and ensures your home is built to modern standards.
FAQs
Do I really need an inspection for a brand-new home?
Yes. While new homes must pass municipal code inspections, those are limited in scope. A third-party inspection offers a more thorough evaluation of craftsmanship, installation quality, and potential defects before you close.
What’s the best time to schedule an inspection on a new construction home?
There are typically three key times: pre-drywall (before insulation and drywall go in), right before closing (final walkthrough inspection), and around the 11-month mark (before your builder’s warranty expires).
Will a home inspection affect my builder’s warranty?
Not at all. In fact, it reinforces it. A professional inspection report provides documented evidence of issues the builder is responsible for fixing under their warranty, helping ensure you don’t end up paying for their oversight later.
Does the builder have to fix everything the inspector finds?
While builders are generally required to fix code violations and structural defects, cosmetic issues or minor suggestions from an inspector may be subject to negotiation. It’s best to present the full report to your builder to discuss which repairs are covered under your specific contract.
Is a municipal code inspection the same as a private home inspection?
No. Municipal inspectors check for compliance with minimum safety and building codes. A private inspector looks more deeply into the quality of the work, the installation of systems (such as HVAC and plumbing), and potential long-term maintenance issues that code inspectors might overlook.
Can I be present during the new construction inspection?
Absolutely. We highly recommend being there. It’s a great opportunity to learn about your new home’s systems, shut-off valves, and maintenance requirements directly from a professional while the house is still in its clean state.
How much does a new construction inspection typically cost?
The cost varies based on the size of the home and the type of inspection (e.g., pre-drywall vs. final walkthrough). However, the price is usually a small fraction of the cost of potential repairs that might go unnoticed without a professional eye.

Do Home Inspections Check for Mold in NEPA?
Standard home inspections in Northeastern Pennsylvania do not include a comprehensive mold inspection. While a general inspector will note visible microbial growth or obvious water damage, they cannot look behind your drywall or HVAC units without special tools, where mold mostly lives.
Mold is a pervasive concern in NEPA due to the region’s higher-than-average rainfall and poor home ventilation, which result from outdated building practices.
According to public data, 40.5% of homes in Luzerne County and 45.1% in Lackawanna County were built before 1950, well before modern ventilation and insulation standards were established. As a result, basement moisture from plumbing leaks, tropical storms, and high summer humidity creates the perfect breeding ground for black mold that harms respiratory health and damages drywall.
Homeowners can live for years without discovering mold, which is why a specialized inspection is required to detect mold, especially when buying or selling a home.
This article examines the important differences between standard and mold-specific inspections and explains why mold inspections are necessary and popular add-ons when transacting a home in NEPA.
Do Home Inspectors Check for Mold?
Standard home inspections in Pennsylvania generally do not include a comprehensive mold inspection or air quality testing. While a general inspector will visually examine a home’s physical structure and mechanical systems—from the roof to the foundation—they primarily look for visible issues.
If an inspector encounters obvious microbial growth or water stains during their walkthrough, they will document it as a defect in their report, but they typically do not perform the specialized testing required to identify hidden mold.
A standard home inspection is limited in the following ways regarding mold:
- Visual Only: Inspectors only report on what is readily accessible and visible; they do not move furniture, pull up carpets, or open up walls where mold often hides.
- No Sampling: General home inspectors are typically not equipped to perform air sampling or surface swabbing to determine the type or concentration of mold spores present in the home.
- No “Pass/Fail”: In Pennsylvania, inspectors do not pass or fail a home based on mold; they simply document their findings so you can make an informed decision.
Because a general inspection may miss moisture trapped behind freshly painted walls or hidden in crawl spaces, many buyers in NEPA choose to add a specialized mold and air-quality test to their inspection package. These additional services use professional tools such as moisture meters and air pumps to uncover hidden growth that a standard inspection might miss.
Is a Mold Inspection Worth It in NEPA?
A mold inspection is worth the investment because it identifies hidden moisture problems and structural risks that a standard home inspection often misses. While it requires an upfront cost, it serves as a critical safeguard against expensive remediation projects and chronic health issues.
By detecting mold before you finalize a property purchase, you gain the leverage to negotiate repairs or walk away from a contaminated environment.
- Identify Hidden Issues: Mold often grows in concealed areas such as behind walls, under flooring, or within HVAC systems, which aren’t typically assessed during standard home inspections. Detecting these hidden problems early can save you from future surprises.
- Protect Your Health: Mold exposure poses risks to your health, especially if you or your family members have allergies, asthma, or other respiratory issues. A mold inspection ensures a safer environment in your new home.
- Prevent Costly Repairs: Mold remediation and repairing underlying issues like leaks can be expensive. Identifying problems during the inspection phase allows for price negotiations or requires the seller to make repairs.
- Assess Moisture Problems: Mold is a symptom of moisture issues such as leaks, poor drainage, or inadequate ventilation. Understanding the source of moisture can help prevent long-term damage and recurring mold growth.
- Ensure a Safe Investment: A mold inspection provides peace of mind, ensuring that your financial investment is sound and you won’t face unexpected remediation costs post-purchase.
Ultimately, the cost of a mold inspection is a fraction of the price of professional remediation, which can easily reach thousands of dollars.
In many real estate transactions, the findings from a mold report can even be used to request seller concessions, effectively paying for the inspection itself. Prioritizing this specialized test ensures that you aren’t just buying a house, but a healthy, moisture-free environment for your family.
What Are the Health Effects of Mold Exposure?
Mold is a fungus that can enter our lungs when we breathe in or irritate our skin when we come in contact with it. While some strains of mold are more dangerous than others, the CDC lists the general symptoms of mold exposure as:
- A stuffy or runny nose
- Soar throat
- Wheezing or coughing
- Asthma-like symptoms
The effects are worse for people who are immunocompromised.
While it is possible to live with mold, it can greatly affect your quality of life and indicate deeper issues in your home.
Where Does Mold Typically Grow in a Home?
What makes mold so difficult to detect during a standard visual inspection is its tendency to thrive in the hidden cavities of a home—specifically behind walls, under floorboards, and inside structural voids.
While high-moisture zones like bathrooms, basements, and kitchens are the most common culprits, mold can colonize nearly any surface where moisture, organic food sources (like drywall or wood), and poor airflow intersect.
In a typical home, you are most likely to find mold in these specific locations:
- Behind walls that have had water damage
- In damp basements with poor ventilation (typically on ceilings and walls)
- Underneath sinks with water leaks
- Underneath floor boards where water has seeped through
- In HVAC systems that have not been properly cleaned
- Inside chimneys
- Between windowsills and screens
- Behind outdoor shutters exposed to the elements
- Around siding and decks that have not been properly sealed or stained
Why Mold Points to Deeper Issues in Your Home
While mold in and of itself is certainly hazardous, it can point to one of two issues in your home:
- Previous or existing water damage
- Poor ventilation
The former could mean deeper structural issues if the water damage was not properly repaired before putting the home on the market. Water-damaged homes sell for significantly less and may have other issues, such as pests or lingering musty odors.
Mold requires moisture to reproduce, which is why mold is found on wet surfaces of your home.
Poor ventilation will also need to be fixed and will be marked in a home inspection report.
How Does a Mold Inspection Differ from a Regular Inspection?
A standard home inspection is a high-level overview of a property’s condition, but it is not a forensic investigation into air quality. While a general inspector focuses on the operational health of the roof, electrical, and plumbing systems, a mold inspection is a specialized service focused entirely on identifying fungal growth and the hidden moisture sources that fuel it.
The primary differences lie in the tools, training, and testing used during the process:
- Advanced Diagnostics: Unlike a regular inspection, which is primarily visual, mold inspectors use specialized technology. This includes infrared thermal imaging to detect temperature anomalies behind walls (indicating moisture) and hygrometers to measure precise humidity levels in the air.
- Specialized Training: A certified mold inspector is specifically trained by credentialed agencies to recognize subtle indicators of growth that a generalist might overlook, such as “ghosting” on walls or specific patterns of water staining.
- Laboratory Analysis: The most significant difference is the use of sampling. A mold inspector will collect air spore samples and surface swabs, which are then sent to a third-party laboratory. This determines the exact species of mold present—distinguishing common mildew from hazardous varieties such as Stachybotrys chartarum (black mold).
During a mold-specific walkthrough, the inspector focuses on high-risk red flags that fall outside the scope of a standard report:
- Historical Water Damage: Tracking the long-term impact of past floods or leaks that may have been “covered up” by new drywall.
- Ventilation Deficiencies: Identifying specific airflow failures in “dead zones” like attics or behind heavy basement insulation.
- Waterproofing Failures: Evaluating the effectiveness of sump pumps and French drains in managing NEPA’s high groundwater levels.
By the end of the process, you receive a breakdown of your home’s air quality and a professional roadmap for the best course of action regarding remediation.
When Is a Mold Inspection Recommended?
While we recommend conducting a mold inspection anytime before purchasing a home, there are several situations in which it is more critical than in others.
In Northeastern Pennsylvania, where environmental factors and the age of the housing stock play a major role in property health, a specialized inspection is often the only way to ensure a safe living environment.
A mold inspection is highly recommended if:
- You are buying or selling a home.
- The home lies in a flood zone.
- The home is older and has poor ventilation.
- The home shows previous signs of water damage.
- The home is well taken care of and has other issues.
How Much Does a Mold Inspection Cost?
According to Angi’s List, the national average for mold inspection costs ranges between $302 to $1,046. However, prices in Northeast Pennsylvania tend to fall on the lower end of the range, and you can shop around among several inspectors for a more competitive quote.
In our opinion, the cost of a mold inspection is well worth it compared with the cost of mold remediation, and it allows us to potentially bundle these costs into closing or have the seller cover them.
FAQs
Do I need a mold inspection if the house looks clean?
Yes. Mold is often invisible to the naked eye, thriving in hidden cavities such as wall interiors, underfloor insulation, and HVAC ductwork. Even a spotless home can harbor elevated spore counts if there are underlying moisture issues or a history of leaks that weren’t professionally remediated.
Are mold inspections included in regular home inspections?
No. While a standard home inspector will note visible microbial growth, they do not perform the specialized air quality sampling or surface testing required for a definitive diagnosis. A dedicated mold inspection is a separate service provided by a certified specialist with the tools to identify hidden environmental hazards.
What happens if mold is found during the inspection?
Finding mold doesn’t have to be a deal-breaker. You can use the inspection report to negotiate with the seller to have the issue professionally remediated, request a credit to reduce the purchase price, or—if the damage is extensive—decide not to proceed with the purchase.
How long does a mold inspection take?
A typical mold inspection for an average-sized home takes between one and three hours. The duration depends on the size of the property and the number of air or surface samples the inspector needs to collect. Lab results for these samples usually take an additional 2–3 business days.
Can I just use a DIY mold test kit from a hardware store?
DIY kits are generally discouraged by professionals. These kits often produce “false positives” because mold spores exist naturally in almost every environment. Without a professional to interpret the data and compare indoor spore levels to outdoor baselines, a DIY kit won’t tell you if you have a dangerous infestation or just normal household dust.
Will a mold inspection tell me the specific type of mold?
Yes. Through laboratory analysis of air and tape-lift samples, a mold inspection identifies the specific genera of mold present. This is crucial for determining if the growth is a common “nuisance” mold or a more hazardous variety, such as Stachybotrys (black mold), which requires more intensive remediation.
Health Risks of Long-Term Radon Exposure in NEPA
Long-term radon exposure is the second leading cause of lung cancer in the United States, responsible for approximately 21,000 deaths annually, according to the EPA. In Northeastern Pennsylvania, radon concentrations frequently exceed the EPA action level of 4.0 pCi/L due to regional geology rich in uranium-bearing shale and granite.
Radon is a radioactive gas that forms when uranium in soil and rock breaks down. It seeps through foundation cracks, sump pump openings, and gaps around utility penetrations.
Once inside, radon accumulates in enclosed spaces like basements and first floors. The gas decays into radioactive particles that lodge in lung tissue when inhaled, causing cellular damage over years of exposure.
This guide explains the health risks of radon exposure in NEPA homes, identifies symptoms and warning signs, establishes safe concentration levels, and provides testing protocols for basements and living spaces.
What Makes Radon Dangerous?
Radon becomes hazardous through radioactive decay. When radon atoms break down, they release alpha particles—high-energy radiation that damages DNA in lung cells. This process creates polonium-218 and polonium-214, both radioactive isotopes that attach to dust and aerosol particles in indoor air.
You inhale these particles without even knowing. They settle in the bronchial epithelium, where continued radiation exposure mutates cells and triggers cancer development.
The EPA and World Health Organization classify radon as a Group A carcinogen, meaning it definitively causes cancer in humans.
Why NEPA Has a Higher Radon Risk than Other Areas
Northeastern Pennsylvania lies within the Reading Prong geology, characterized by uranium-rich Precambrian rock formations.
Counties such as Lackawanna, Luzerne, and Wayne consistently report indoor radon levels above the national average.
The Pennsylvania Department of Environmental Protection designates NEPA as a Zone 1 area, indicating predicted average indoor radon screening levels exceeding 4 pCi/L.
Soil permeability and indoor air pressure differentials exacerbate the problem. For example, the stack effect—where warm air rises and exits through upper floors—creates negative pressure in basements. This vacuum pulls radon from soil into living spaces through any available opening.
Older homes with basements and poor ventilation tend to carry the highest risk of elevated radon levels.
Symptoms of Chronic Radon Exposure
Radon exposure produces no immediate symptoms. Unlike carbon monoxide or natural gas leaks, radon is colorless, odorless, and tasteless and cannot be detected through physical sensation.
Health effects develop after years of exposure. Lung cancer symptoms from radon typically appear 5 to 25 years after prolonged exposure to elevated concentrations. By that point, cellular damage has accumulated significantly.
Late-Stage Warning Signs
When lung cancer from radon exposure advances, symptoms include:
- Persistent cough that worsens over time or doesn’t respond to treatment
- Coughing up blood (hemoptysis), even small amounts
- Chest pain that intensifies with deep breathing, coughing, or laughing
- Shortness of breath during routine activities
- Wheezing or hoarseness without infection
- Recurrent respiratory infections like bronchitis or pneumonia
- Unexplained weight loss and fatigue
These symptoms mirror other respiratory conditions. Medical diagnosis requires imaging (CT scans, X-rays) and sometimes a biopsy to confirm lung cancer.
Radon-induced lung cancer cannot be distinguished from smoking-related lung cancer through symptoms alone. Early testing is the only way to identify and mitigate radon exposure.
Is Radon Risk Higher in Smokers?
Smokers face 10 times higher lung cancer risk from radon compared to non-smokers, according to EPA research. Tobacco smoke damages cilia—tiny hair-like structures that clear particles from airways. This damage allows radon decay products to remain in the lungs longer, increasing radiation exposure to lung tissue.
Even former smokers maintain an elevated risk. If you smoked previously and live in a high-radon home, your cumulative lung cancer risk remains significantly higher than that of someone who never smoked.
How to Test for Radon in Your Basement
Radon testing in basements provides worst-case concentration data since radon enters primarily through foundation-soil contact.
Two testing categories exist: short-term and long-term.
- Short-Term Tests (2–7 Days): These provide a quick screening, ideally during the heating season (October–April). You must keep all windows and exterior doors closed for 12 hours before and during the test, placing the device at breathing height in the lowest lived-in level of the home.
- Long-Term Tests (90+ Days): These measure radon for 3–12 months to provide an annual average concentration. This is the most accurate way to represent true exposure risk because it accounts for daily and seasonal fluctuations caused by soil moisture and temperature changes.
To ensure the highest accuracy, a professional radon inspector will determine your home’s levels using Continuous Radon Monitors (CRMs). These specialized devices record hourly concentration patterns and include anti-tampering features, providing a detailed report that is considered the industry standard for real estate transactions.
DIY kits are available only in hardware stores, but for accurate results, it’s important to conduct a professional radon inspection. Continuous Radon Monitors have much higher accuracy and can help mitigation experts determine the right methods to reduce radon levels in your home.
If your home uses a private well, you should also consider well-water testing, as radon can be released into the air during activities like showering or dishwashing. The EPA suggests considering mitigation if water concentrations exceed 4,000 pCi/L.
How Does Radon Mitigation Work
If your testing reveals elevated radon levels, there are professional solutions that can lower exposure and protect your health.
For most homes, the standard solution is a sub-slab depressurization system. This system uses a specialized fan and PVC piping to pull radon gas from beneath your home’s foundation and vent it safely into the outside air. When professionally installed, these systems can reduce indoor radon levels by up to 99%.
Additional structural defenses can further support mitigation:
- Sealing Foundations: Closing cracks in concrete and gaps around plumbing helps block primary entry points.
- Sump Pit Covers: Installing airtight lids on sump pits prevents soil gases from escaping into the basement.
- Crawl Space Encapsulation: Using a heavy-duty plastic barrier to cover exposed soil can significantly reduce radon infiltration in older homes.
For homes where radon is entering through the water supply, point-of-entry treatment systems, such as aeration or granular activated carbon filters, are installed to strip the gas from the water before it ever reaches your faucets or showerheads.
Why Early Radon Testing Matters
Early radon testing is the only proactive way to protect your family from a “silent” health threat. Because radon is colorless, odorless, and tasteless, it can accumulate to dangerous levels without anyone in the household ever knowing.
Since the health risks associated with radon, specifically lung cancer, often take years or even decades of chronic exposure to develop, identifying and fixing the problem today can prevent a life-threatening diagnosis in the future.
In high-risk regions like Northeastern Pennsylvania, where 40% of homes exceed the action level, testing shouldn’t be a one-time event. H By making radon testing a regular part of your home maintenance, you ensure that your indoor air remains safe and that any necessary mitigation is handled before long-term damage to your health can
Frequently Asked Questions
Can I smell or see radon in my home?
No. Radon is completely colorless, odorless, and tasteless. You cannot detect radon through physical senses, which is why testing is the only way to identify it.
How long does radon exposure take to cause cancer?
Lung cancer from radon typically develops 5-25 years after prolonged exposure to elevated concentrations. Risk increases with both radon level and exposure duration.
Do air purifiers remove radon?
No. Air purifiers filter particles but cannot remove radon gas. The only effective reduction methods are ventilation or active soil depressurization systems that prevent radon entry.
Should I test every floor of my home?
Start with the lowest lived-in level where radon concentrations are typically highest. If basement results exceed 4 pCi/L, first-floor testing helps determine whole-house exposure, but mitigation systems usually reduce radon on all levels.
Does opening windows reduce radon?
Temporarily. Open windows dilute indoor radon, but don’t stop entry. Concentrations return to elevated levels once windows close. This strategy doesn’t provide reliable long-term protection, especially during winter when homes stay sealed.
Is radon only a basement problem?
No. While basements typically show the highest concentrations due to soil contact, radon reaches upper floors through air circulation. Homes without basements—built on slabs or crawlspaces—also accumulate radon.
Can radon cause other health problems besides lung cancer?
Radon exposure is specifically linked to lung cancer. No conclusive evidence connects radon to other cancers or health conditions. However, lung cancer from radon represents a significant preventable health risk.
How accurate are home radon test kits?
EPA-approved test kits provide accurate results when placement and timing protocols are followed correctly. Lab analysis introduces minimal error. The main accuracy factor is test duration: longer tests better represent true annual average exposure.
Do radon levels change over time in the same house?
Yes. Radon concentrations fluctuate daily, seasonally, and year-to-year based on soil moisture, barometric pressure, snow cover, and home operation. A previously low-radon home can develop elevated levels, which is why the EPA recommends retesting every 2 years.
How to Conduct Commercial Realty Due Diligence in NEPA
In Northeastern Pennsylvania (NEPA), skipping due diligence can trigger significant losses under laws like the Comprehensive Environmental Response, Compensation, and Liability Act (CERCLA), which holds owners liable for historical contamination.
A $2 million Wilkes-Barre warehouse might appear structurally safe but may not meet code or contain hidden environmental hazards, such as leaking underground storage tanks. According to EPA Brownfields data, remediation for such sites averages $140,000, potentially erasing a buyer’s equity instantly.
A thorough due diligence process mitigates these risks by uncovering “deal-breaking” problems, from unrecorded municipal liens to flooding issues, before you close. Your due diligence investigation should include:
- Market & Zoning Analysis: Verifies that your intended use is legally permitted and supported by local comparable sales data.
- Commercial Property Inspections (PCA): Evaluates complex HVAC systems, roofing, and structural masonry common in the region’s historic corridors.
- Title Searches & ALTA Surveys: Clears subsurface mineral rights disputes and ensures the property is free of hidden encumbrances.
- Phase I Environmental Site Assessments (ESA): Establishes the “Innocent Landowner Defense” and identifies “Recognized Environmental Conditions” (RECs).
This guide provides a technical roadmap for navigating the NEPA commercial landscape, ensuring your acquisition meets the highest standards of institutional investment and long-term profitability.
Why Commercial Due Diligence Matters in NEPA
Thorough due diligence in NEPA acts as your financial shield, uncovering hidden risks before they become your legal and financial responsibility. By identifying issues early, you gain critical advantages in the negotiating process:
- Liability Protection: Documents the property’s condition to establish the “Innocent Landowner Defense,” protecting you from historical contamination and cleanup costs.
- Negotiating Power: Transforms “hidden” defects—like coal-related subsidence or structural distress—into documented leverage to demand seller repairs or a lower purchase price.
- Equity Preservation: Ensures your investment isn’t wiped out by “silent” defects that often cost more to fix than the property’s original value.
- Informed Decision Making: Provides a clear picture of the true cost of ownership, allowing you to move forward with confidence or walk away from a bad deal.
By integrating professional property inspections, comprehensive title searches, and Phase I environmental assessments, you transform these regional risks into a strategic roadmap for a secure investment.
How to Conduct Commercial Due Diligence in NEPA
Executing a thorough due diligence strategy requires a multi-step approach to verify a property’s physical, legal, and financial viability within the Pennsylvania market.
Step 1: Market Analysis & Financial Feasibility
Before committing money to a purchase, verify that the property’s income potential aligns with current NEPA economic trends and localized data.
- Comparable Market Analysis: Validate the purchase price by reviewing recent sales and lease rates for similar assets in sub-markets like the Scranton/Wilkes-Barre corridor. This ensures you aren’t overpaying based on inflated projections.
- Pro Forma & Expense Audit: Move beyond the seller’s “marketing” numbers. Audit actual utility costs, historical vacancy rates, and the risk of property tax reassessment—a common trigger in Pennsylvania after a sale—to ensure your net operating income (NOI) is realistic.
A rigorous market analysis is critical for accuracy; for stabilized assets with ample comparable data, a well-supported appraisal typically lands within 5–10% of the eventual sale price, whereas guessing can lead to massive valuation gaps.
Step 2: Order a Commercial Property Inspection in NEPA
An important part of evaluating a property’s financial feasibility is evaluating its condition and budgeting for future repairs.
Hire a licensed commercial inspector who specializes in industrial, retail, or office properties. Commercial inspections evaluate the physical condition of buildings and systems, including:
- Structural Components: Foundation cracks, load-bearing walls, floor integrity, and roof structure all affect safety and value. Inspectors measure deflection, check for settlement, and identify water damage.
- Building Systems: HVAC units, electrical panels, plumbing lines, and fire suppression systems require specialized knowledge. Commercial inspectors test functionality and estimate the remaining useful life for each system.
- Code Compliance: ADA accessibility, fire exits, emergency lighting, and occupancy limits must meet current standards. Violations create liability and require costly upgrades before you can operate legally.
- Environmental Concerns: Asbestos, lead paint, mold, and radon appear in older NEPA buildings. While Phase I ESAs handle soil and groundwater contamination, building inspections identify hazardous materials inside structures.
Properties in Lackawanna and Luzerne counties face unique risks from historical mining activity that creates ground instability.
In NEPA, inspectors also check for coal-mining subsidence damage and water intrusion caused by freeze-thaw cycles.
A commercial inspection costs $500 to $2,500, depending on property size and complexity. This investment prevents surprise repairs that run into six figures after purchase.
Step 3: Complete a Title Search and Review
Title searches verify legal ownership and uncover liens, easements, or claims against the property. These searches uncover hidden title defects that can prevent you from selling the property later or lead to legal disputes over ownership.
You conduct them by hiring a title company or real estate attorney to examine public records in the county where the property sits. For NEPA properties, this means searching records in Lackawanna, Luzerne, Wayne, or surrounding counties.
What Title Searches Reveal
Title professionals review deeds, mortgages, judgments, tax records, and court documents going back 30-50 years. This search identifies any party with a legal claim or interest in the property.
Common title issues in NEPA include unpaid property taxes, contractor liens, mineral rights disputes, and boundary disagreements. Coal mining history in the region creates additional complications with mineral rights and subsurface ownership.
Critical title documents to review include
- Chain of Title: This document traces every owner and transfer of the property. Gaps or irregularities in the chain create ownership questions that require legal resolution.
- Liens and Judgments: Unpaid debts attach to properties, not people. Tax liens, mechanic’s liens, and judgment liens must be satisfied before or at closing to clear the title.
- Easements and Restrictions: Utility companies, neighbors, or government entities may have rights to use portions of your property. Easements affect how you can develop or modify the site.
- Zoning Verification: Title searches confirm current zoning matches your intended use. A property zoned for retail can’t legally operate as a warehouse without variance approval.
According to the American Land Title Association, title defects appear in 25% of all property transactions. Professional searches catch these problems before they become your responsibility.
Title Insurance Protection
Title insurance protects against undiscovered defects that surface after purchase. Even thorough searches can miss historic claims or forged documents in the chain of title.
Owner’s title insurance costs 0.5-1% of the purchase price as a one-time premium. This policy defends against claims and pays losses if someone successfully challenges your ownership.
Step 4: Commission a Phase I Environmental Site Assessment
A Phase I Environmental Site Assessment (ESA) provides liability protection against hidden environmental hazards under federal environmental law. Because property owners can be held responsible for historical contamination they didn’t cause, this assessment serves as the primary tool for establishing the Innocent Landowner Defense.
Rather than invasive testing, this process relies on specialized environmental consultants to identify Recognized Environmental Conditions (RECs) through a rigorous review of historical records and site reconnaissance. By adhering to the updated ASTM E1527-21 standards, this investigation surfaces potential “deal-killers”—such as underground storage tanks or chemical plumes—before you inherit the legal and financial obligation to clean them up.
What Phase I ESAs Include
This assessment targets three primary areas to evaluate risk:
- Historical & Regulatory Review: Consultants audit Sanborn Fire Insurance maps, aerial photography, and government databases to trace a property’s past. This is important in NEPA, where former coal veins, dry cleaners, or manufacturing plants often leave behind hidden environmental contamination.
- Site Reconnaissance: A physical inspection identifies visible red flags, such as underground storage tank (UST) vent pipes, stained soil, stressed vegetation, or chemical drums.
- Interviews: Discussions with current owners, occupants, and local government officials often reveal undocumented spills or historical land uses not found in public records.
By identifying these environmental liabilities during the due diligence period, you ensure that you aren’t inheriting a site where remediation costs could easily exceed your total investment.
When Phase II Assessments Become Necessary
If a Phase I ESA identifies RECs, a Phase II investigation is triggered to quantify the actual risk through soil boring, groundwater sampling, and laboratory analysis. These findings dictate the scope of your legal liability and the potential for remediation costs that typically range from $50,000 to over $500,000, depending on the contaminant type.
While a standard Phase I ESA typically costs $2,000 to $5,000, a Phase II assessment is a more significant investment, often ranging from $10,000 to $50,000 depending on the complexity of the required sampling.
Creating Your NEPA Commercial Due Diligence Timeline
Due diligence timelines depend on the property’s complexity and the purchase agreement terms. Most commercial transactions allow 30-60 days for investigation, though complicated properties may require extensions.
Start with commercial inspections within the first week because structural issues can kill deals quickly. Order Phase I ESAs simultaneously since environmental assessments take 2-3 weeks to complete.
Title searches typically finish in 5-10 business days, so use this time to review financial documents, verify zoning, and analyze leases if the property includes tenants.
Budget Allocation for Due Diligence
Professional due diligence costs 1-2% of the purchase price for most commercial properties. For example, a $1 million property will require about $10,000 to $20,000 for research and due diligence.
Estimated Due Diligence Budget Breakdown
| Service Category | Estimated Cost Range | Key Considerations |
| Phase I ESA | $2,000 – $5,000 | Provides “Innocent Landowner” protection. |
| Commercial Inspection | $1,000 – $3,000 | Varies by building size and system complexity. |
| Title Work & Insurance | $1,000 – $2,000 | Covers search fees and the initial insurance layer. |
| Property Survey | $1,500 – $3,000 | Necessary for verifying boundaries and easements. |
| Legal Review | $2,000 – $5,000 | Dependent on the complexity of the purchase agreement. |
| Total Estimated Budget | $10,000 – $20,000 | Total represents approx. 1-2% of the purchase price. |
Assembling Your Commercial Due Diligence Team
Closing a successful deal in Northeastern Pennsylvania requires coordinating with a team of local experts who understand the region’s specific industrial and geological risks.
Rather than relying on national firms that may overlook localized issues like anthracite coal subsidence or specific PA DEP regulatory hurdles, you should assemble a specialized “due diligence strike team”:
- Commercial Inspectors & Engineers: Essential for evaluating aging infrastructure and structural integrity, especially in historic Wilkes-Barre or Scranton masonry buildings.
- Environmental Consultants: Critical for navigating NEPA’s industrial legacy; they provide the Phase I and II ESAs necessary to secure your liability protection.
- Real Estate Attorneys & Title Experts: These professionals resolve complex mineral rights disputes and ensure that transactions with title defects don’t impact your ownership.
- Surveyors & Land Planners: Vital for verifying property boundaries and ensuring your project complies with specific municipal zoning and parking requirements.
To maximize your protection, ensure your team communicates with one another. Your attorney should review the environmental findings for liability risks, while your inspector’s discovery of a hidden tank should immediately trigger a consultant’s review.
By coordinating these experts through a strict timeline, you can execute a smooth closing process that protects you from potential liability.
FAQs
How long does commercial due diligence take in Northeastern Pennsylvania?
Commercial due diligence typically takes 30-60 days, depending on property complexity. Simple retail spaces may finish in 30 days, while industrial properties with environmental concerns require 60-90 days.
What does a Phase I Environmental Site Assessment cost in NEPA?
Phase I ESAs cost $2,000 to $5,000 for standard commercial properties in NEPA. Larger sites or properties with complex histories cost more. Phase II assessments add $10,000 to $50,000 if contamination requires testing.
Do I need a commercial inspection for new buildings in NEPA?
Yes, new commercial buildings still require inspections because construction defects, code violations, and system issues appear even in new construction. Inspections verify that the building meets specifications and functions properly.
What title issues commonly affect NEPA commercial properties?
Common title issues in NEPA include coal mining mineral rights disputes, unpaid property taxes, contractor liens, and boundary disagreements. The region’s mining history creates unique complications regarding subsurface ownership.
Can I skip due diligence if I’m paying cash for commercial property?
No, paying cash doesn’t eliminate due diligence needs. You still face liability for environmental contamination, structural defects, and title problems regardless of financing method. Cash purchases should include the same investigation as financed transactions.
What happens if due diligence uncovers major problems?
You can negotiate price reductions, require seller repairs, request environmental cleanup, or terminate the purchase agreement. Due diligence contingencies in purchase agreements protect buyers who discover significant defects.
Are Phase I ESAs required by law in Pennsylvania?
Phase I ESAs aren’t legally required, but they’re necessary to establish the innocent purchaser defense under federal CERCLA law. Without Phase I documentation, you assume liability for all environmental contamination on the property.
What’s the difference between residential and commercial due diligence?
Commercial due diligence is more extensive because commercial properties involve complex systems, environmental liability, tenant leases, and higher financial stakes. Commercial investigations cost more and take longer than residential due diligence.