9 Home Inspection Tips to Help Sellers Get Their Homes Sold Faster
Selling a home can be just as stressful, if not more stressful, than buying a home.
If you are trying to buy a home yourself, and it’s contingent on selling your existing home or actively paying a mortgage on two separate homes, then the pressure to sell quickly can be unbearable.
One way sellers can ease this pressure and avoid obstacles in the closing process is with a pre-listing inspection. This article will outline the benefits of a pre-listing inspection for sellers and outline eleven home inspection tips for sellers to ease this process.
Why Should You Get a Pre-Listing Inspection?
The nationwide average for closing times is around 44 days, though this could easily double or triple in length with a bad inspection report.
For sellers under pressure to sell fast, unforeseen issues that inevitably come up in an inspection report can mean waiting weeks to repair or relisting the home at a lower price.
That’s why we often recommend a pre-listing inspection on your current home as the first step in selling it or buying another one.
By conducting a pre-listing inspection and getting an honest assessment of its condition, you will be able to:
- Price your home accurately, understanding how much you can get in equity to finance a new home.
- Market your home appropriately to attract the right buyers.
- Proactively make repairs that could delay closing times and actively imperil any offer you’ve made on another home.
What Does a Pre-Listing Inspection Check?
A pre-listing inspection provides the same overview of your home as a traditional residential home inspection that any buyer would purchase. Some of the most important elements of the inspection include:
- Structural integrity: The condition of the roof, foundation, and floors.
- Plumbing Issues: The condition of pipes, water heaters, and water pressure.
- Electrical Issues: The condition of wires, electrical boxes, and outlets.
- HVAC Issues: The condition of all heating and cooling equipment.
However, a pre-listing inspection will be more thorough than that. Most inspectors will evaluate every inch of your property and outline any problems they spot, from a chimney with poor flashing to a bedroom door knob that doesn’t function properly.
9 Tips for Homeowners to Prepare for an Inspection
You may think you are powerless during a home inspection, but there are many things you can do to help your inspector and clean up your inspection report.
1. Find the Right Inspector
First, it’s essential to find the right inspector. A good inspector will be able to identify any issues that may come up in a future inspection report and save you the headache.
There are many resources to find an inspector, including:
- Your realtor or brokerage
- Referrals from friends and family
- Online directories and review sites
One thing to keep in mind is certification. Look for things like certification from the International Association of Certified Home Inspectors (InterNACHI) to find a properly qualified inspector. There are even tiers of service, with a Certified Master Inspector representing the highest tier.
2. Make Small Repairs Where Possible
While most people can’t fix a roof, you can be proactive in helping your inspection report by making small repairs wherever possible. Ideas could include:
- Fixing loose door knobs
- Sanding down doors that stick
- Patching any holes in walls or ceilings
- Tightening railings
- Fixing leaking or dripping pipes
- Applying caulk to cracks
- Using pest control to eliminate any pests
- Repairing or replacing weatherstripping
- Fixing light switches or loose outlet covers
- Ensuring locks work properly
3. Conduct Exterior Maintenance
Likewise, it helps to conduct some exterior maintenance on your home. This will also add some serious curb appeal. Some ideas include:
- Trimming overgrown brush
- Clearing out clogged gutters and downspouts
- Positioning downspouts away from the home
- Repairing loose bricks, stones, or cement.
- Painting and sealing wooden decks or porches.
- Power spraying your siding.
- Eliminating any birds or wasps nests.
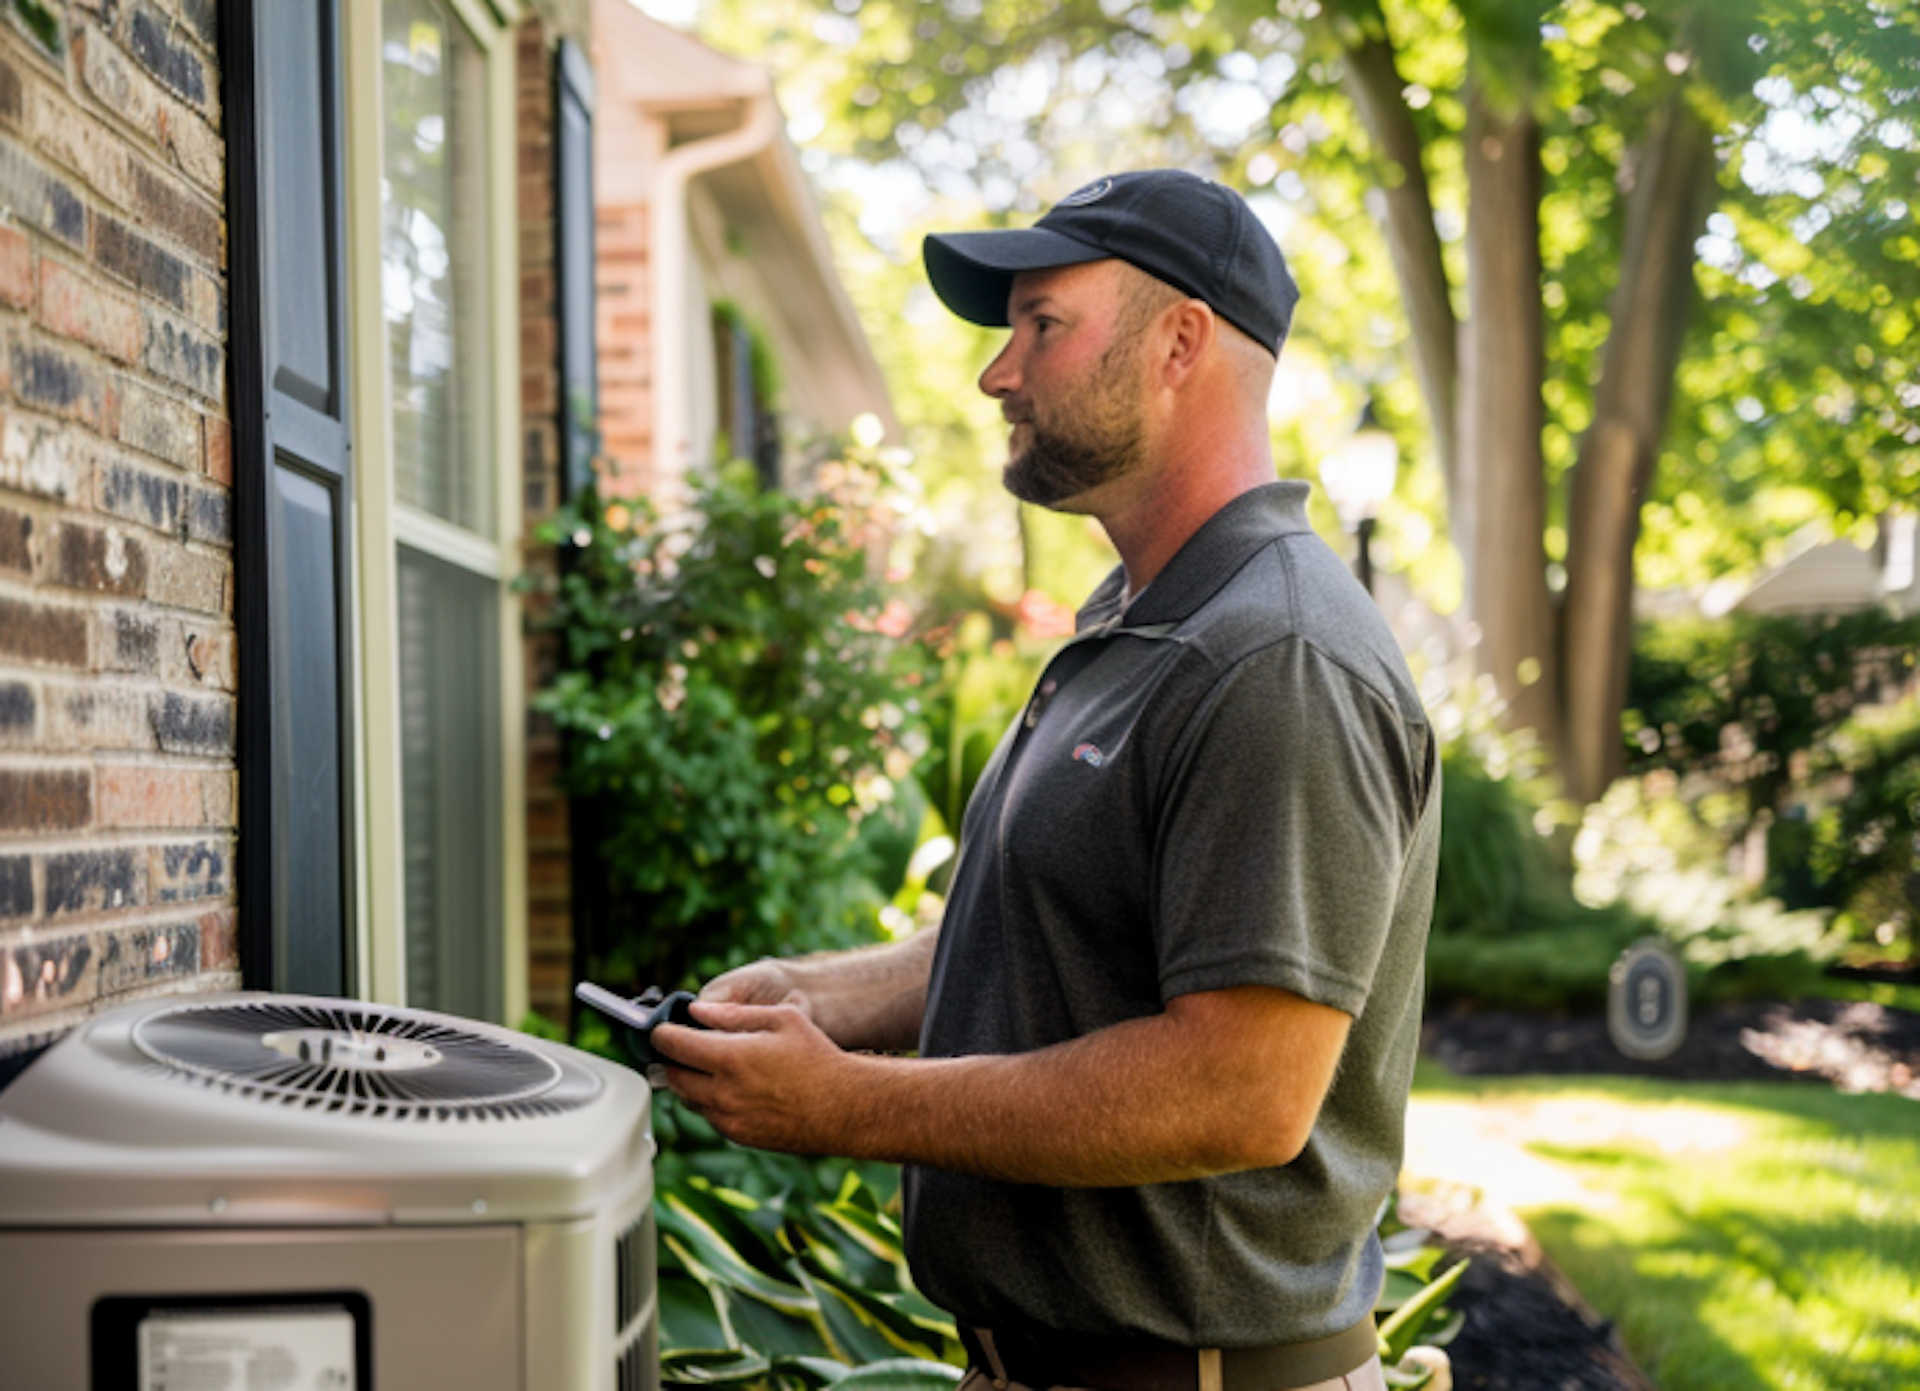
4. Get Your HVAC System Tuned Up
Unlike many appliances in your home, heating and cooling systems require routine maintenance over the years to ensure they are in working order. This includes cleaning filters, though it often pays to hire a local contractor to ensure your refrigerant and coils are working on all cooling systems.
Ductwork inspections should also be done routinely to inspect for cracks and leaks that rob you of energy efficiency.
5. Inspect for Water Damage
Water damage is a massive concern for homeowners, and it can lead to issues like mold, pests, and damage to interior framing components. Inspect for water damage before an inspection to see if any repairs need to be made or if an additional mold inspection should be completed.
- Look for wet spots around pipes.
- Inspect pipes in your basement drop ceiling for corrosion and loose fittings.
- Search for cracks in drywall.
- Inspect for mold in areas where visible.
- Monitor humidity and moisture content in rooms with poor ventilation.
6. Clean and Eliminate Any Clutter
Tidying up your home and getting rid of clutter will allow the inspector to thoroughly search every inch of your home without missing any issues. Even just keeping your home neat could result in a more positive inspection report.
7. Ensure Utilities Are in Working Order
Inspect all utility hookups, including electrical, gas, water, and septic, to ensure they are in working order. For homes with septic systems, it often pays to complete a septic inspection to ensure all parts and filters are in working order.
8. Give Inspectors Enough Time and Space for Inspections
Some people recommend being present during inspections, but for sellers, it makes sense to give an inspector enough freedom to conduct the inspection at their own pace. This may require you to leave for an hour or two and possibly take your pet or restrict them to one room of the house.
9. Disclose All Known Issues
State law requires you to disclose all known issues to buyers, but it’s good practice to do the same for your inspector. This will give them a good starting point to look at and allow them to determine the extent of the damage.
Next Steps for Sellers
If the inspection report comes back positive, you can list your home and price it confidently.
However, if the report uncovers some major issues that do require repair or a close eye, there are a few options you can pursue:
- Hire a Contractor for Repairs: This is often the most straightforward solution, especially for major repairs that require technical knowledge. The important thing here is finding a contractor you trust that can make the repairs quickly.
- Make the Repair Yourself: This is not recommended for major repairs, but many homeowners don’t want to pay the additional cost of a contractor. Just be sure to disclose that you made the repairs yourself when providing the inspection report, as some buyers may want a follow-up inspection.
- Sell Home As-Is: This isn’t a bad option if you want to sell your home quickly, but it may require repricing the home.
Overall, a pre-listing inspection will help you avoid unforeseen obstacles that could slow or stall the sale of your home and allow you to make the necessary adjustments before listing.
FAQs
Should I provide documentation of past repairs or maintenance?
Yes, providing documentation of repairs, maintenance, and upgrades can demonstrate that the home has been well cared for and can alleviate buyer concerns.
Do I need to disclose known issues?
Yes, sellers are typically required to disclose known issues with the property. Honesty is crucial to avoiding legal issues and maintaining trust with potential buyers.

15 Reasons You Need a Home Inspection in NEPA
Even Northeast Pennsylvania’s housing market is not immune to price hikes and the glut of increased demand that rapidly outpaces supply.
According to Zillow, home values in the area rose by 6% between April 2023 and 2024.
Unfortunately, a National Association of Home Builders Housing Trends Report states that being outbid is the number one reason buyers lose out on homes.
One way that house hunters have tried to gain an advantage in the housing market has been to waive inspection requirements to make their offers more attractive to sellers. However, this has several potential consequences, including financial devastation and health hazards.
While viewed as an added expense, a residential home inspection can offer homeowners insurance against the worst possible consequences and give them confidence in their purchase. Even sellers can benefit from getting their homes inspected before listing by anticipating possible repairs and increasing their marketability.
This article will discuss fifteen benefits of performing a home inspection in NEPA and why you should never waive one.
10 Reasons Buyers Should Perform a Home Inspection Before Purchase
Unlike your deposit, a home inspection is one expense that cannot be refunded when you put an offer on the house.
However, if something in the inspection prevents you from buying that house, then the benefits of the inspection far outweigh the costs.
Here are some concrete reasons why you absolutely should get a home inspected before purchase.
1. Eye Inspections Don’t Pain the Full Picture
Most house hunters are more allured by a home’s cosmetic details than its structural details. Unfortunately, a home walkthrough does not give you the full picture of its safety and condition.
Unless you have extensive knowledge of construction, electrical, plumbing, and HVAC work, you are basically leaving these features up to chance that they are in good condition without a proper inspection.
2. Avoid Safety Hazards
The most important reason to perform a home inspection is to protect the health and safety of your family. A qualified residential home inspector will be able to provide a detailed report of a home from the ground up, including essential components like its:
- Foundation
- Roofing
- Electrical
- Plumbing
- HVAC
- Siding/Facade
- Framing
A home inspector will literally inspect every inch of your home, from the porch you first enter through to every door, inch of crawl space, attic component, and everything in between.
3. Protect You from a Potentially Bad Investment
From a financial perspective, a home inspection identifies any issues requiring immediate or future repair.
Many first-time buyers in Pennsylvania don’t anticipate the amount of cash required to cover closing costs, typically 2-5% of the home’s total value. Add in possible roofing, foundation, or HVAC repair, and your dream home can quickly become a financial nightmare.
4. Give You Peace of Mind
Conversely, a good home inspection can give you added peace of mind that you are not trapping yourself into a poor financial decision. If you’ve ever purchased a home, you know the anxiety of waiting to hear back from an inspector and appraiser.
Having confidence in your purchase is simply priceless.
5. Offer Leverage for Negotiations
If a home you are looking to purchase does come back with defects and issues that require immediate repair, this can give you leverage as a seller to lower the asking price and possibly save you short-term money.
In many cases, sellers may be willing to accept this, especially if it means having them avoid covering the cost of repair and waiting to re-list their home (while still paying on the mortgage).
6. Help You Budget for Future Repairs
A detailed home inspection will help you identify issues that require long-term repair. Knowing this will help you avoid surprise purchases down the road, such as installing a new furnace or appliance, which can be equally devastating financially.
7. Option to Bundle Repairs Into the Selling Price
In this scenario, a seller may add the cost of repairs to a home to its asking price, essentially allowing you to pay for those repairs throughout your loan instead of with cash on hand. This strategy is similar to bundling closing costs into your loan and may suit some buyers, depending on their financial needs.
8. Many Homes in NEPA Are Very Old
Depending on the type of home you’re trying to purchase in the area, it could face unique issues related to its age. Outdated electrical work, such as knob-and-tube wiring, is very commonly found in many older homes in the area, especially around Scranton, Bloomsburg, and the Wilkes-Barre areas
Even smaller issues, such as poor insulation, outdated windows, or lack of ventilation in a bathroom, are very commonly found in older homes and should be updated.
9. Even New Construction Runs Into Issues
Likewise, newer homes are not immune to shoddy workmanship. In fact, newer homes are often more likely to suffer from foundation issues, poor flooring installation, and grading/drainage issues.
10. Avoid Health Concerns Like Radon and Mold
Finally, we recommend homeowners protect themselves from dangerous pathogens like radon and mold by performing a special indoor air quality and radon test. While not required, this can protect your family’s health or those of those residing in that home.
5 Reasons Sellers Should Get an Inspection Before Listing
If most buyers are willing to perform an inspection on their own dime, then why should sellers do so? However, there are multiple benefits to a pre-listing inspection, especially in a buyer’s market.
1. Gain Accurate Pricing
Appraisals rely more on cosmetic details and comparative homes in the area for pricing, not necessarily their condition. A home inspection will allow you to gain more accurate pricing. Who knows? A positive home inspection may even allow you to raise the price.
2. Expedite the Listing and Sales Process
One of the best reasons to proactively hire a home inspector is to list your home faster and speed up the closing process. Depending on the buyer, they may accept the results of your home inspection report, especially if a trusted inspector in the area did it.
3. Control the Repairs
Completing a pre-listing inspection gives you control of the repairs, including who’s making them and what you’re paying for them. This allows you to save money and know the job was done right.
4. Avoid Legal Complications
Selling a home that is not up to local building codes can delay and even stop your home sale in its tracks. Depending on the city, you may be required to make immediate repairs or provide certain disclosures to get your home listed.
5. Attract the Right Buyers
Finally, conducting a proactive inspection increases the marketability of your home by outlining its new repairs or features. This will help connect you with the right buyers, especially if you want top dollar for your home.
Do Not Waive a Home Inspection
Waiving a home inspection could end up leaving you saddled with tens of thousands of dollars in repair and an unsafe home.
While there may be a small upfront investment to perform a home inspection, the return on investment in terms of avoided costs and peace of mind far outnumber the few hundred dollars you have to pay a home inspector.
We also recommend additional inspections, such as septic inspections if you are buying a home with a septic tank and a pest inspection if there is evidence of termite damage.
For the most comprehensive and reliable home inspection results in NEPA, turn to the experts at Mountain to Valley Home Inspections. Contact us for a free quote today and to see how we can assist you!
FAQs
What does a home inspection include?
A standard home inspection covers, but is not limited to:
- Structural components (foundation, walls, roof)
- Exterior components (siding, windows, doors)
- Roofing
- Plumbing
- Electrical systems
- Heating and cooling systems (HVAC)
- Interior components (walls, ceilings, floors)
- Insulation and ventilation
- Fireplaces and chimneys
How long does a home inspection take?
The duration of a home inspection varies based on the size and condition of the home, but it typically takes 2-4 hours. Most homeowners can expect to see results in 2-4 business days.
What happens if the inspector finds problems?
If the inspector finds issues, you can use the inspection report to negotiate with the seller for repairs, a price reduction, or credit toward closing costs. In some cases, you may decide to withdraw your offer based on the severity of the issues.
Cracks in Foundation: When to Worry
So, you found the house of your dreams and are ready to put in an offer, but noticed some cracks in the foundation. While some cracks are entirely normal, there are a few types of cracks to be noted depending on the foundation type.
Understanding the type of foundation crack you're dealing with can help you determine the condition of your foundation and whether or not you'll need to repair or patch it soon.
Cracks in Foundation Wall vs. Horizontal Slabs
Before we dive into each type of foundation crack, it's important to distinguish between two types of foundations in NEPA. Most homes in freezing climates, like Pennsylvania, are built with foundation walls and typically have a crawl space of attic. Slab foundations are rare to the area since rapid freeze-thaw cycles would greatly reduce their longevity.
The problem with foundation wall cracks is that they are typically more concerning. Unlike slab cracks, foundation wall cracks usually indicate a much more serious structural issue--at least in some circumstances.
We'll discuss what foundation wall cracks you should be worried about in NEPA so that you are prepared as a homeowner, buyer, or seller.
Types of Foundation Cracks and Should I Worry
There are many types of foundation wall cracks that can be easily observed by the layman.

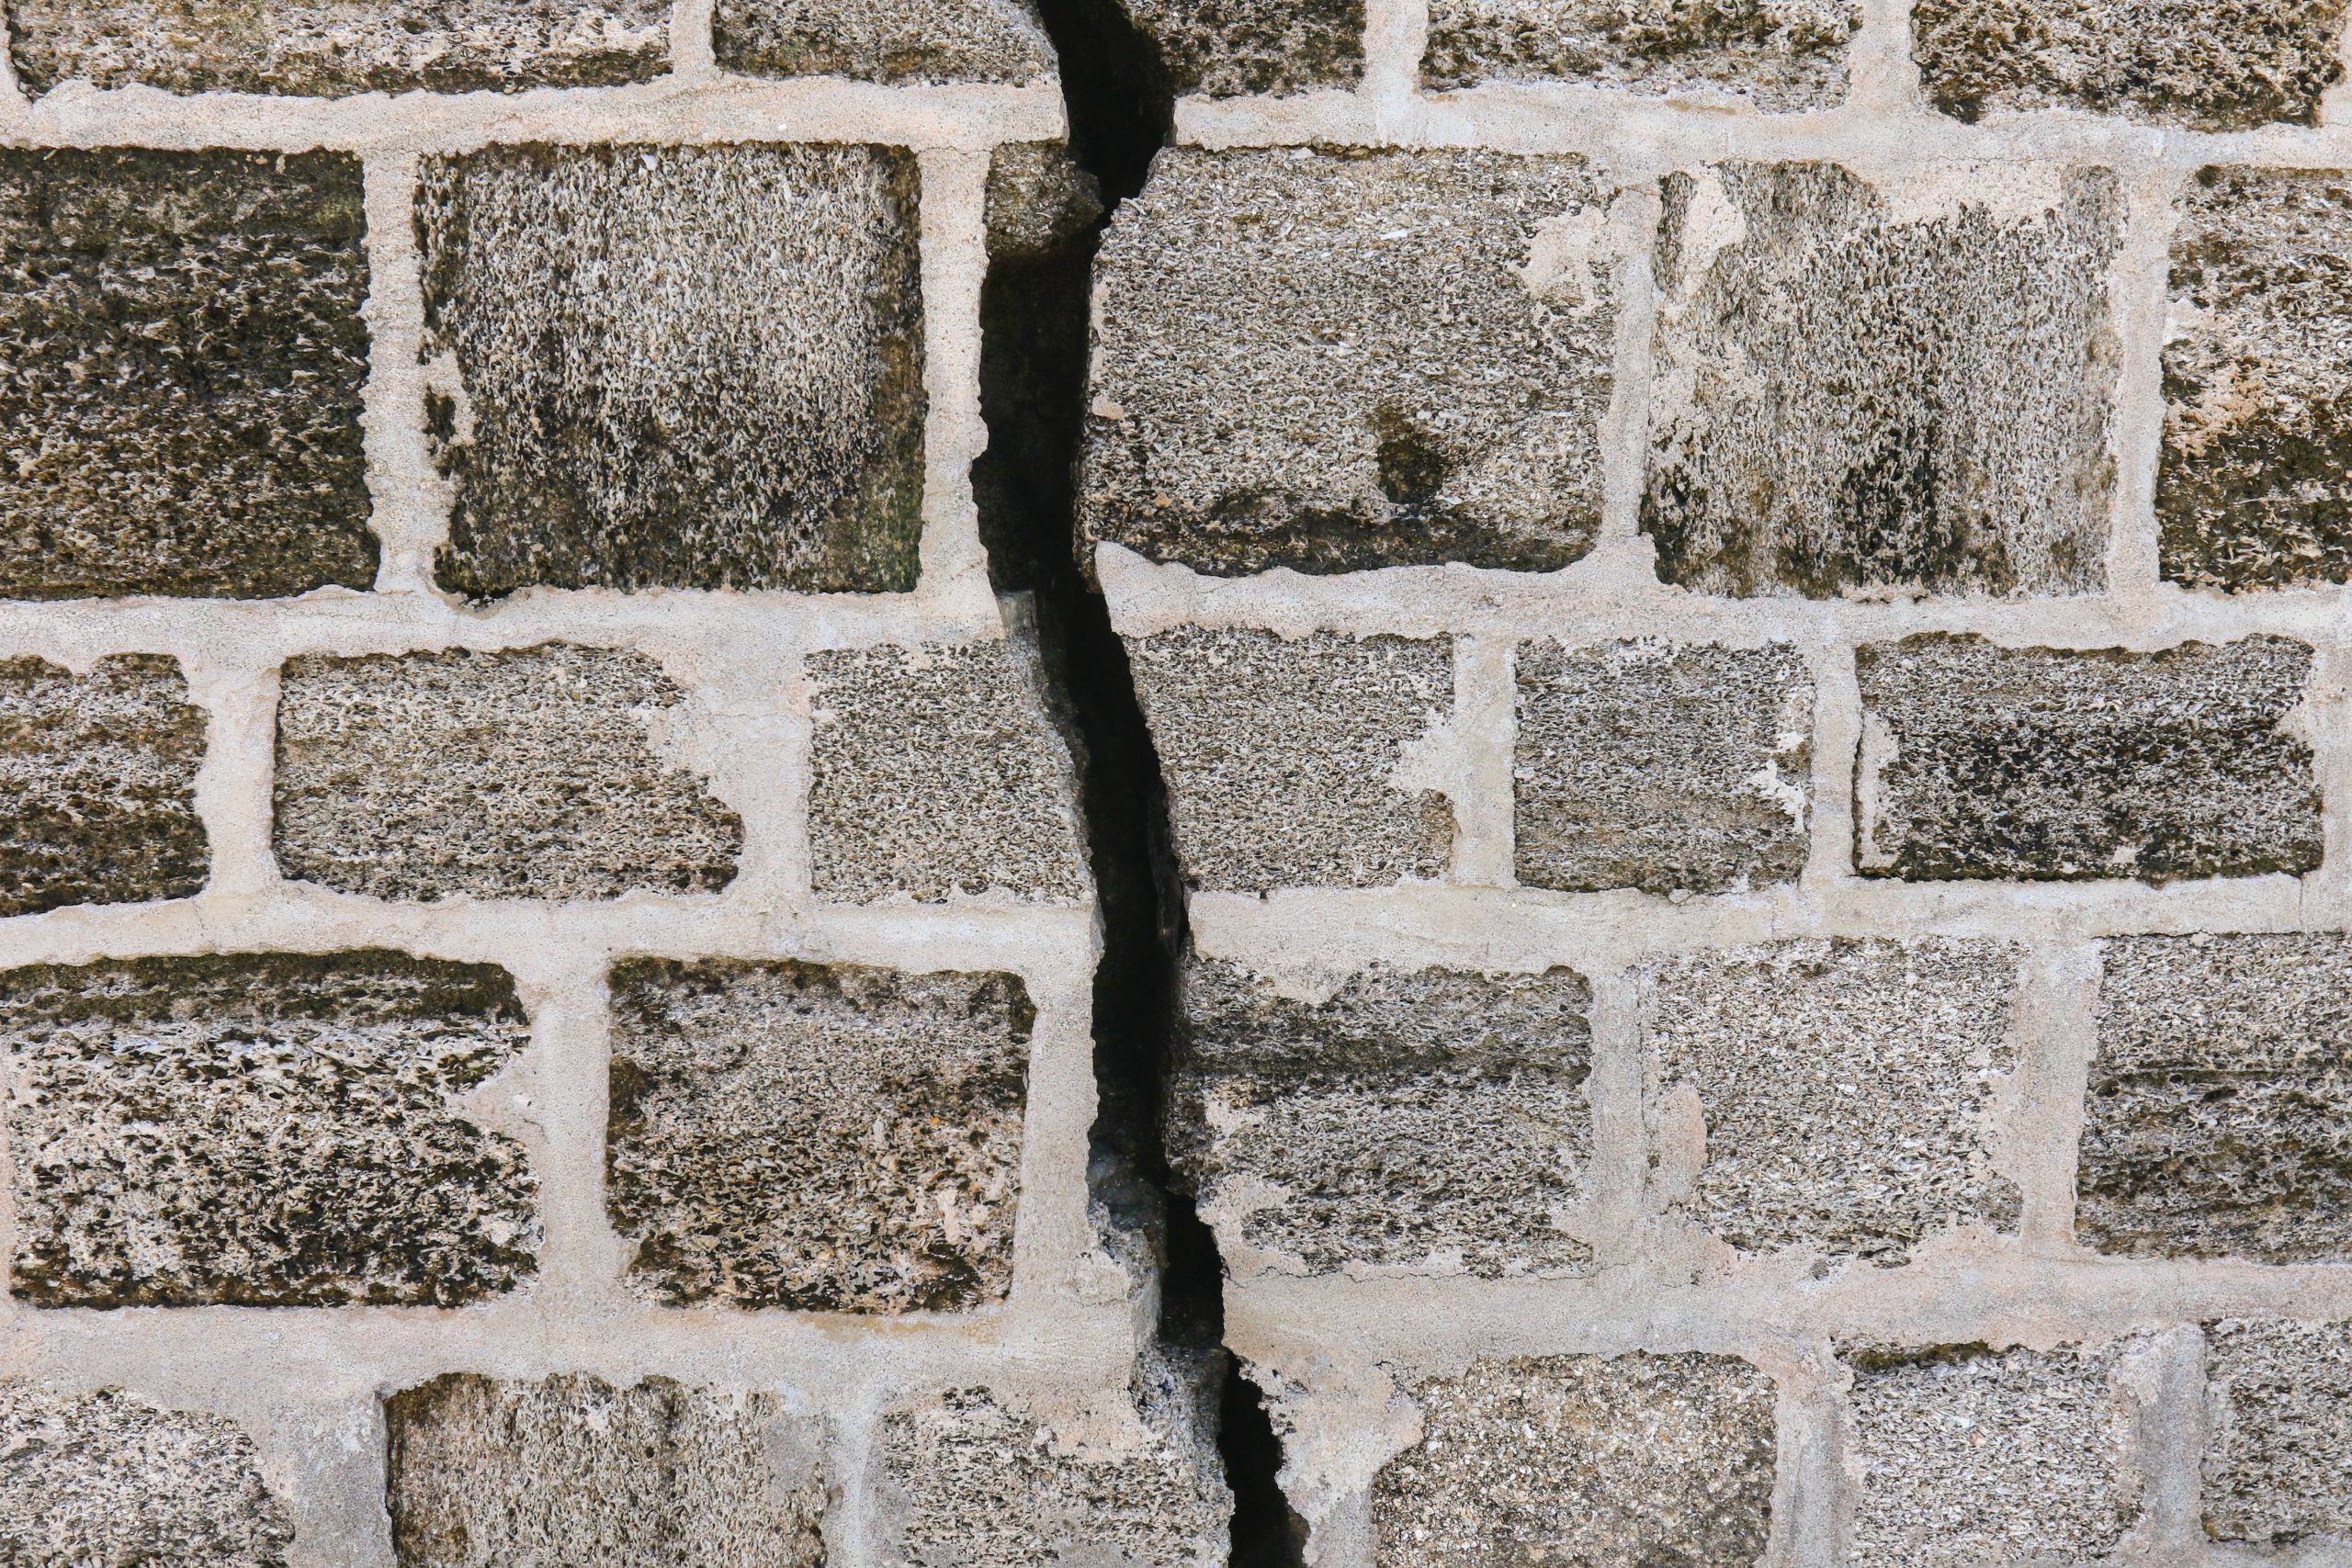
1.) Vertical Cracks: No Concern
These cracks are commonly a result of the foundation and home settling. These cracks are mostly natural and may not give cause for concern especially in an aging house. If the crack gets larger from the point of origin or is wider than a pinky finger, this may be cause for concern and warranty further inspection.
2.) Horizontal Cracks: Be Concerned
These cracks are not as innocuous and are usually caused by soil and hydrostatic water pressure. Horizontal cracks can be costly to fix as they typically indicate deeper problems with the foundation.
3.) Stair StepCracks: Be Concerned
These cracks are easily visible along mortar joints surrounding your basement and the side of your home. While some stairstep cracks and separation can be due to natural settling, they usually indicate a buildup of moisture and warrant concern. By the rule of thumb, if you can fit anything thicker than a quarter through the crack, reach out to a professional for prompt repair.
4.) Diagonal Cracks: No Concern
Sometimes referred to as hairline cracks, diagonal cracks typically form as the foundation naturally settles and cures in new homes. The good news is that these cracks are typically cosmetic and don't warrant repair--though they can be patched.
Common Causes of Foundation Cracks
No foundation is free of cracks, and there are as many natural reasons for cracks due to aging as there are cracks that result from poor practice. The most common causes of cracks in both new and aging foundations are:
Settlement: When the soil underneath a foundation compresses or shifts, it can cause the foundation to settle unevenly, leading to cracks as the structure adjusts to the new position.
Poor Construction: Inadequate reinforcement, improper concrete mixing, or insufficient curing time during construction can result in weak spots in the foundation, which may eventually crack under stress.
Hydrostatic Pressure: Excessive moisture in the soil surrounding the foundation can exert pressure on the walls, causing them to crack as the foundation attempts to resist the force. This is an important reason to winterize your gutters so that water drains properly away from the home!
Tree Roots: Large tree roots growing near the foundation can exert pressure on the walls as they expand, potentially leading to cracks over time as the roots seek water and nutrients.
Signs You Should Be Worried About Cracks in Your Foundation
As we stated, foundation cracks are a natural result of an aging foundation and can even indicate that the foundation has settled properly. However, there are a few worrying signs throughout your home that indicate a foundation is in worse shape than you may have anticipated.
- Moisture is seeping through cracks. If you are noticing excess moisture buildup in your basement, foundation, or crawl space, this could be a cause for concern. If you are witnessing moisture penetrate cracks in your foundation, this is an even greater cause for concern as it will only compound the issue even greater over time.
- Cracks continue to grow in width. If you notice cracks in your foundation growing wider with time, this will indicate a serious foundation issue.
- You're noticing cracks in your ceilings and walls. One of the first signs homeowners notice that there is a problem with their foundation is cracks that form on their interior walls and ceilings. While some cracks are normal, cracks that are wide or form from your ceiling to your floors will indicate a structural issue.
- Your chimney is separating from your home: If your pre-listing inspection report finds that your chimney is forming gaps between your home, then you can bet there is a foundation issue.
- Floors are slanting. Slanting or uneven floors not due to a cracked joist or subfloor will certainly indicate a foundation issue.
How Often Should I Inspect My Foundation?
Homeowners should perform a visual inspection of their foundation every year to monitor growing cracks. We recommend going further and performing one every season, especially during the winter and summer.
If you are purchasing a home or selling one, then a foundation inspection will be a must to ensure that your investment is protected.
When it comes to purchasing a home, we here at Mountain to Valley Home Inspections understand that it is an important decision. This is why we are always here to help put your mind at ease! It is important to have an inspection done at any stage in this process to give you the information needed to ensure your family is safe, and that they're no dangerous issues hiding within the home. As always if you have any questions give us a call, we are happy to help!

Eww Mold! What to Do When You Find Mold
Finding mold in your home can be an uncomfortable discovery for any homeowner. If you've recently been dealing with difficulty breathing, allergy-like symptoms, or consistent headaches, it could be a sign of mold.
Unfortunately, many older homes with poor ventilation in Northeast PA are harbingers of mold. The only way to eliminate mold is to identify the extent of the problem and the areas where it lies in your home with a proper indoor air quality inspection. Ideally, a home inspection report would catch many of the culprits of indoor mold in houses, including roof leaks, plumbing issues, and even high humidity, but often, an indoor air quality inspection is required to spot mold that often lies beneath the surface.
Here at Mountain to Valley Home Inspections, we are certified indoor air consultants. This means that we follow the standards for mold testing put in place by the certified body for residential and commercial indoor air quality consultants in North America to ensure that we are providing superior service.
Learn more about how mold inspections work and why they are the first step in eliminating mold if you spot it in your home.
Step 1: Identifying Mold
Depending on where you spot mold in your home, you may be able to identify some of what lies underneath with a simple visual examination. However, hiring a mold inspector to dig beneath the surface is always recommended to uncover the true extent of your mold exposure and where it lies in your home.
What will a Mold Inspector Look For?
A mold inspector will look for some common signs of mold exposure throughout your home, which will help them locate the source of mold.
- Moisture intrusion
- Water damage
- Musty odors
- Apparent mold growth
- Results of a laboratory analysis of all mold samples taken at the home or building.

Digging Deep: Following IAC2 Standards of Practice
Mountain to Valley Home Inspections follows strict standards put forth by the International Association of Certified Indoor Air Consultants (IAC2) to provide customers with a more robust inspection. Some areas of your home we will search for signs of mold or causes of mold growth include:
1.) Roofs
- Roof coverings
- Roof drainage systems such as gutters and downspouts
- Vents, flashings, skylights, chimneys, and any other roof penetrations.
2.) Exterior and Grounds
- Cladding, flashing, and trim
- Exterior doors, windows, decks, stoops, steps, stairs, porches, railings, etc.
3.) Basement, Foundation, Crawlspace
- Moisture intrusion
- Inspection of ventilation for each.
4.) Heating, Cooling, and Ventilation
- Air handlers, circulating fans, and air filters
- Central humidifier
- Central air conditioning unit
5.) Plumbing
- Visible main water line
- Visible water supply lines
- Visible drain, waste, and vent pipes
- Hot water source
- Toilets, faucets, showers, and tubs
6.) Attic
- Insulation
- Ventilation of Attic Spaces
- Framing and Sheeting

7.) Interior
- Walls, ceilings, floors, doors, and windows
- Ventilation in kitchen, bathroom, and laundry
- Whole-house ventilation fans
8.) Moisture, Humidity, and Temp.
- Will measure the moisture of any room or area of the building that has moisture intrusion, water damage, moldy odors, apparent mold growth, or conditions conducive to mold growth.
- If warranted, the inspector may measure the humidity as well as temperature in any room or area of the building.
Step 2: Eliminating Mold
Treating mold requires careful procedure, as incidental exposure can lead to skin irritation and respiratory illness. Some proper precautions homeowners must take before cleaning and wiping mold off of surfaces include:
- Wearing a mask with a HEPA cartridge
- Wearing gloves and safety glasses
- Covering door and window openings with a plastic sheet to prevent spores from spreading
Once properly equipped, you'll want to apply a general household cleaner solution or one cup of bleach to every gallon of water to wipe away mold from dirty surfaces. Bleach is recommended for black mold.
Then, using a shop vac or a vacuum with a HEPA filter, you'll want to vacuum up any leftover residue or water.
Finally, use a dehumidifer to dry out the area.
Step 3: Protecting Against Mold
Based on the findings of your indoor air quality inspection, you will need to solve any issues contributing to mold growth.
In many cases, fixing leaks, installing vents, or installing a dehumidifier in areas with high moisture content, especially during the summer, will resolve any issues.
However, for deeper issues, such as roof leaks or aging insulation, more serious repairs may be necessary to guard against mold.
Fight Back Against Mold
The only way to eliminate mold is to identify its source and remove all traces of it from your house.
At Mountain to Valley Home Inspections, our indoor air quality tests follow the best standards of practice laid out by industry experts and veterans. Whether you're buying, selling, or living in a home with mold right now, don't hesitate to reach out to us for a mold consultation.